> ## Documentation Index
> Fetch the complete documentation index at: https://octanist.com/docs/llms.txt
> Use this file to discover all available pages before exploring further.
# GTM Pixel
> Install the Octanist pixel through GTM.
Use this setup when you want Google Tag Manager to load the Octanist pixel on your website. The pixel tracks sessions, page views, attribution parameters, and can optionally detect forms.
If your website already pushes lead data into the dataLayer and you want GTM to send lead events directly, use [GTM DataLayer](/docs/incoming-integrations/gtm) instead.
## Get your pixel script
1. Open Octanist.
2. Go to **Settings > Tracking**.
3. Copy the pixel script.
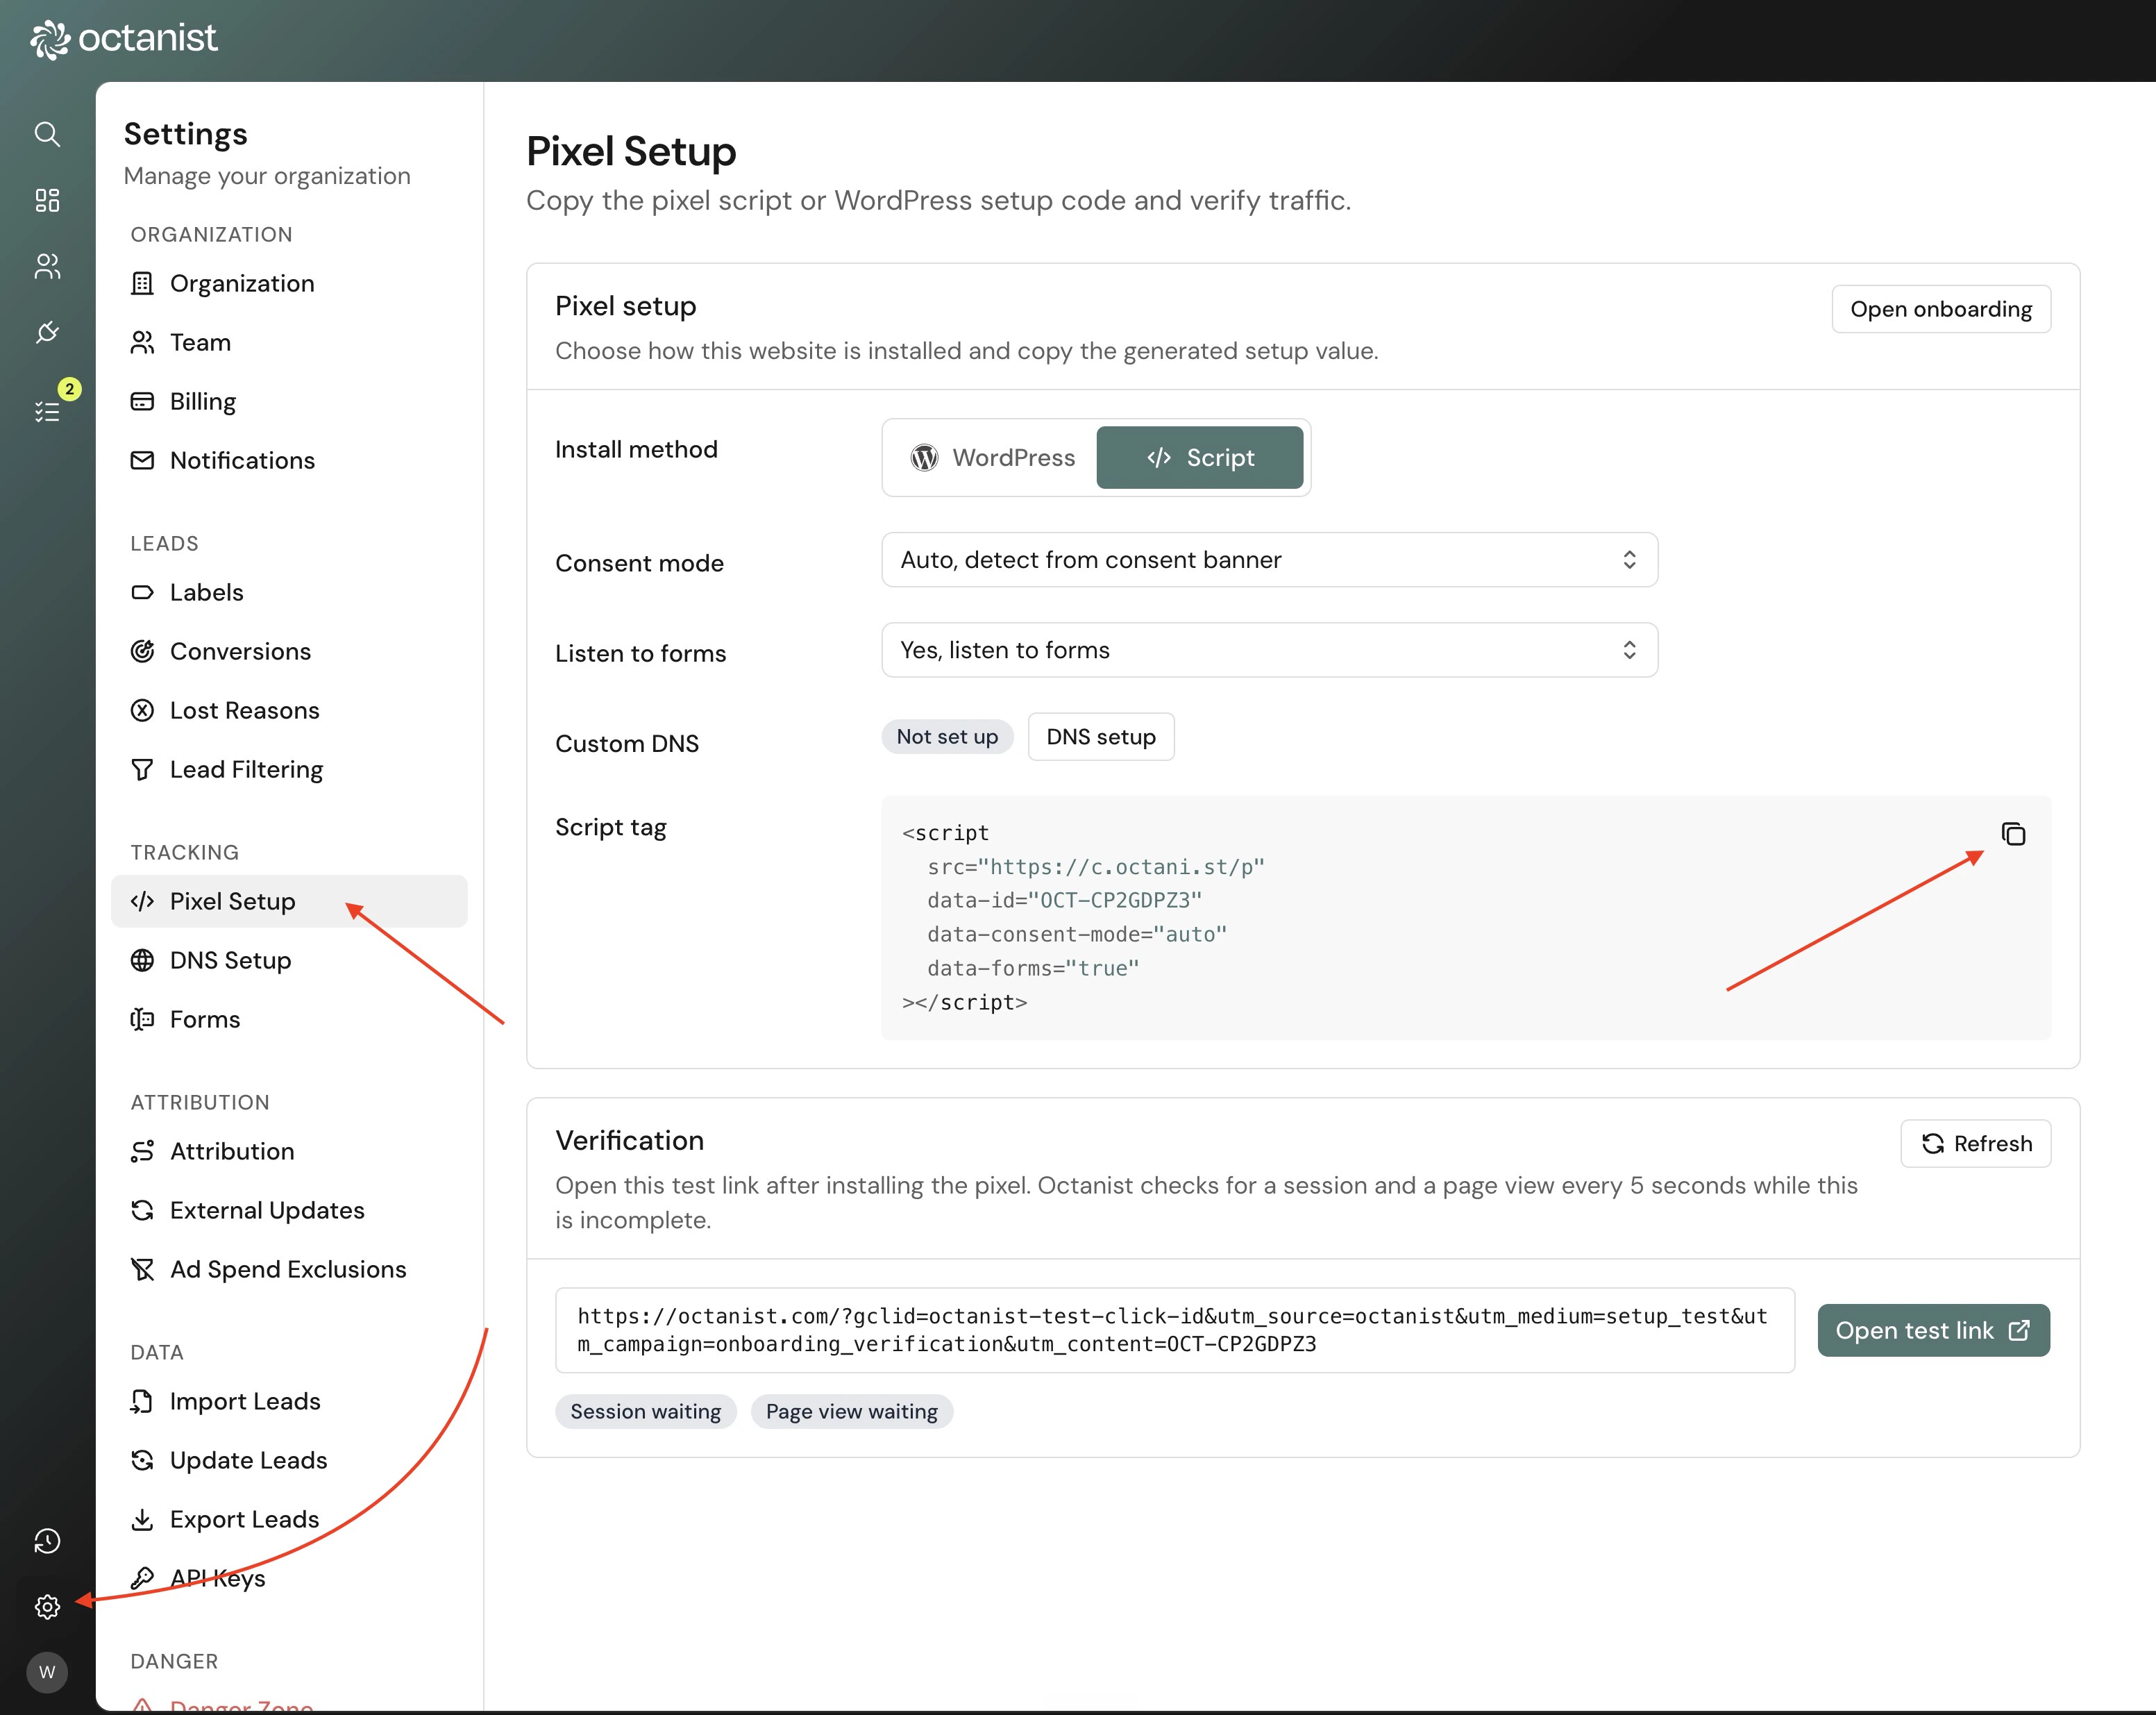 The script looks like this:
```html theme={null}
```
## Create a GTM tag
1. Open Google Tag Manager.
2. Open your website container.
3. Go to **Tags**.
4. Click **New**.
The script looks like this:
```html theme={null}
```
## Create a GTM tag
1. Open Google Tag Manager.
2. Open your website container.
3. Go to **Tags**.
4. Click **New**.
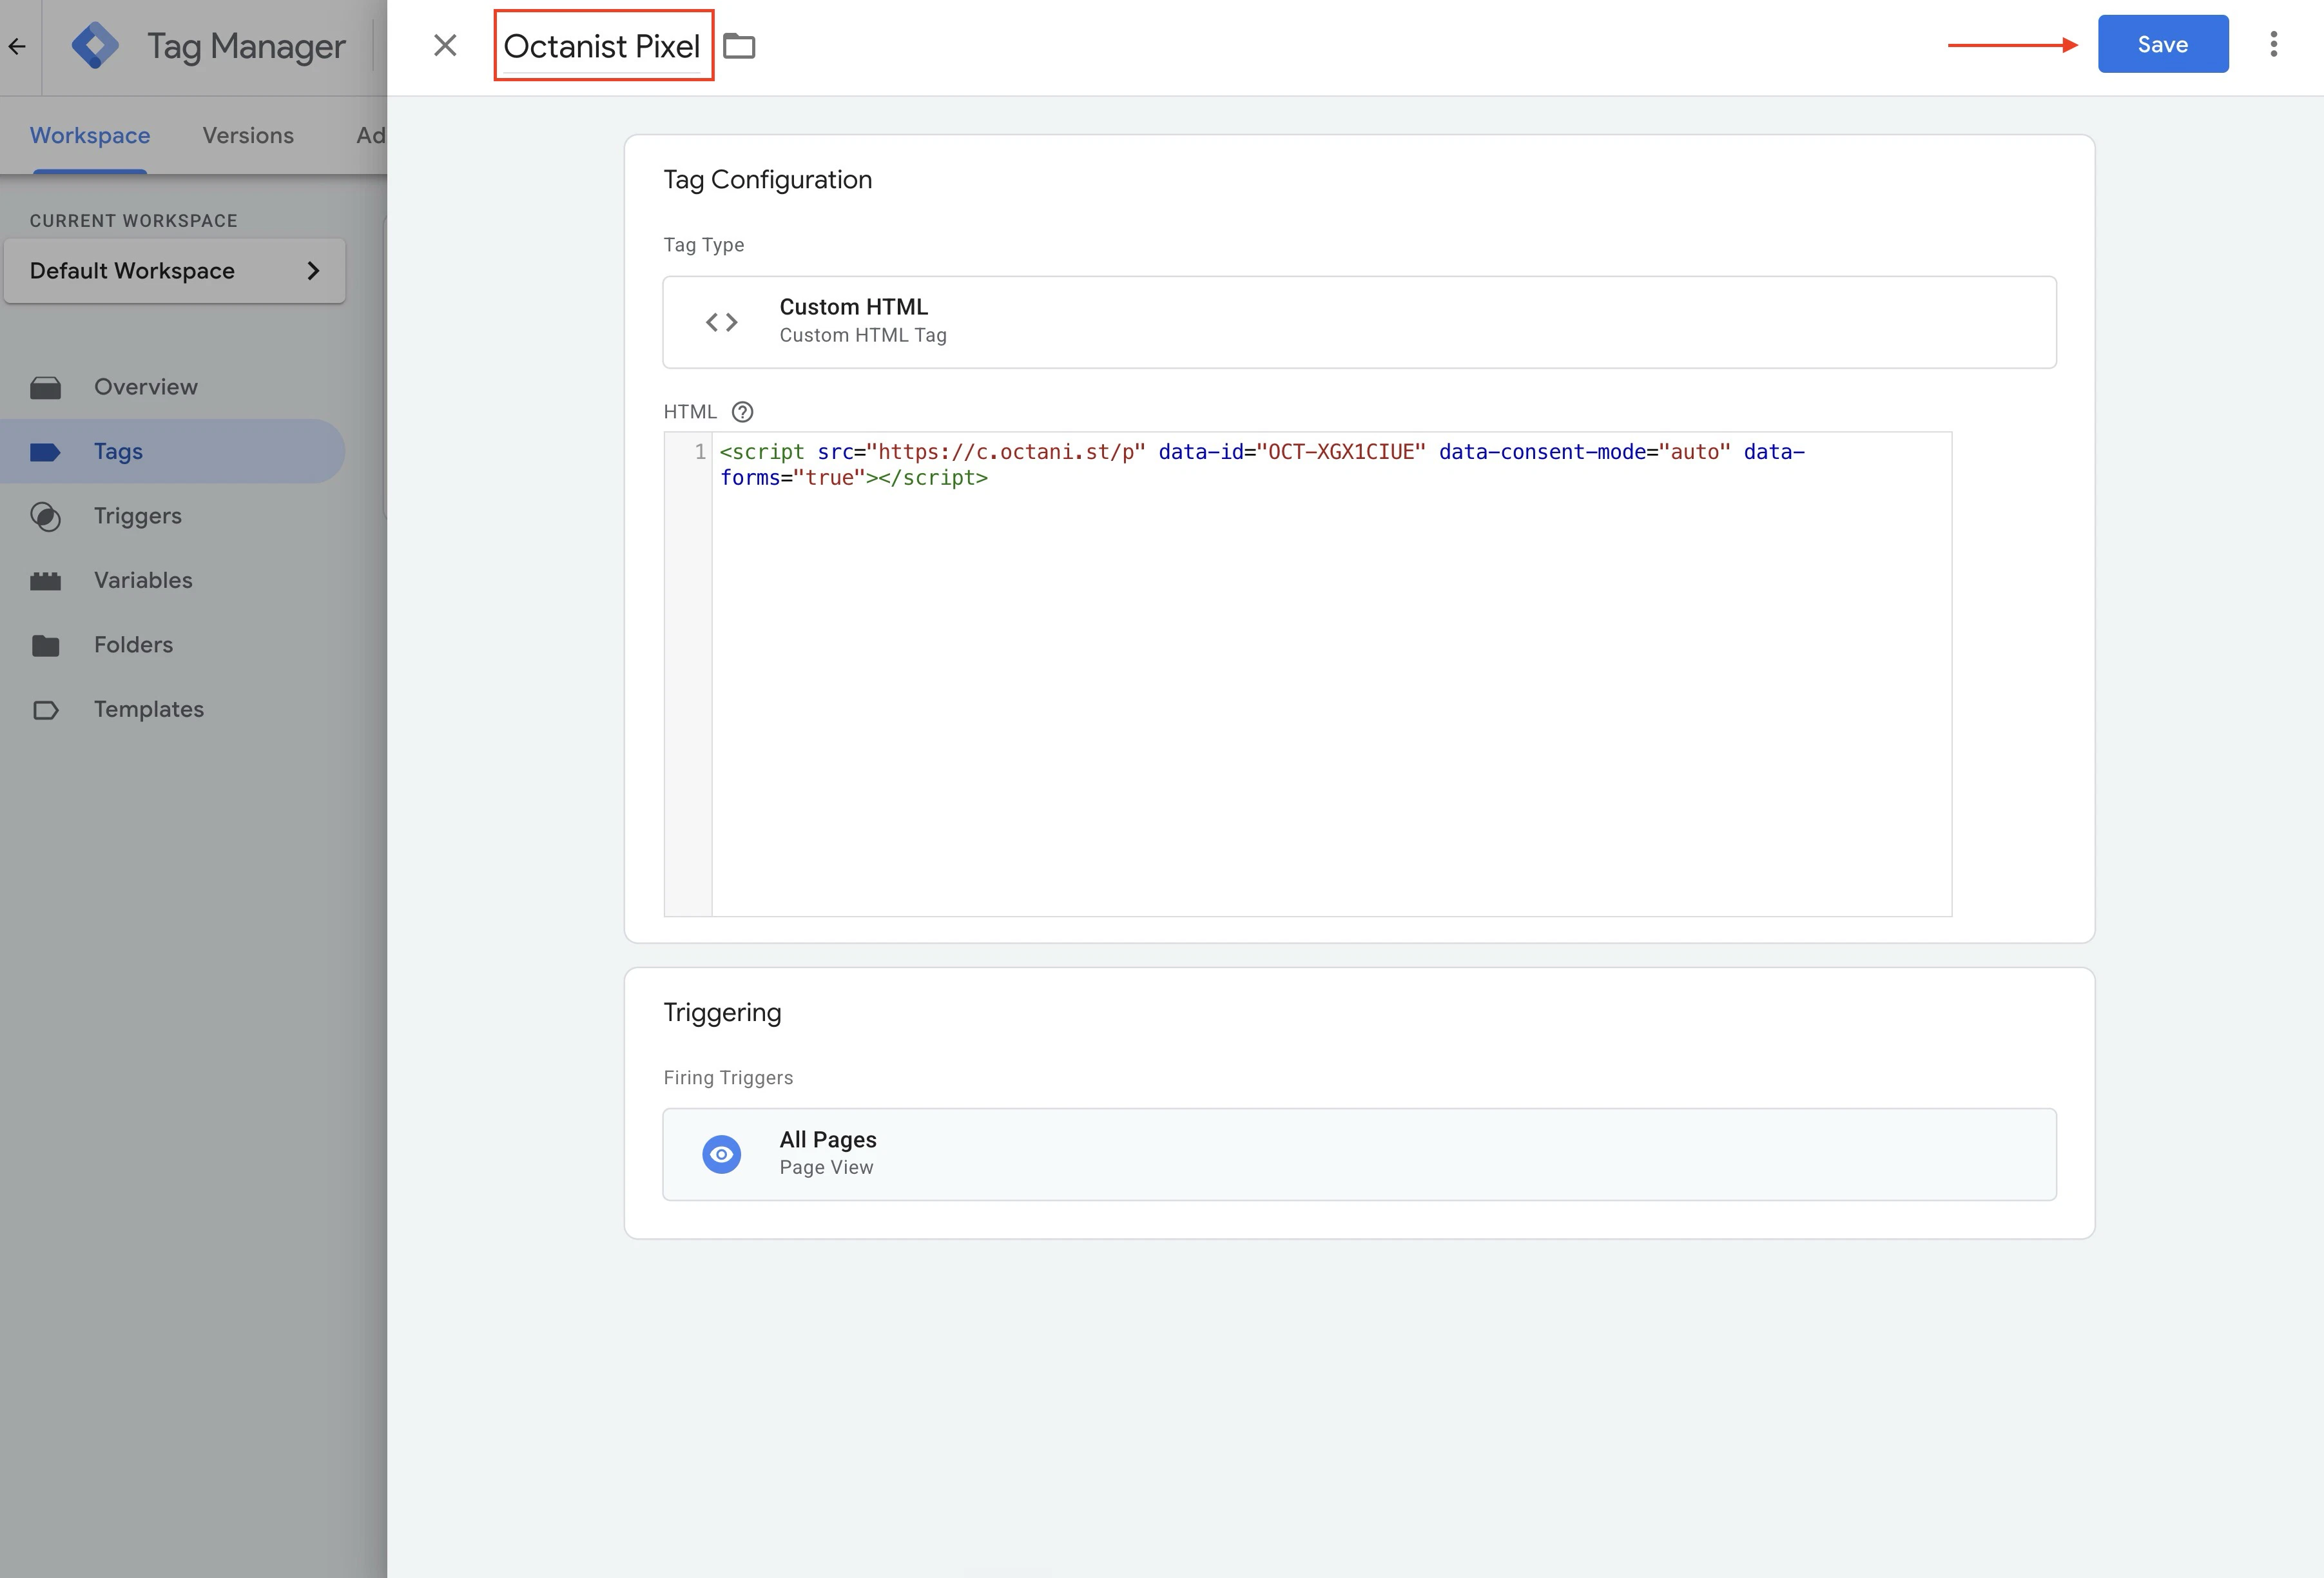
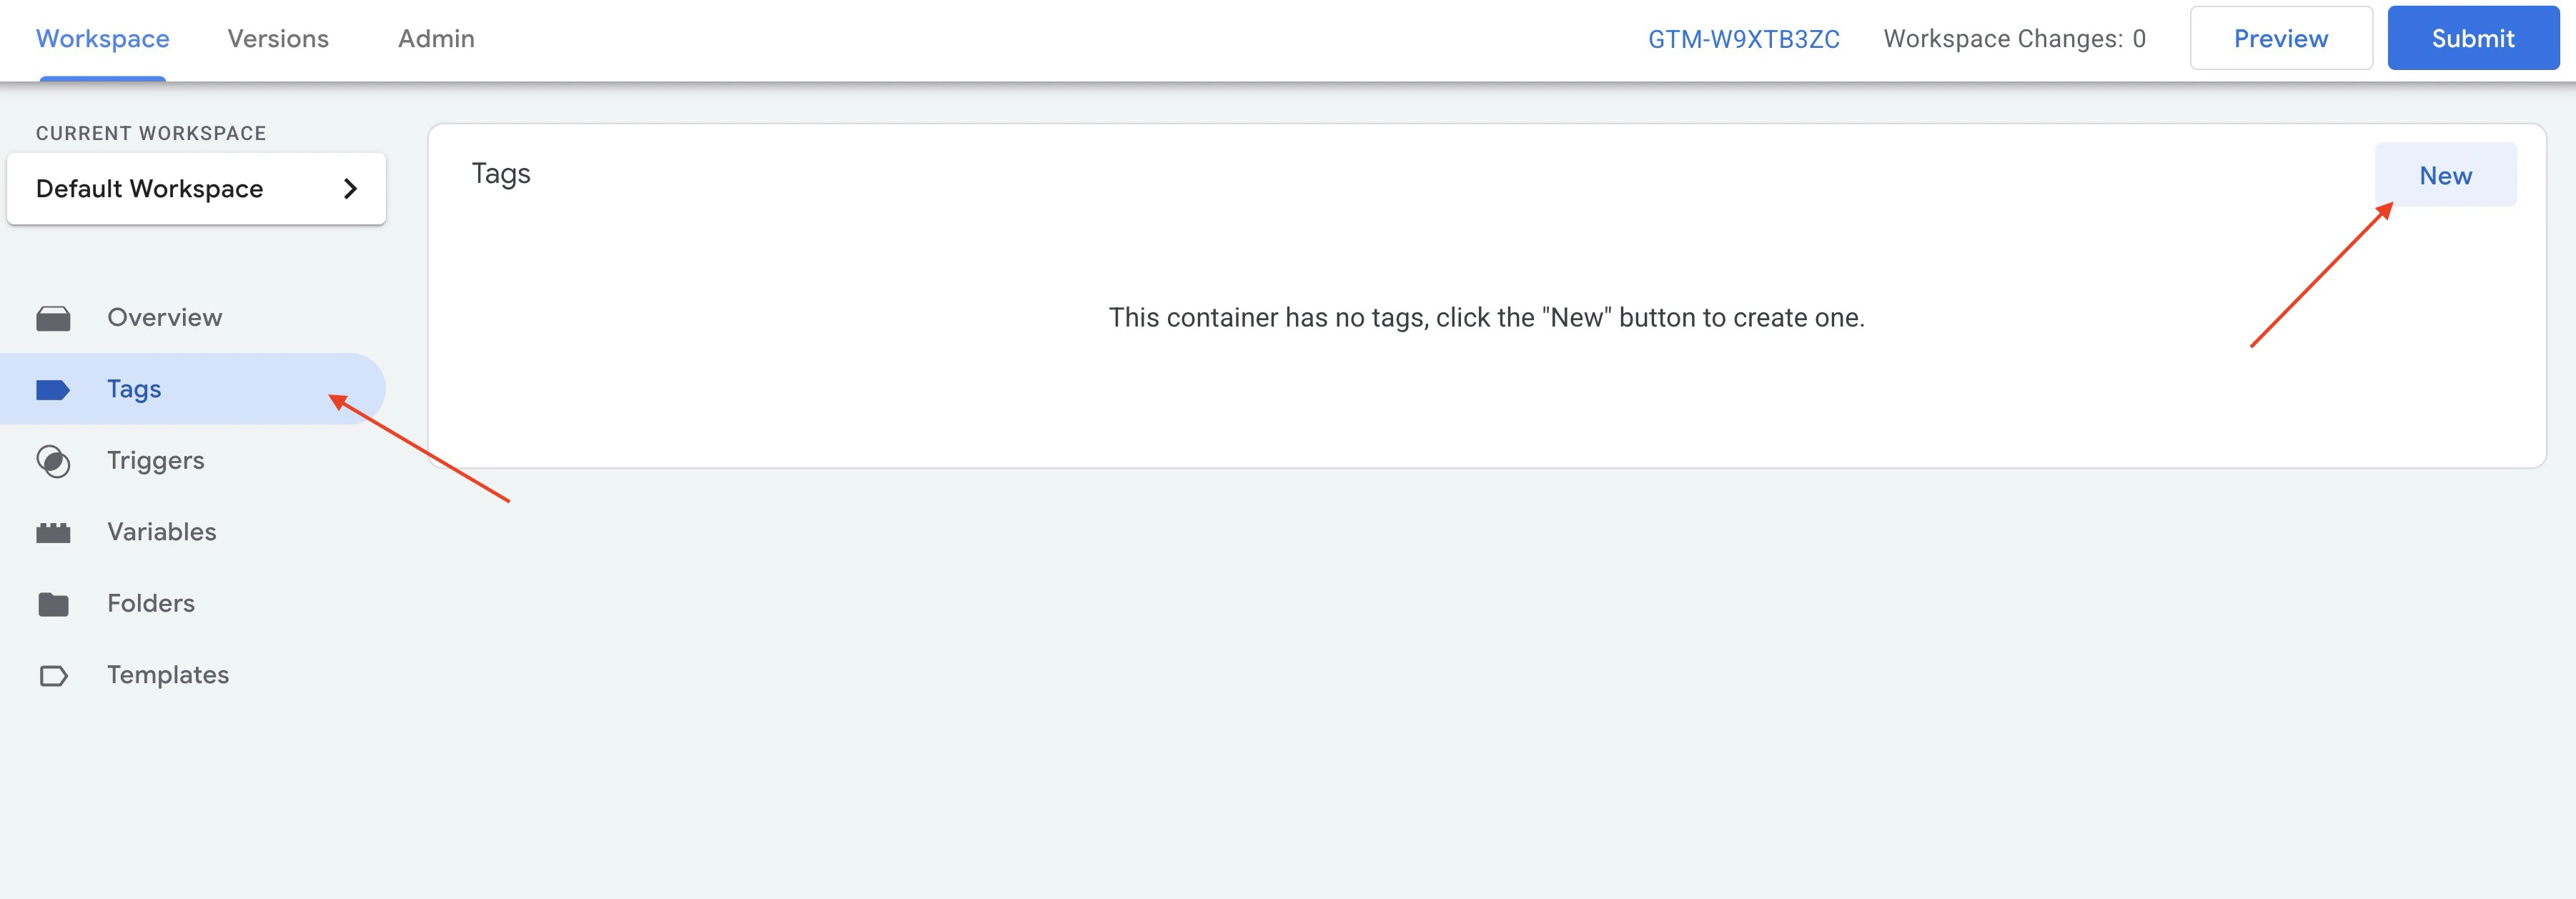 5. Name the tag **Octanist Pixel**.
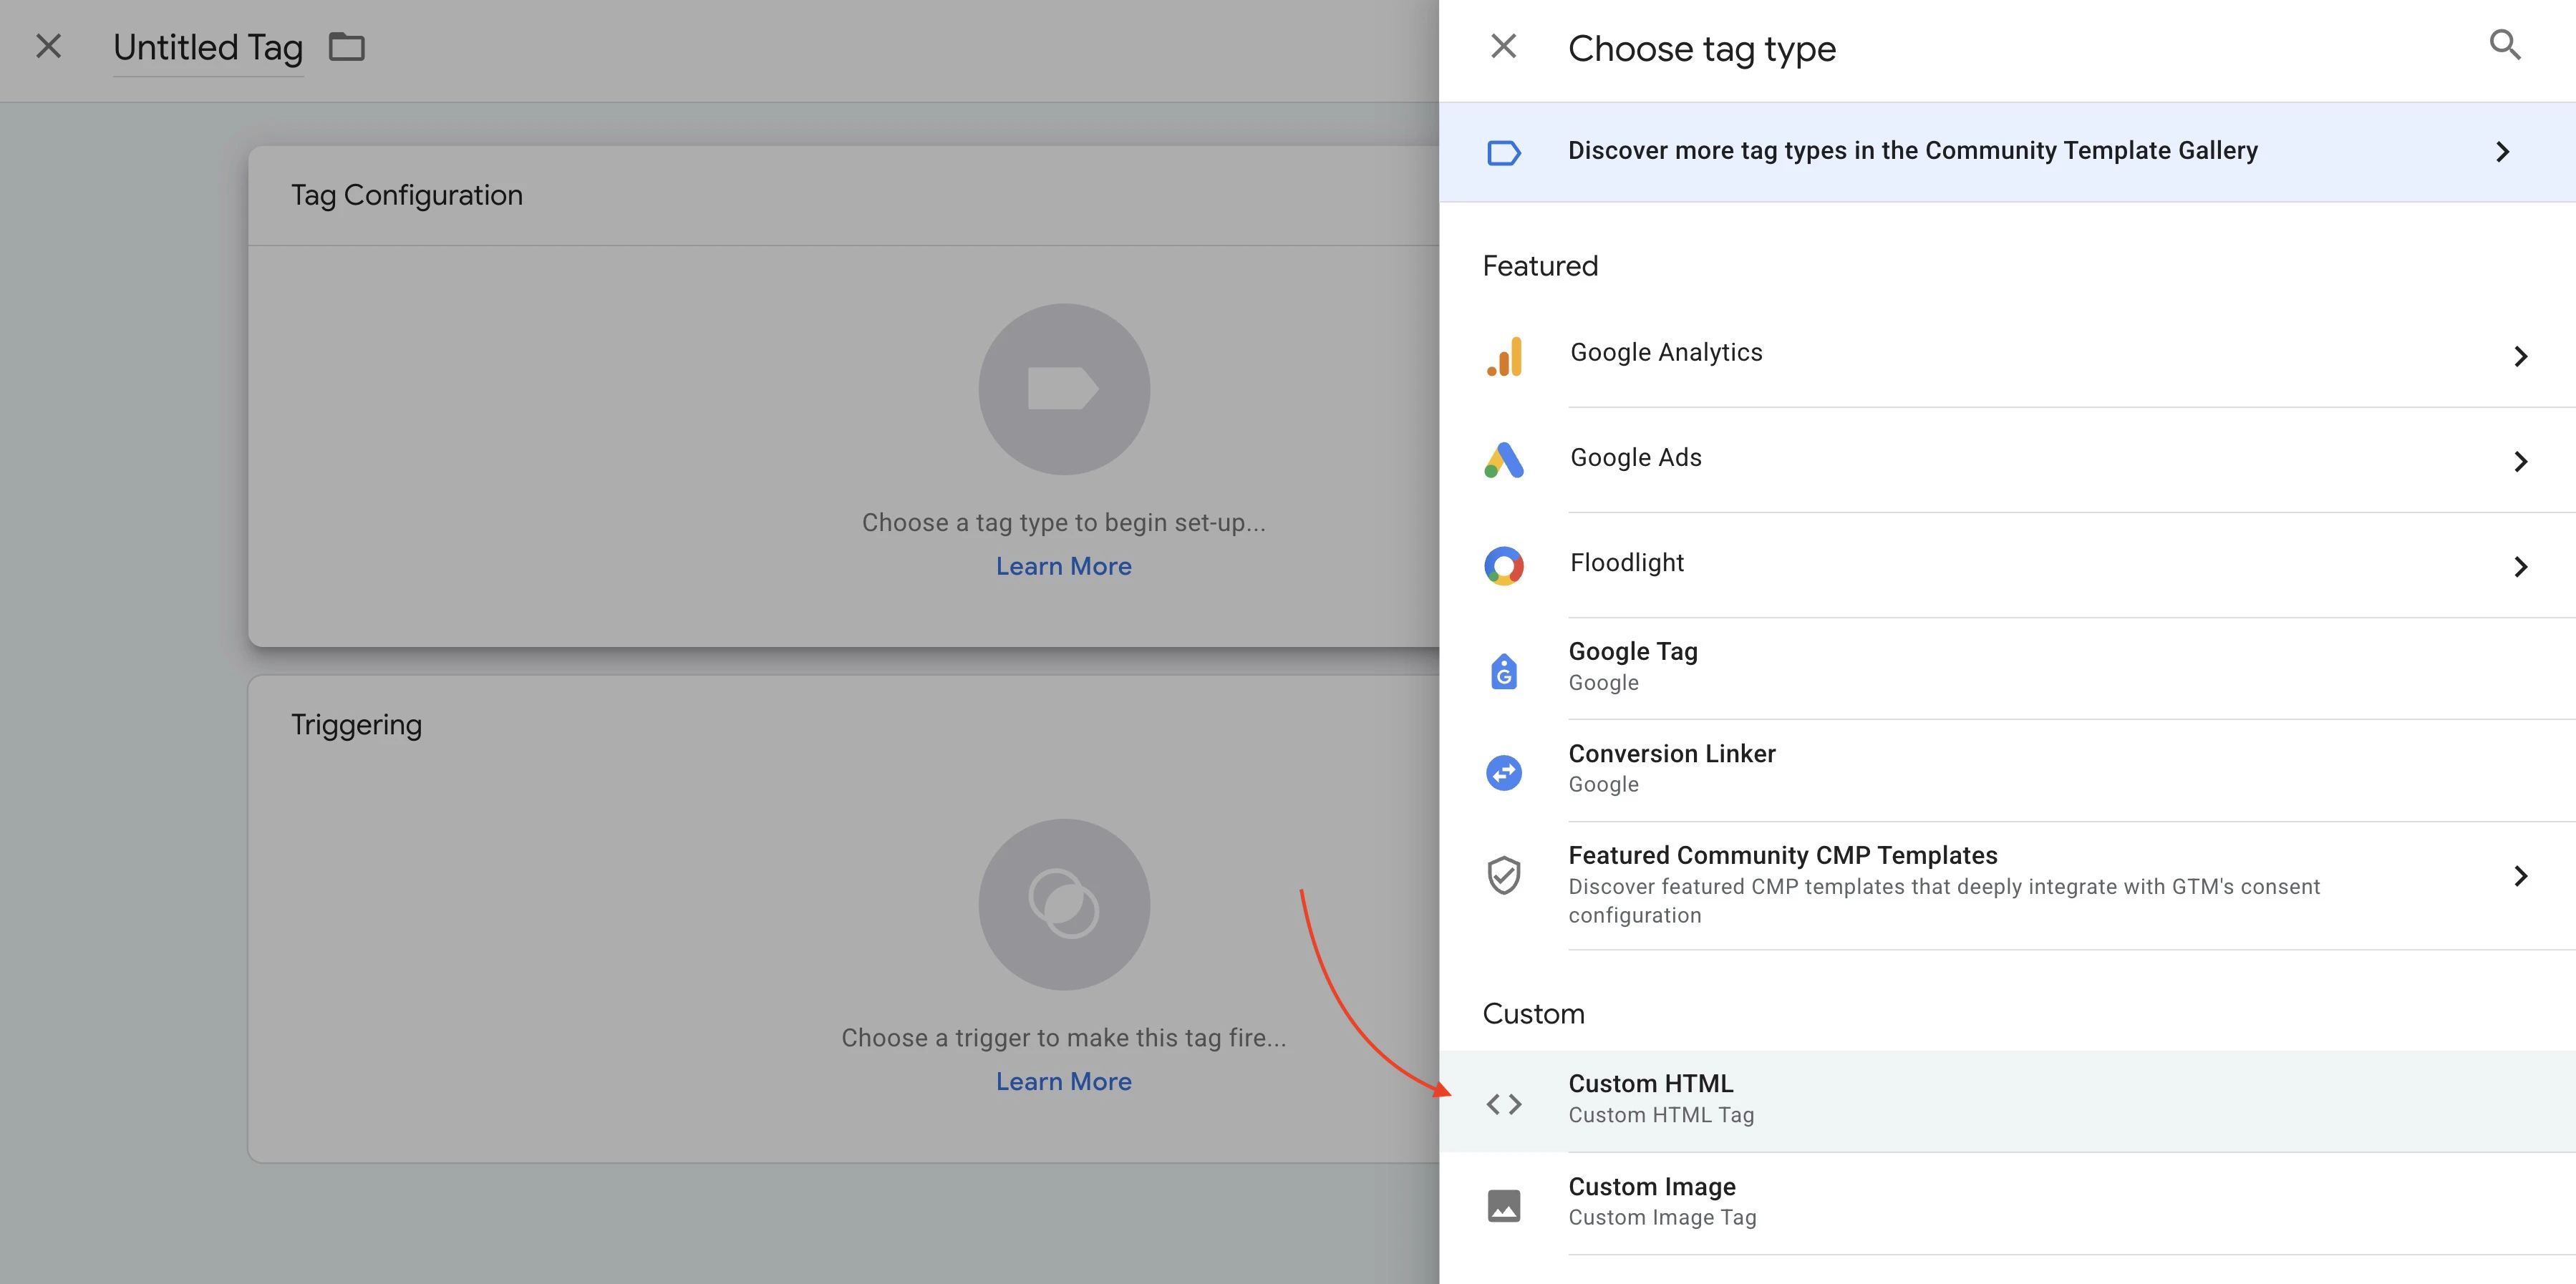
6. Choose **Tag Configuration > Custom HTML**.
5. Name the tag **Octanist Pixel**.
6. Choose **Tag Configuration > Custom HTML**.
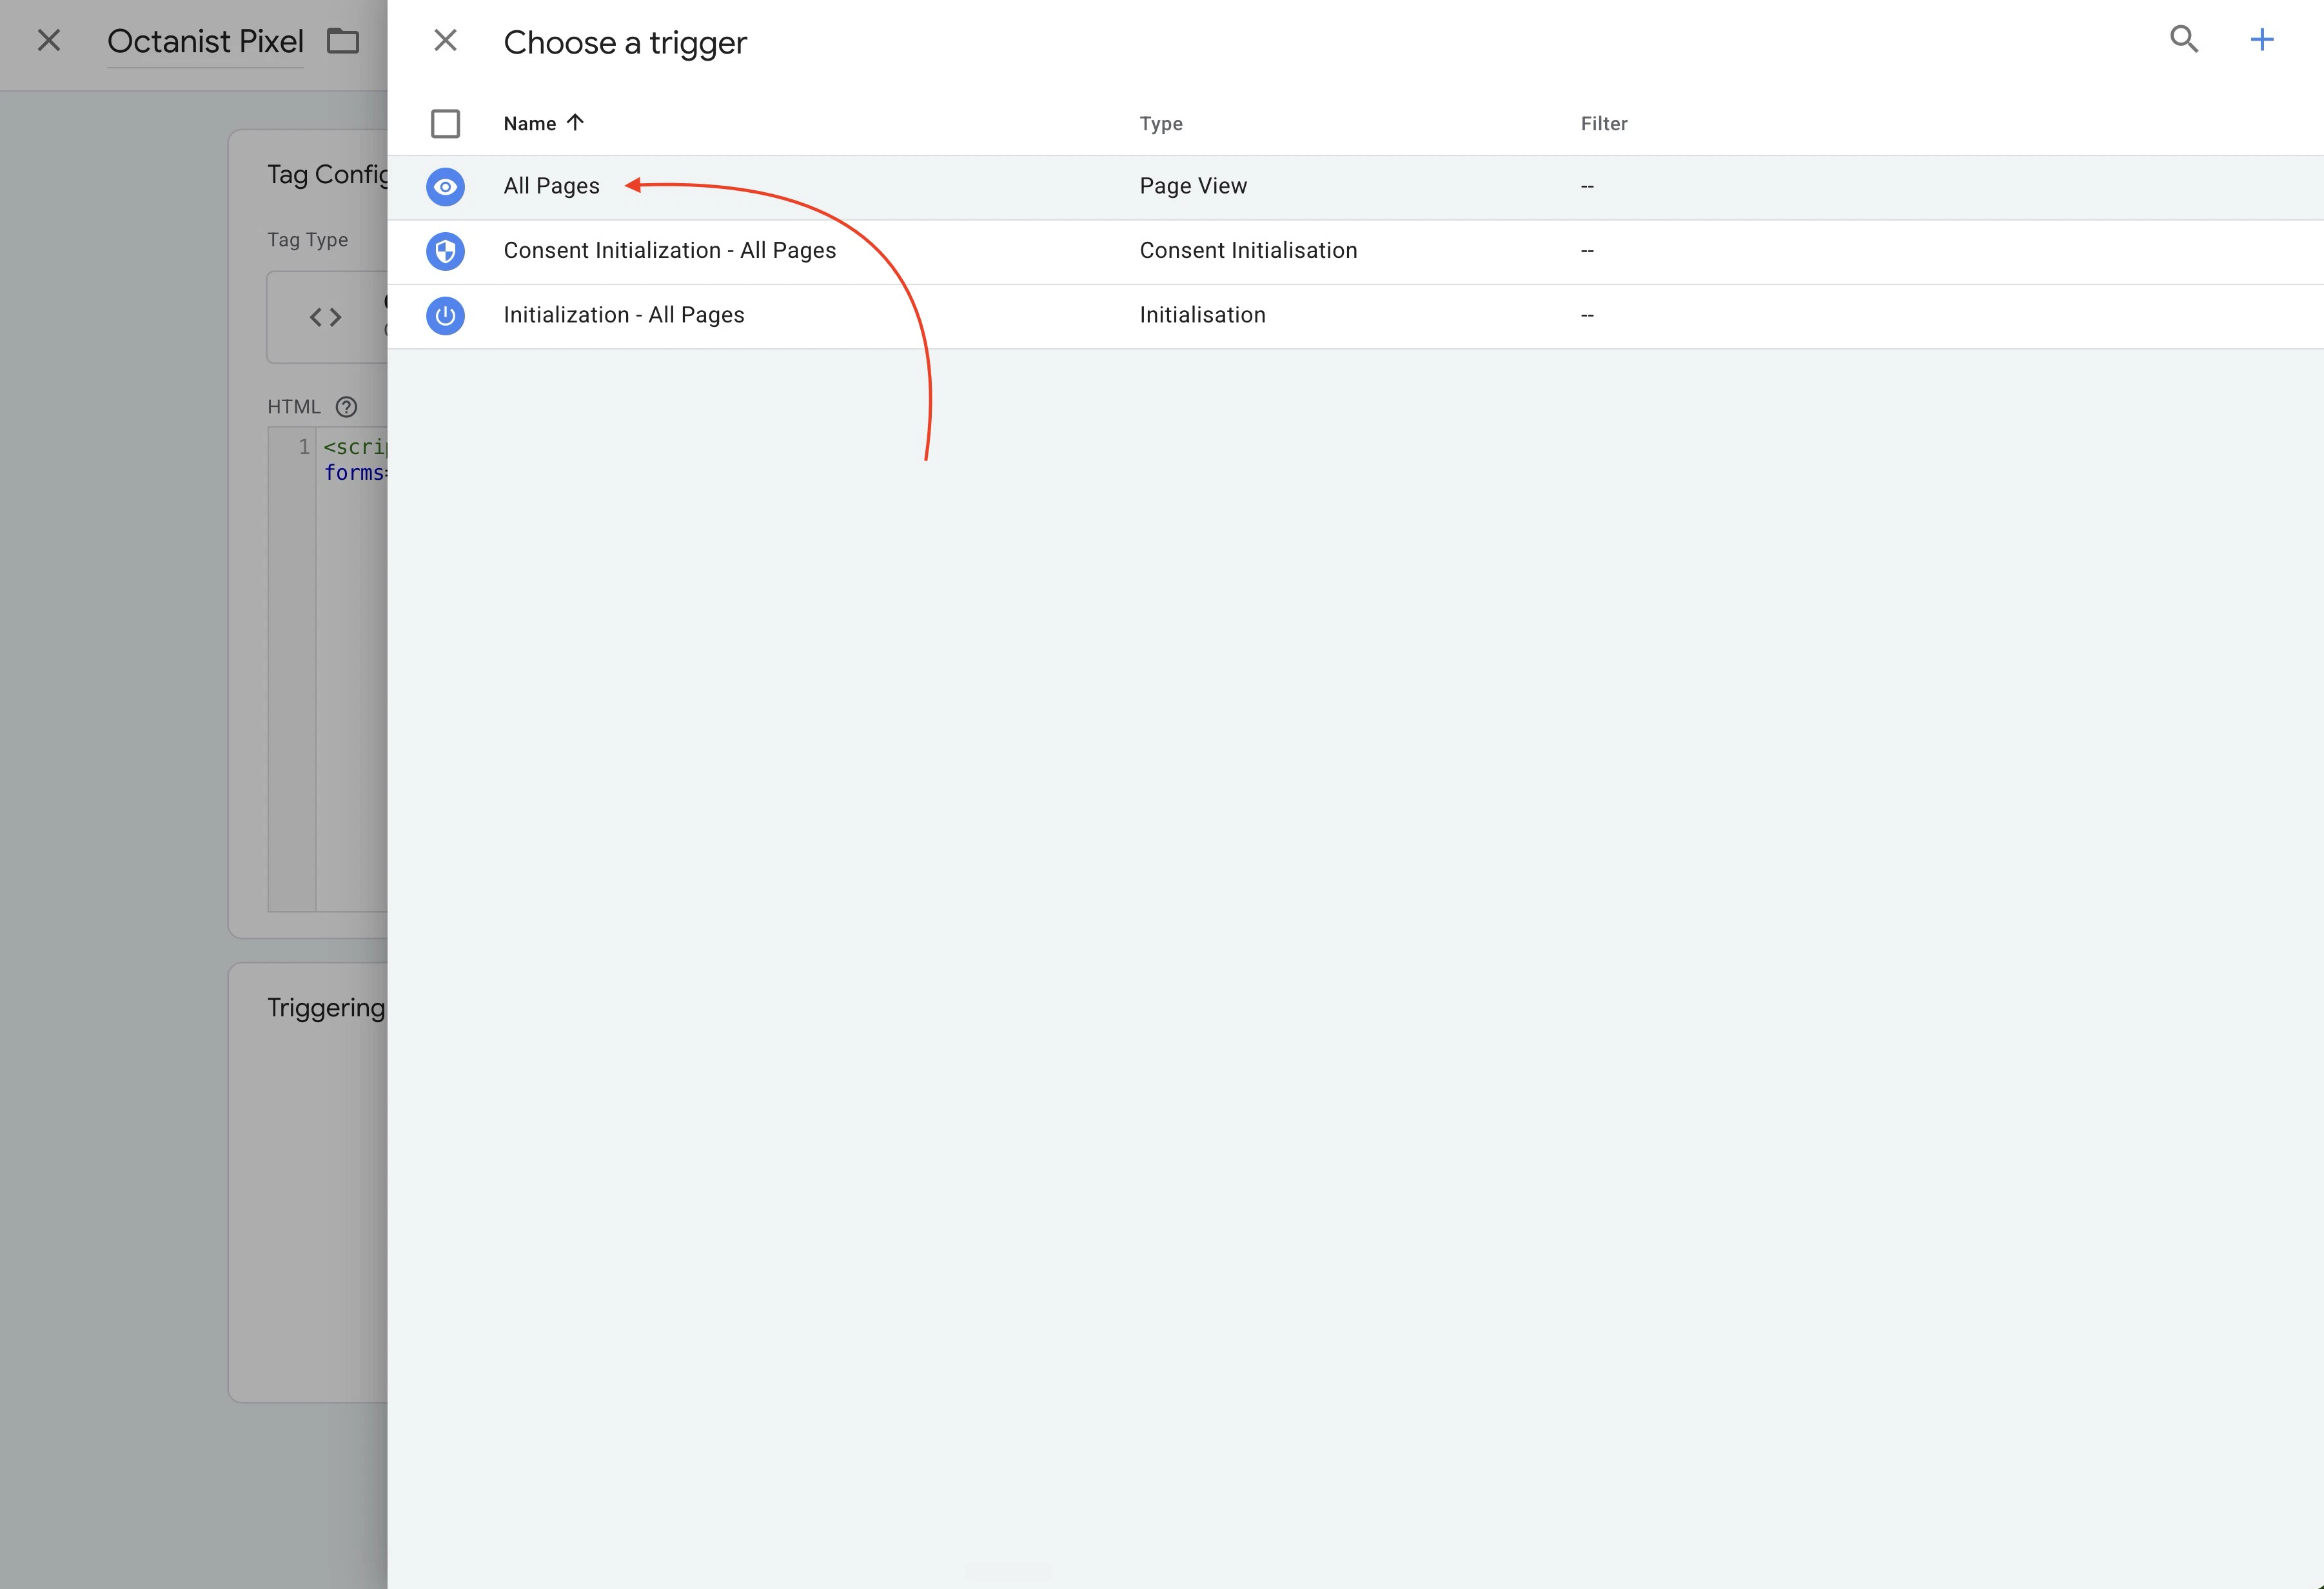
 7. Paste the pixel script from Octanist.
8. Set the trigger to **All Pages**.
7. Paste the pixel script from Octanist.
8. Set the trigger to **All Pages**.
 9. Save the tag.
 ## Publish and test
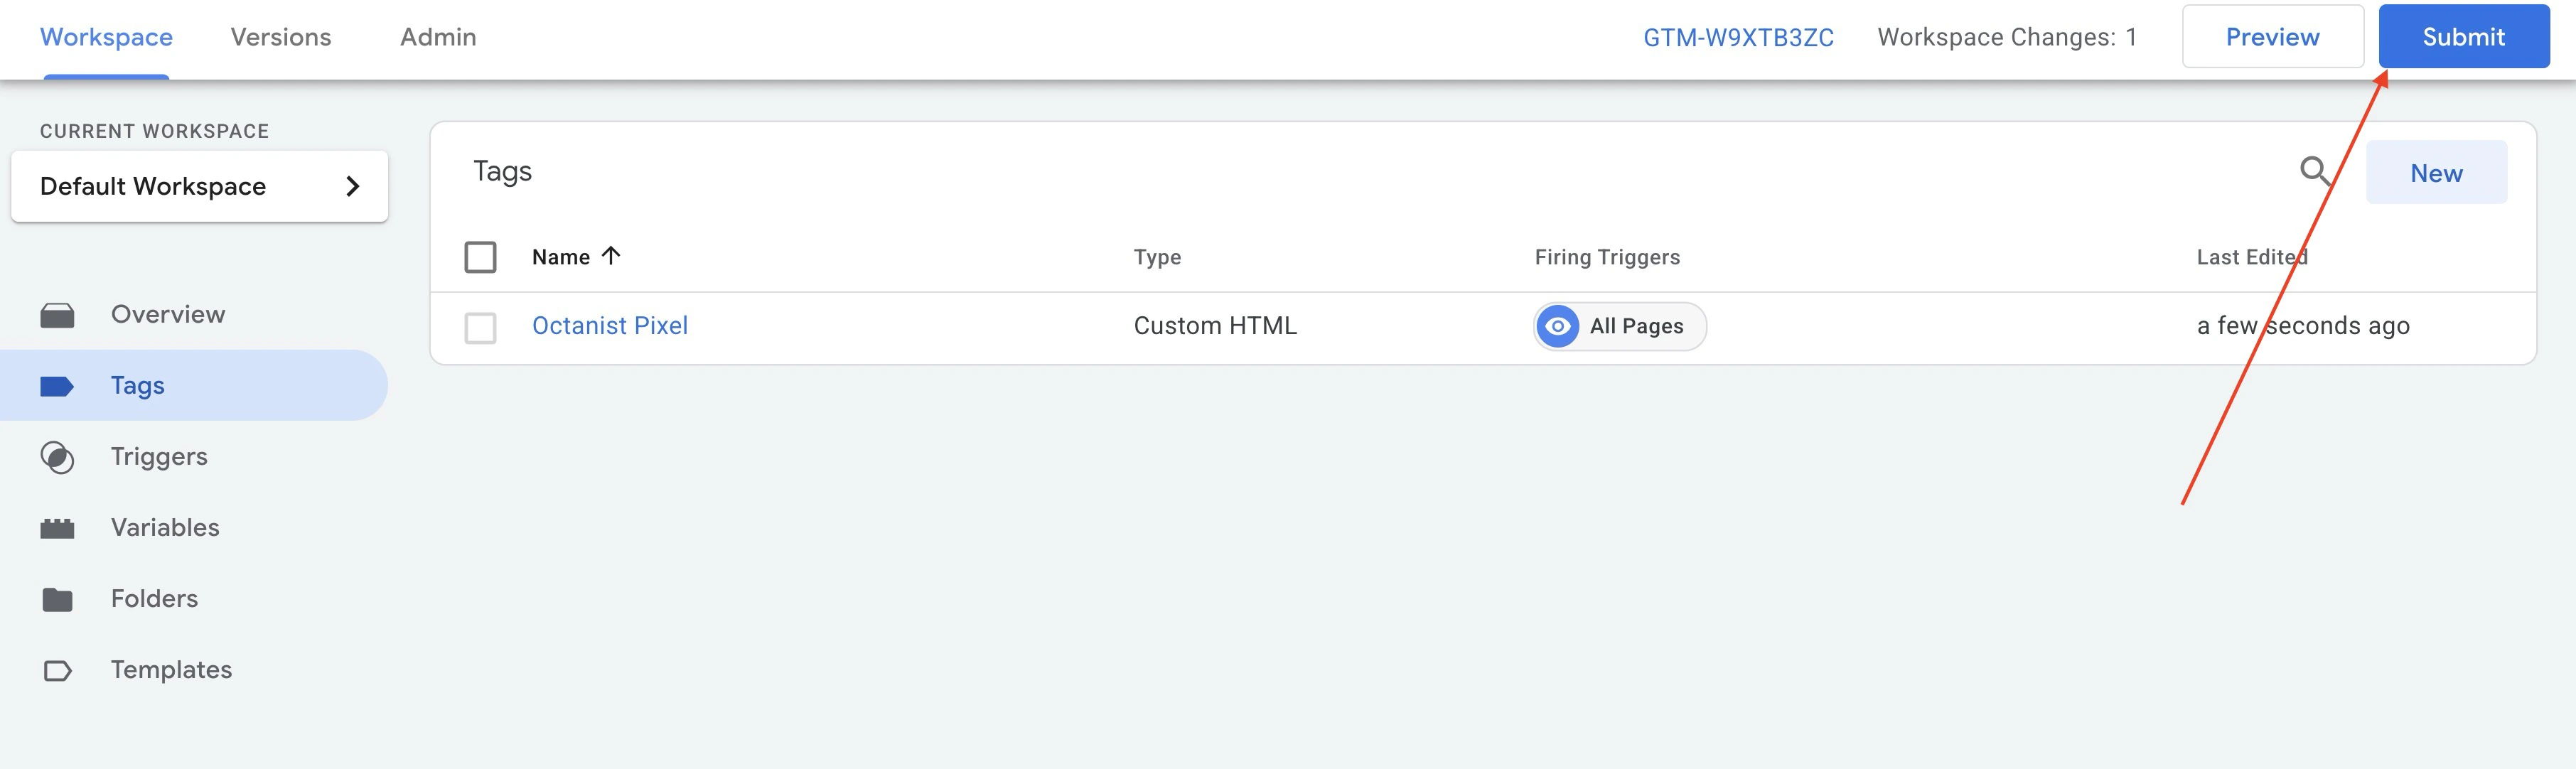
1. Click **Preview** in GTM.
2. Enter your website URL and connect Tag Assistant.
3. Confirm the **Octanist Pixel** tag fires on the page.
4. Submit a test form if `data-forms="true"` is enabled.
5. Publish the GTM container.
6. Open Octanist and verify the setup status or test lead.
## Publish and test
1. Click **Preview** in GTM.
2. Enter your website URL and connect Tag Assistant.
3. Confirm the **Octanist Pixel** tag fires on the page.
4. Submit a test form if `data-forms="true"` is enabled.
5. Publish the GTM container.
6. Open Octanist and verify the setup status or test lead.
 ## Avoid duplicate form captures
If another Octanist integration already sends the same form submissions, remove `data-forms="true"` from the pixel script before adding it to GTM.
Use only one form capture method per form:
* Browser-side pixel form detection through `data-forms="true"`
* Server-side form capture through your backend
* WordPress server-side capture through the Octanist plugin
* GTM DataLayer lead sending
The pixel can still inject the hidden session field without `data-forms="true"`, so [server-side form capture](/docs/incoming-integrations/server-side-capturing) can link form submissions to the same session.
If you only need to exclude one specific form, add `data-octa-ignore` to that form instead of removing `data-forms="true"` from the site-wide pixel:
```html theme={null}
```
This is useful for login, checkout, account, sensitive, or manually tracked JavaScript forms.
## Custom JavaScript forms
If your website needs to send a form submission from custom JavaScript, use the [Client-side API](/docs/incoming-integrations/client-side-api). Mark that form with `data-octa-ignore` so automatic browser capture does not also send it.
## Avoid duplicate form captures
If another Octanist integration already sends the same form submissions, remove `data-forms="true"` from the pixel script before adding it to GTM.
Use only one form capture method per form:
* Browser-side pixel form detection through `data-forms="true"`
* Server-side form capture through your backend
* WordPress server-side capture through the Octanist plugin
* GTM DataLayer lead sending
The pixel can still inject the hidden session field without `data-forms="true"`, so [server-side form capture](/docs/incoming-integrations/server-side-capturing) can link form submissions to the same session.
If you only need to exclude one specific form, add `data-octa-ignore` to that form instead of removing `data-forms="true"` from the site-wide pixel:
```html theme={null}
```
This is useful for login, checkout, account, sensitive, or manually tracked JavaScript forms.
## Custom JavaScript forms
If your website needs to send a form submission from custom JavaScript, use the [Client-side API](/docs/incoming-integrations/client-side-api). Mark that form with `data-octa-ignore` so automatic browser capture does not also send it.