How to Set Up Meta Offline Conversion Tracking and Optimise for Actual Sales
Most Meta campaigns are optimised using the first conversion that happens online.
Someone clicks an advertisement, submits a form and Meta records a lead. That is usually where the tracking stops.
But a submitted form is not necessarily a good lead. Some people never respond. Others are not a good fit. Only a small percentage may eventually become customers.
This means Meta is often optimising campaigns using incomplete information.
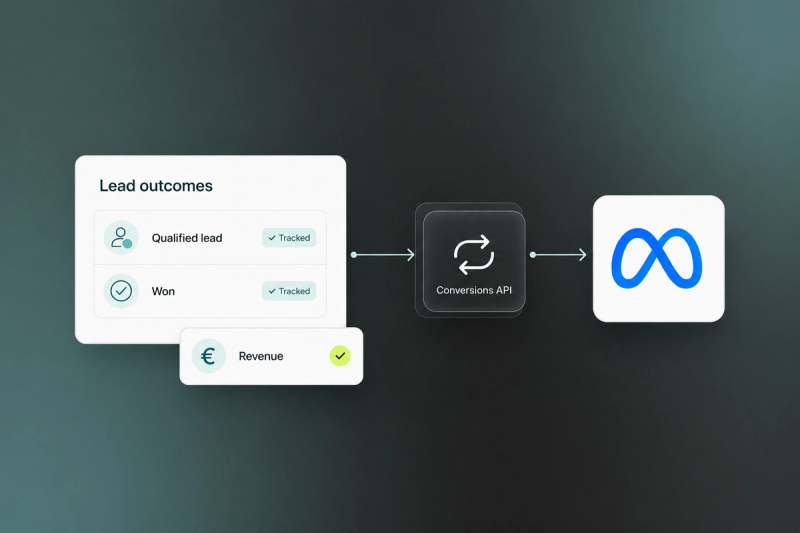
Offline conversion tracking solves this problem. It allows you to tell Meta what happened after the initial form submission:
- Was the lead qualified?
- Did the lead book an appointment?
- Did the customer complete a purchase?
- How much revenue did the customer generate?
The goal is not simply to measure these outcomes. Eventually, you want Meta to optimise your campaigns towards the people who actually become customers.
In this article, I will show you how to configure offline conversion tracking inside Meta, how to connect it through Octanist and how to start optimising campaigns towards actual offline sales.
What is Meta offline conversion tracking?
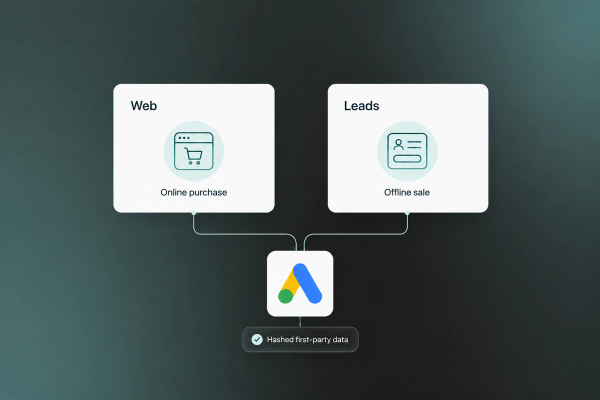
Offline conversion tracking allows you to send events to Meta that happen outside the original website session.
For example:
- Someone clicks your Meta advertisement.
- They submit a form on your website.
- The lead enters your CRM or Octanist.
- Your sales team qualifies the lead.
- The customer completes their purchase offline.
- The qualification and sale are sent back to Meta.
Meta can then try to connect these events with the person, advertisement, and campaign that originally generated the lead.
This is now handled through the Meta Conversions API. Older articles may still refer to a separate Offline Conversions API, but that implementation has been discontinued.
Why offline conversions matter
If Meta only receives form submissions, it will look for more people who are likely to submit forms.
That does not automatically mean they are likely to become customers.
Imagine that one campaign generates 100 leads and another generates 40 leads.
Based on cost per lead, the first campaign may appear to be performing better. But if the first campaign produces two customers and the second produces ten customers, the second campaign is clearly more valuable.
Without offline conversion tracking, Meta cannot see this difference.
With offline conversion tracking, you can send qualified leads, won customers and revenue back to Meta. This gives you a much better understanding of which campaigns are actually working.
More importantly, once there is enough reliable data, Meta can start optimising towards these deeper outcomes.
Step 1: Decide which conversions you want to send
Before changing anything inside Meta, decide which stages in your sales process are important.
A simple lead funnel could contain:
- Raw Lead: Someone submitted a form.
- Qualified Lead: The lead meets your requirements.
- Won Lead: The lead became a customer.
These events do not have the same value.
A raw lead only tells Meta that someone completed a form. A qualified lead says that the person was relevant. A won lead tells Meta that the campaign generated a customer.
The closer the conversion gets to revenue, the more useful the information becomes.
However, there is an important trade-off.
Qualified leads usually happen more quickly and more frequently. Actual sales may take several weeks and happen less often.
This means you will often start by optimising campaigns for qualified leads. Once Meta receives enough reliable sales and revenue data, you can test optimising towards actual purchases.
Step 2: Collect enough information to match the conversion
Sending an offline conversion is only one part of the process.
Meta also needs to understand which person and which advertisement generated it.
Useful matching information includes:
- Email address
- Phone number
- First and last name
- Meta click identifier
_fbcvalue_fbpbrowser identifier- IP address
- Browser user agent
- The time the conversion happened
The more accurate information you provide, the better the chance that Meta can match the conversion with the original advertisement.
This can be especially difficult when you use embedded or external forms. Many form tools do not automatically store Meta click and browser identifiers.
Octanist stores the available attribution information when a lead is created. When the lead later becomes qualified or won, Octanist can send that event back to Meta.
Email addresses and phone numbers are hashed before they are sent. However, hashing does not replace your privacy obligations or the need for a lawful basis to process the information.
Step 3: Open your dataset settings in Meta
Go to:
Meta Events Manager → Data sets → Select your dataset → Settings
Your existing Meta Pixel may appear as a dataset. In most cases, you do not need to create a completely separate dataset for offline conversions.
Step 4: Enable the offline upload settings
Inside the dataset settings, look for:
- Extend attribution uploads
- Allow historical conversion uploads
These settings sound similar, but they do different things.
Extend attribution uploads
This extends how far back Meta may look when attributing an uploaded offline event to an earlier advertisement impression.
This can be useful when customers take several weeks to make a decision.
Allow historical conversion uploads
This extends how long after the conversion happened you are allowed to upload the event.
This is useful when your CRM updates are delayed or when you want to send existing conversions from the previous 90 days.
Meta currently describes both settings in relation to offline or physical-store events.
These settings can improve attribution and allow older events to be uploaded. They do not automatically mean that Meta will optimise campaign delivery using a sale that happened several months later.
The campaign attribution window and the speed at which your conversions happen remain important.
Step 5: Enable Auto-tracking
Scroll to the Auto-tracking section in the dataset settings.
Click Select ad accounts.
Enable Auto-tracking for the correct ad account and save the settings.
Meta states that new campaigns will use the dataset for offline event tracking by default.
Do not assume that every existing campaign has been updated automatically. Open your active campaigns and check whether the correct dataset is connected under the tracking settings.
Connect Meta Ads to Octanist
Inside Octanist, go to:
You will be asked to connect your Meta account and select the correct advertising account.
Make sure you select the account where your campaigns are running.
Select your dataset and map the events
After selecting the account, choose the dataset you configured inside Meta.
You can then map your Octanist lead stages to Meta events.
In this example:
- Qualified Lead is mapped to Lead
- Converted is mapped to Purchase
Use a Purchase event when the conversion represents a genuine commercial outcome.
A booked appointment is not automatically a purchase. A qualified lead is not automatically a purchase either.
Your events should continue to describe what actually happened:
- Use Lead for a qualified lead.
- Use Purchase when the customer really bought something.
- Send the genuine revenue as the Purchase value.
This keeps your reporting accurate and gives Meta better information for value-based optimisation.
Decide how to handle Meta Instant Forms
If you generate leads using Meta Instant Forms, Octanist can import these submissions automatically.
If your leads already enter Octanist through your website, CRM or another integration, you can skip Instant Form importing and only send offline conversions back to Meta.
Only enable the import when you actually use Meta Instant Forms.
Finalise the integration
The final setup screen contains several important settings.
Enhanced conversions for leads
This sends hashed email addresses and phone numbers to Meta to improve matching.
Enable this when you collect the information properly and are allowed to use it for advertising measurement.
Send all leads
This allows Octanist to send qualified and won leads even when a Meta click ID is unavailable.
Meta can then attempt to match the conversion using hashed customer information.
Backfill existing leads
This sends eligible qualified and won leads from the previous 90 days.
Only enable this when your historical lead statuses, values and conversion dates are reliable.
Check whether the conversion was sent
Once the integration is active, use a test lead and change its status to a stage that should trigger a Meta conversion.
Inside Octanist, open the lead and check its history.
A successful upload should appear as a synced Meta Ads activity.
This confirms that Octanist sent the event. It does not yet prove that Meta attributed the conversion to a campaign.
Next, open the dataset overview in Meta Events Manager.
In this screenshot, Meta received a Raw Lead event through the Conversions API.
This proves that Meta received the event. It does not prove that a qualified or won conversion was attributed to a specific advertisement.
Meta states that events can take up to 30 minutes to appear inside Events Manager.
Lead Campaigns Versus Sales Campaigns
Once your events are arriving in Meta, you need to decide whether to use a Lead campaign or a Sales campaign.
A Lead campaign is designed to generate enquiries, form submissions and qualified leads. Meta optimises the campaign towards events such as Raw Lead or Lead.
This is usually the best starting point when your sales cycle is longer or when you do not yet generate enough purchases for Meta to learn from. You generally do not need to send a conversion value unless different leads have genuinely different and reliable values.
A Sales campaign is designed to generate purchases and revenue. Meta optimises towards Purchase events instead of the initial lead.
This becomes useful once you consistently send actual sales back to Meta. If customers have different values, you can also include their real purchase value and optimise for conversion value.
The main difference is therefore the outcome Meta is asked to prioritise.
A Lead campaign asks Meta to find more people who are likely to become leads. A Sales campaign asks Meta to find more people who are likely to become paying customers.
A Lead campaign can still receive Purchase events for reporting. A Sales campaign can still begin with a website form. What matters is the event selected for campaign optimisation.
For many businesses, the best approach is to start with a Lead campaign and gradually move closer to revenue:
- Start by optimising for Raw Lead.
- Begin sending qualified leads back to Meta.
- Test optimising for qualified leads.
- Continue uploading every real purchase and its revenue.
- Once Meta receives enough reliable Purchase events, test a Sales campaign.
- Compare cost per purchase and revenue, not only cost per lead.
This lets Meta learn from a frequent lead event at the beginning, while you collect the purchase data needed to optimise towards real sales later.
How to Set Up a Lead Campaign
Use a Lead campaign when the main outcome is a form submission, enquiry, application or qualified lead.
This is normally the best starting point when sales happen later or when you do not yet generate enough purchases for Meta to optimise reliably.
Step 1: Select the Leads objective
Create a new campaign and select Leads as the campaign objective.
Do not select Traffic simply because people need to visit your landing page.
Traffic campaigns optimise for visits and clicks. Lead campaigns are designed to find people who are more likely to complete a lead conversion.
Step 2: Select the lead conversion location
Choose where people can become leads.
In this example, the conversion location is:
Website and Instant Forms
Only select conversion locations that you actually use.
If all leads come through your website, select Website. If you use both website forms and Meta Instant Forms, select both.
Step 3: Select the lead conversion event
Choose the dataset and the event Meta should use for campaign optimisation.
In this example, Raw Lead is active and is being received through the Conversions API.
The screenshot shows Raw Lead, but this does not mean Raw Lead is always the best optimisation event.
Use Raw Lead when:
- You are starting with limited data.
- You need more conversion volume.
- You cannot yet send reliable qualification events.
Use Lead or Qualified Lead when:
- Meta receives enough qualified events.
- Your qualification process is consistent.
- Qualified leads are a much better predictor of revenue.
A campaign cannot optimise for an event it is not receiving. Send the event first, confirm that it is active and then select it inside the campaign.
The logical progression is:
- Start with Raw Lead.
- Send qualified leads through CAPI.
- Confirm that the qualified event becomes active.
- Test optimising the campaign for qualified leads.
- Continue sending won customers and revenue for later analysis.
How to Set Up a Sales Campaign
Use a Sales campaign when you want Meta to optimise towards actual purchases and revenue.
This is the long-term goal of a good offline conversion setup.
However, it only works properly when Meta receives enough reliable Purchase events.
Step 1: Select the Sales objective
Create a campaign and select Sales.
A Sales campaign tells Meta that the final commercial outcome matters more than the initial form submission.
Step 2: Include in-store conversions
When someone becomes a lead online but completes the purchase offline, select a conversion location that includes the store or offline sales environment.
In this example, select:
Website, app and in store
This allows the campaign setup to include both online activity and purchases that are uploaded later through the Conversions API.
If you only upload offline purchases but never include them in your campaign setup, they may remain mainly useful for reporting. The purpose here is to make the actual sale part of the outcome Meta should work towards.
Step 3: Select the Purchase event
Choose the dataset receiving your offline Purchase events and select Purchase as the conversion event.
Only do this when:
- Purchase represents a real completed sale.
- The correct purchase time is included.
- Each purchase contains the correct currency.
- The revenue value is accurate.
- Meta receives the events consistently.
- Meta can match enough purchases with advertisements.
Do not send qualified leads as Purchase events merely to create more volume. That makes your reporting unreliable and teaches Meta using the wrong outcome.
Step 4: Choose the performance goal
You can optimise for the number of conversions or the value of those conversions.
Choose Maximise number of conversions when:
- Every purchase has approximately the same value.
- You want as many purchases as possible.
- Revenue values are not reliable enough yet.
Choose Maximise value of conversions when:
- You send the genuine revenue for every purchase.
- Some customers are significantly more valuable than others.
- Meta receives enough Purchase events to learn from.
- The values are consistent across campaigns.
Do not assign random or estimated values simply to unlock value optimisation. If the values are poor, Meta may optimise towards the wrong customers.
When Should You Move from Leads to Sales?
You do not need to choose one campaign type forever.
For many businesses, the sensible progression is:
- Start with a Lead campaign optimised for Raw Lead.
- Begin sending qualified lead events.
- Move the Lead campaign towards qualified leads.
- Continue uploading every real purchase and its revenue.
- Wait until Meta receives enough consistent Purchase events.
- Launch a Sales campaign that includes in-store conversions.
- Test Purchase or value optimisation against the Lead campaign.
Do not switch every campaign at once.
Run a controlled comparison and evaluate:
- Cost per raw lead
- Cost per qualified lead
- Cost per purchase
- Purchase conversion rate
- Revenue
- Return on ad spend
A Sales campaign may generate fewer leads while producing more customers. If you only compare cost per lead, you could mistakenly stop the better campaign.
For long sales cycles, a qualified lead may remain the most useful optimisation event because it happens sooner. The final Purchase should still be uploaded for revenue reporting and future Sales campaign testing.
We recommends using a faster proxy event when the final sale happens too late for campaign optimisation.
Add Offline Conversion Columns to Ads Manager
Inside Ads Manager, open the Columns menu and select Offline conversions.
If it is not displayed under Recently used, click See more.
This adds columns such as:
- Offline purchases
- Offline purchase value
- Cost per offline purchase
- Offline leads
- Cost per offline lead
- Other offline conversions
If expected conversions are missing, check:
- The selected reporting period
- The campaign attribution settings
- Whether Auto-tracking is enabled
- Whether the correct dataset is connected
- Whether Meta received the event
- Whether Meta could match the customer
- Whether the event was selected as the campaign conversion
- Whether the conversion happened inside the attribution window
Final Checklist
Before using the conversion data to make campaign decisions, confirm that:
- The correct Meta dataset is selected.
- Auto-tracking is enabled.
- Historical and extended attribution uploads are configured.
- Your CRM, direct CAPI integration or Octanist is sending events.
- Meta receives Raw Lead, Lead and Purchase as separate outcomes.
- Purchase is only used for genuine sales.
- Purchase events include accurate values and currencies.
- Lead campaigns optimise for an active lead event.
- Sales campaigns optimise for an active Purchase event.
- In-store conversions are included in the Sales campaign.
- Events appear in Meta Events Manager.
- Offline conversion columns are visible in Ads Manager.
- Personal information is processed with the correct privacy controls.
Start with Leads, but Work Towards Revenue
A Raw Lead tells Meta that someone completed a form.
A qualified Lead tells Meta that the person was relevant.
A Purchase tells Meta that the campaign generated a real customer.
Revenue tells Meta which customers were the most valuable.
Start with the deepest event that happens frequently and quickly enough for Meta to learn from.
For a new setup, that may be Raw Lead. For a more mature setup, it may be Qualified Lead. Once you generate enough reliable sales, the goal should be to test Sales campaigns that optimise towards purchases and genuine revenue.
That is when offline conversion tracking becomes more than a reporting system. It becomes a way to help Meta find more customers who actually make money.