c.example.com.
How it works
- You choose a short custom subdomain in Octanist.
- Octanist gives you a CNAME record.
- You add that CNAME record at your DNS provider.
- Octanist verifies the DNS record.
- Octanist issues SSL for the custom domain.
- Your pixel script uses the custom domain instead of the default Octanist domain.
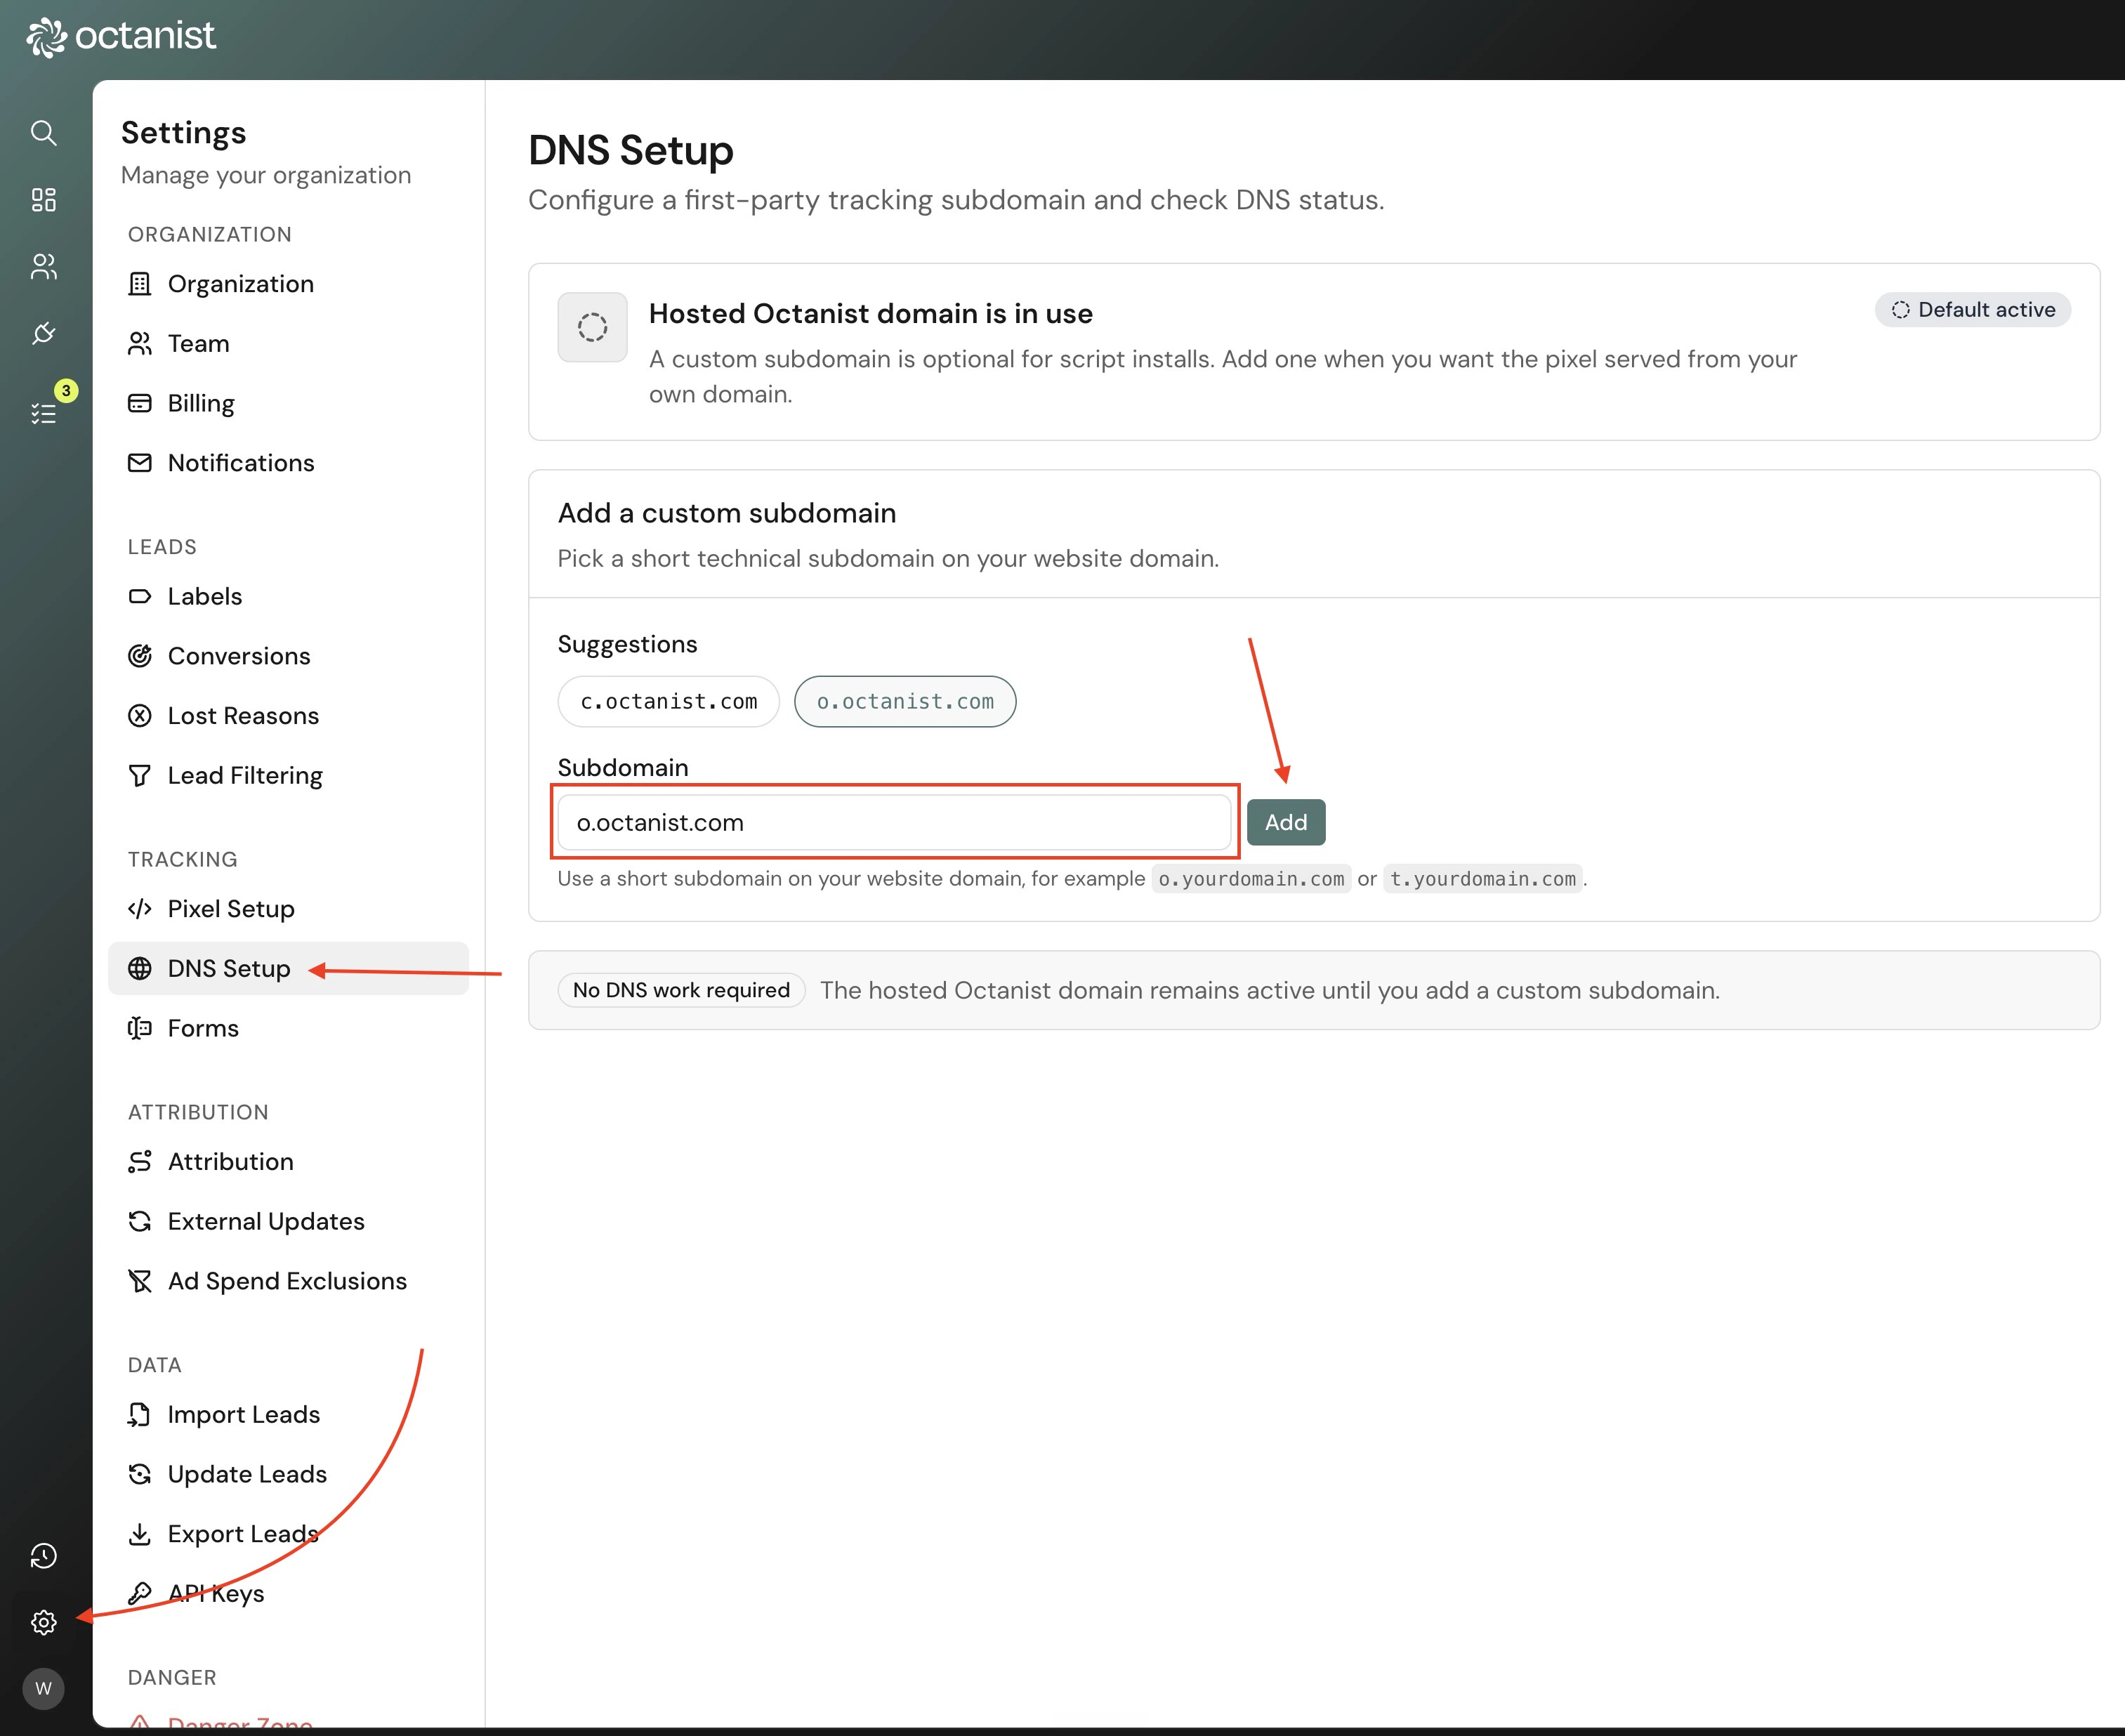
Create the custom domain
- Open Octanist.
- Go to Settings > DNS Setup.
- Choose a suggested subdomain or enter your own.
- Click Create DNS setup.
c.example.como.example.comx.example.com
Add the DNS record
Octanist shows the exact DNS record to add.
Add the record at the DNS provider for the website domain. This is usually where the domain’s nameservers are managed.
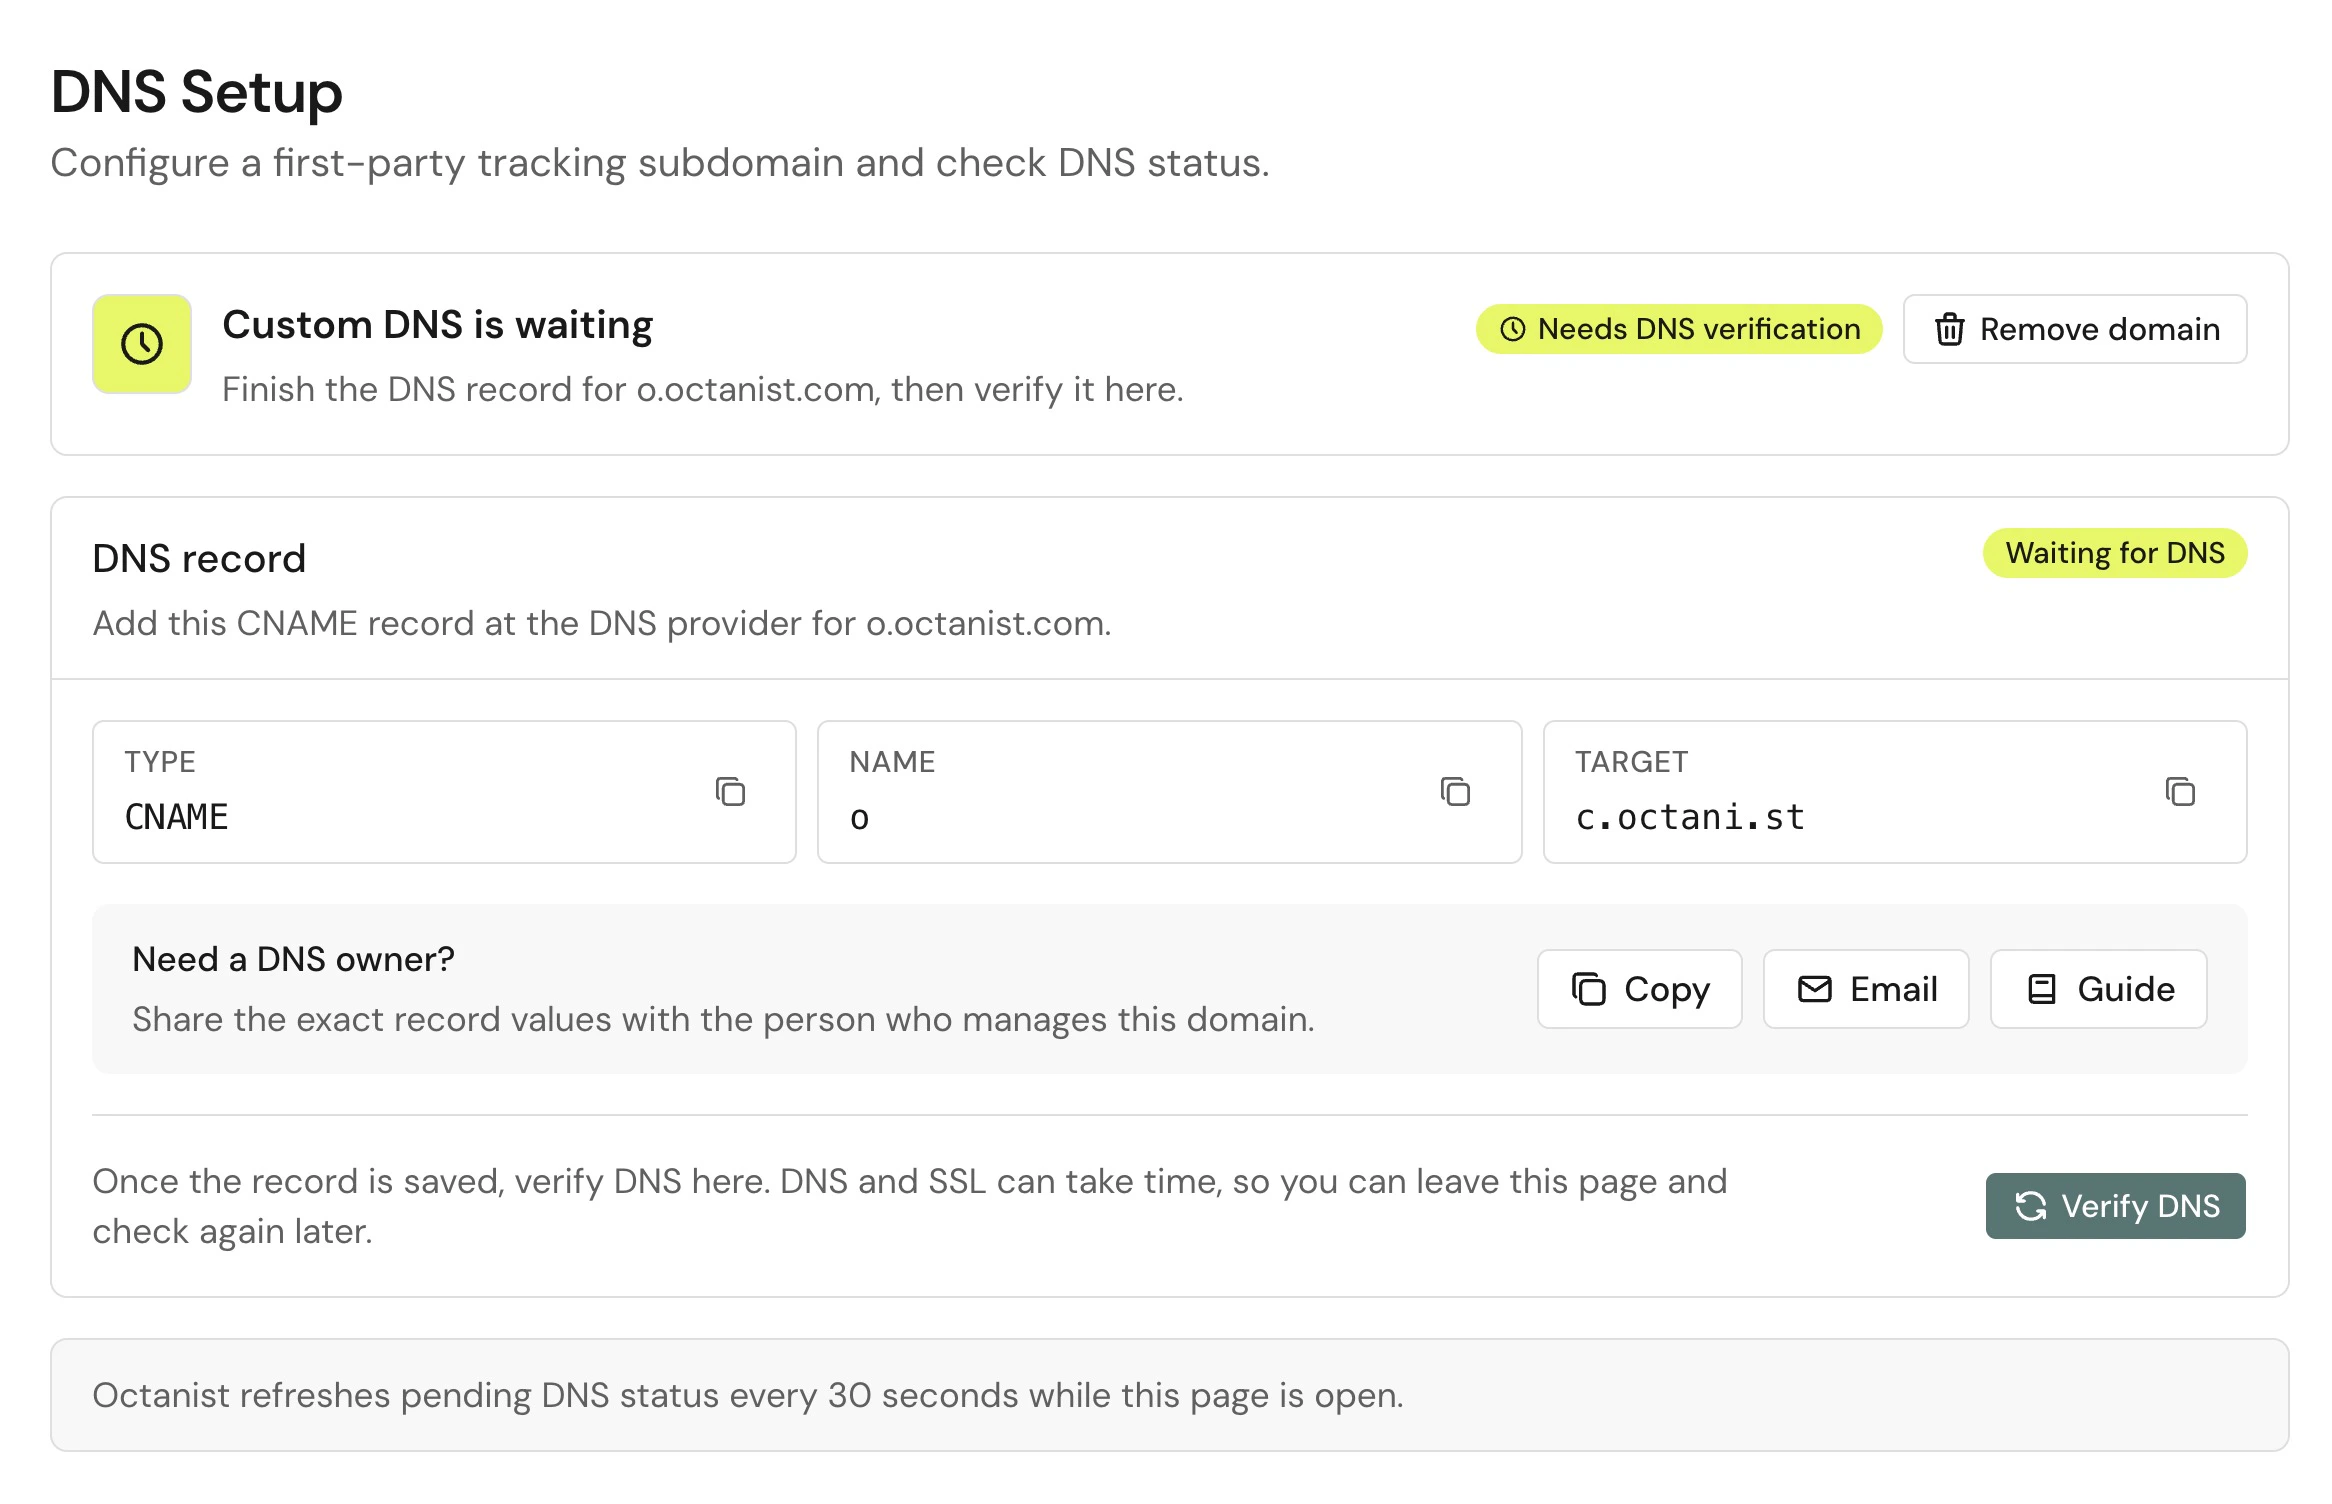
Verify DNS
After the record is saved, click Verify DNS in Octanist. DNS changes can take time. Octanist also refreshes pending DNS status while the DNS setup page is open. The usual states are: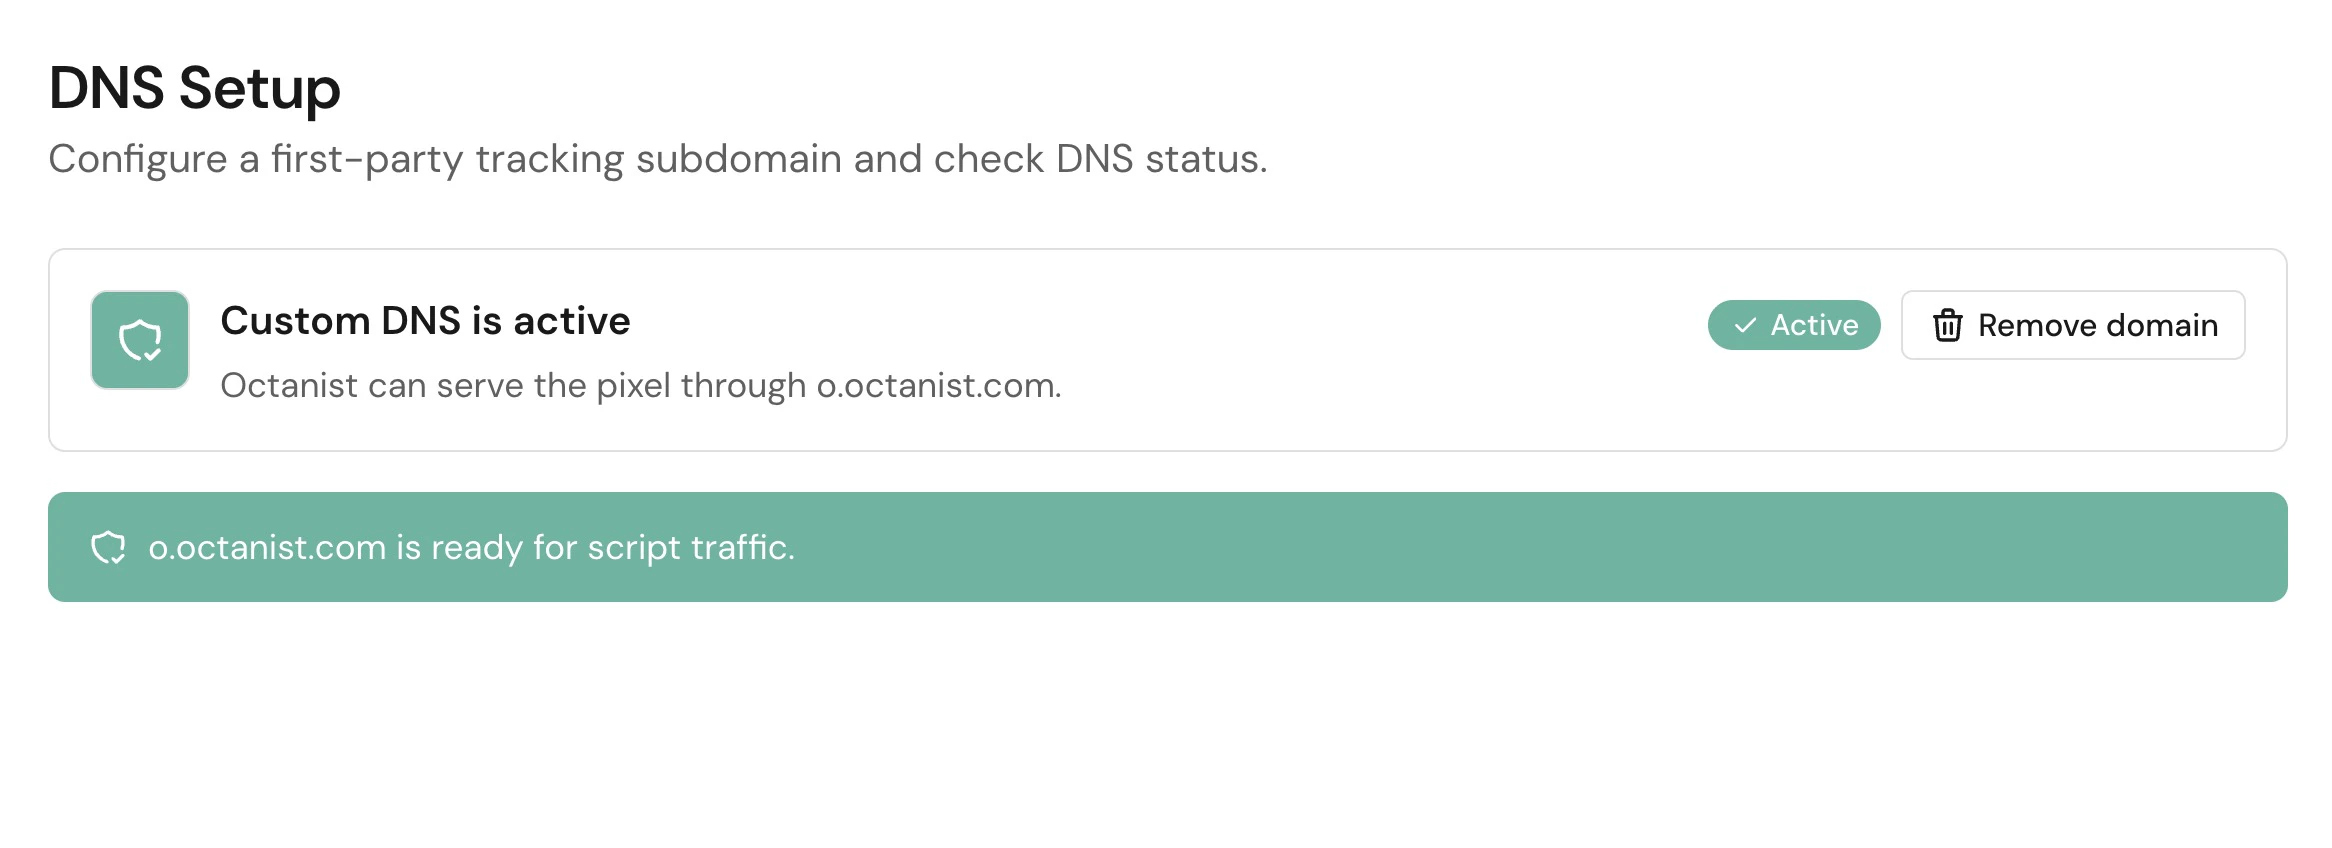
Update the pixel script
When custom DNS is active, copy the pixel script from Settings > Pixel Setup again. The script should now use your custom domain. Do not manually edit the script URL unless support tells you to. Copy the script exactly as shown in Octanist.Troubleshooting
DNS does not verify
DNS does not verify
- Check that the record type is
CNAME. - Check that the name is only the subdomain label when your DNS provider expects that format.
- Check that the target matches Octanist exactly.
- Remove extra spaces or punctuation.
- Wait and try again if the record was created recently.
The DNS provider rejects the record
The DNS provider rejects the record
- Confirm the subdomain is not already used by another DNS record.
- Remove existing
A,AAAA, orCNAMErecords for the same subdomain before adding the Octanist CNAME. - If the provider asks for a fully qualified name, use the full domain shown in Octanist.
The script still uses the old domain
The script still uses the old domain
- Go back to Settings > Pixel Setup.
- Copy the script again after DNS is active.
- Replace the old script on the website.
- Clear website, CDN, and tag manager cache if needed.