Table of Contents
- Getting Leads in Octanist – Incoming Integrations
- Sending Lead Value to Campaigns – Outgoing Integrations
- Qualifying Your Leads
- Lead Actions
- Expired Leads
1. Getting Leads in Octanist – Incoming Integrations
To qualify leads, they first need to exist in Octanist. There are different ways to bring in leads. Please refer to our Incoming Integrations guide to set this up. If you’re having trouble, feel free to reach out to support@octanist.com — we’re here to help.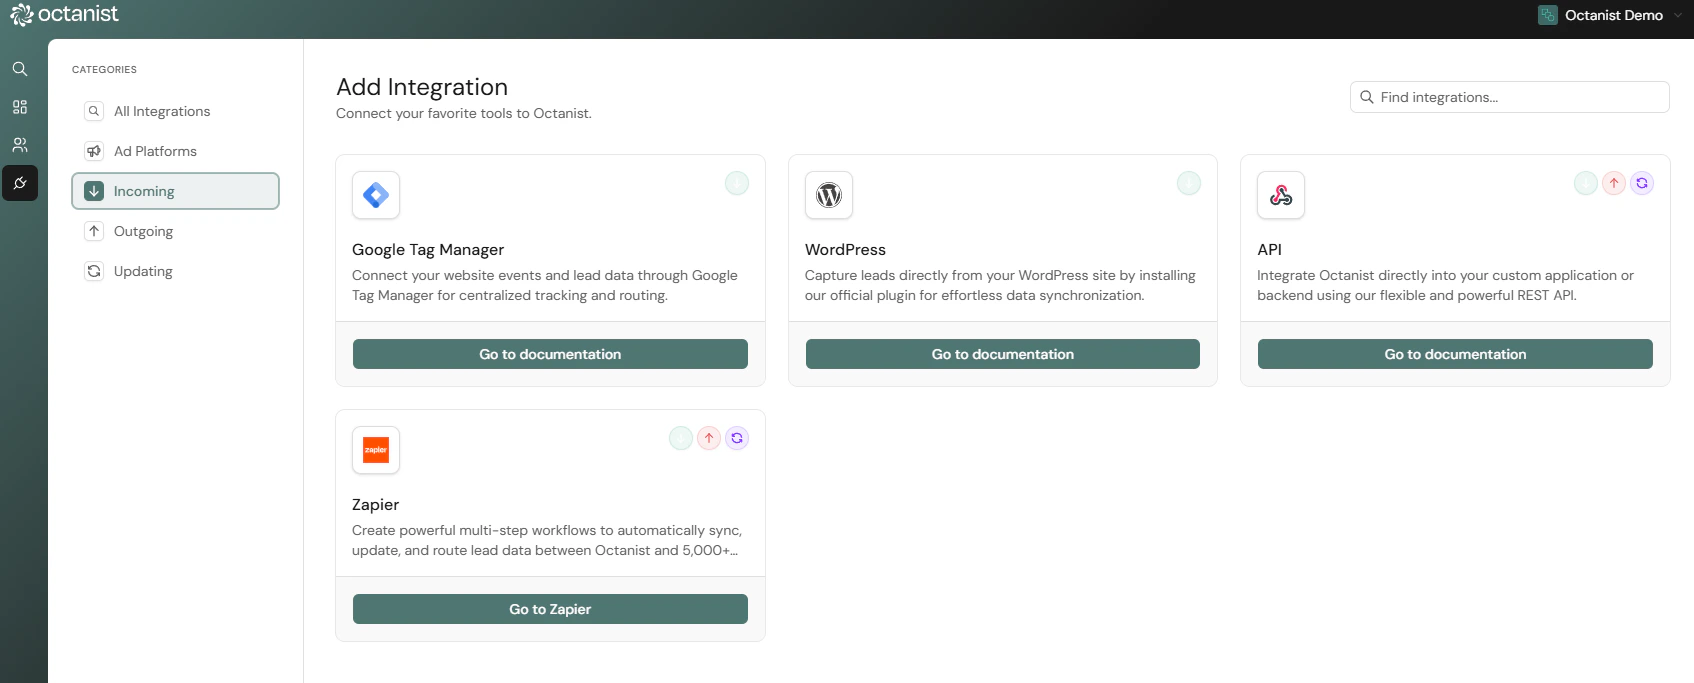
2. Sending Lead Value to Campaigns – Outgoing Integrations
Before you begin qualifying leads, we recommend setting up your Outgoing Integrations first. Some platforms, such as Meta and Google Analytics, do not support backdating data. This means that if you qualify leads before setting up the integration, those conversions will not be sent to the platform. Set up your outgoing connections in our Outgoing Integrations section.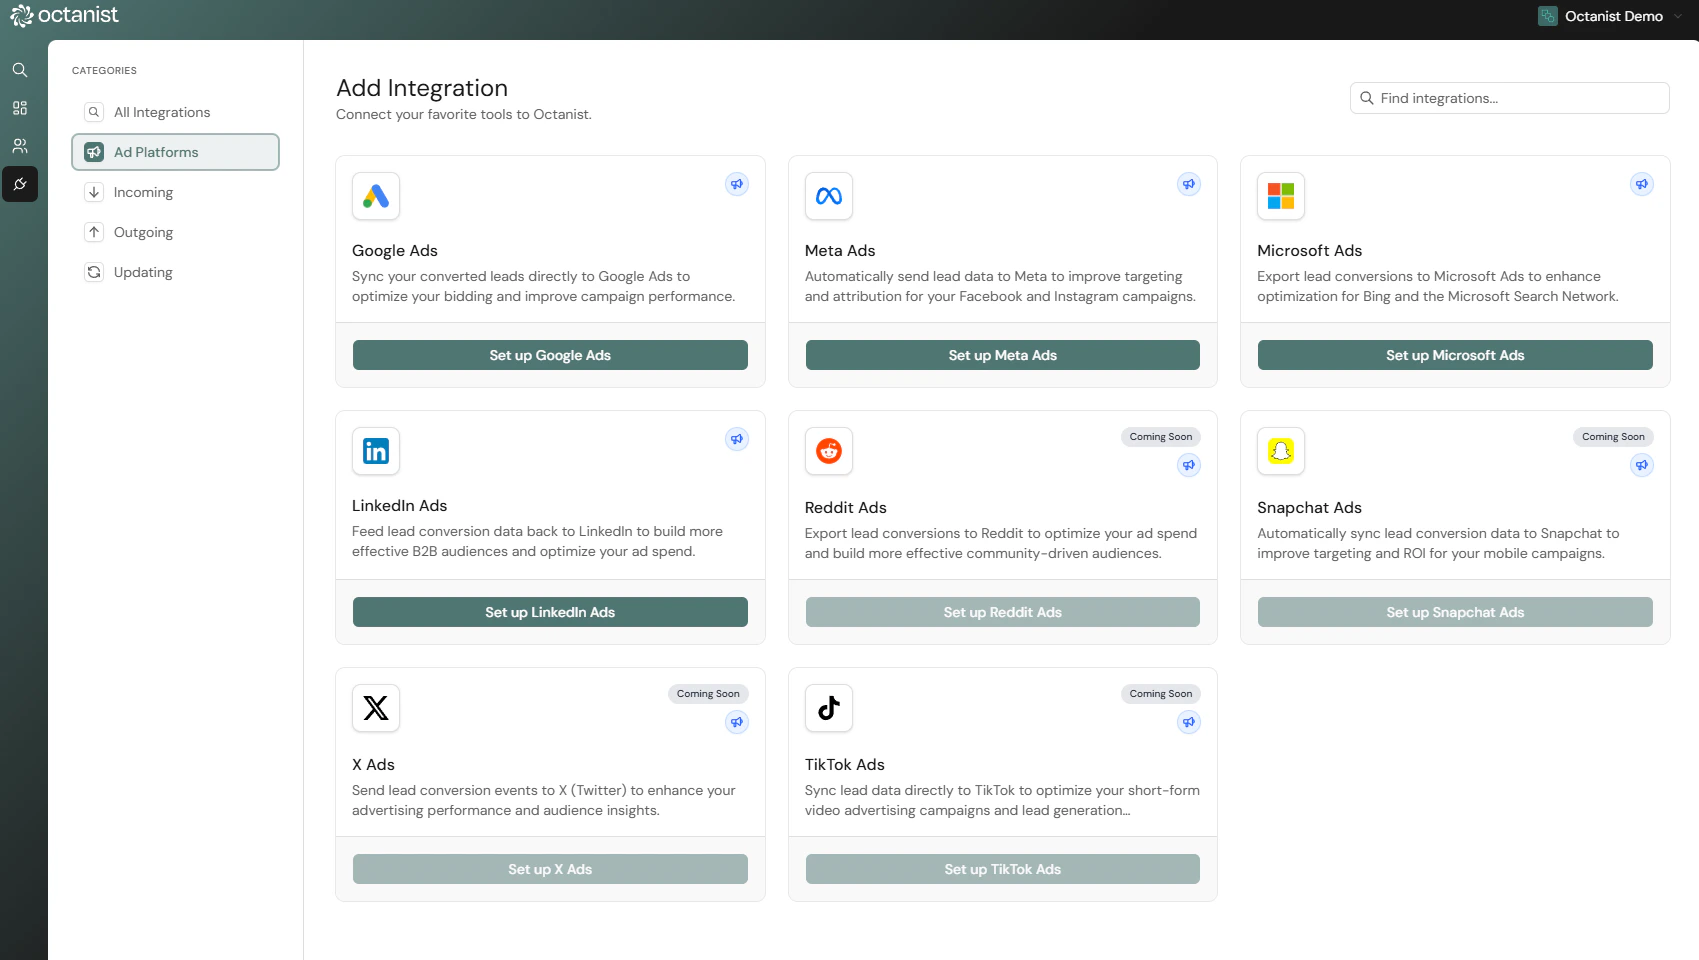
3. Qualifying Your Leads
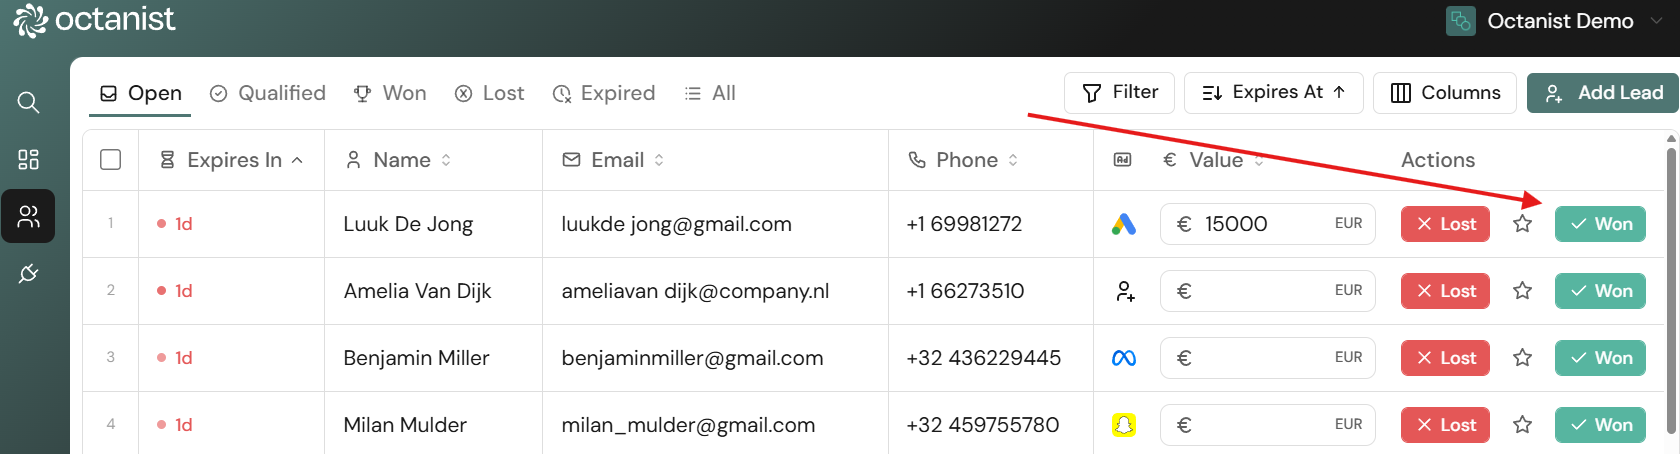
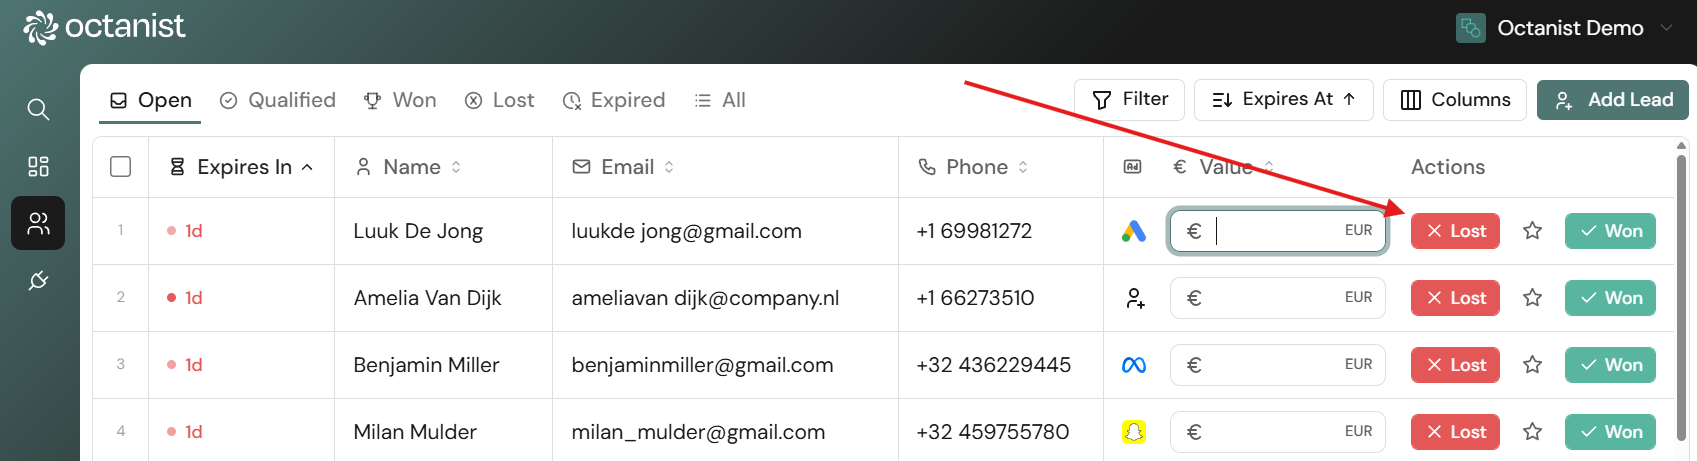
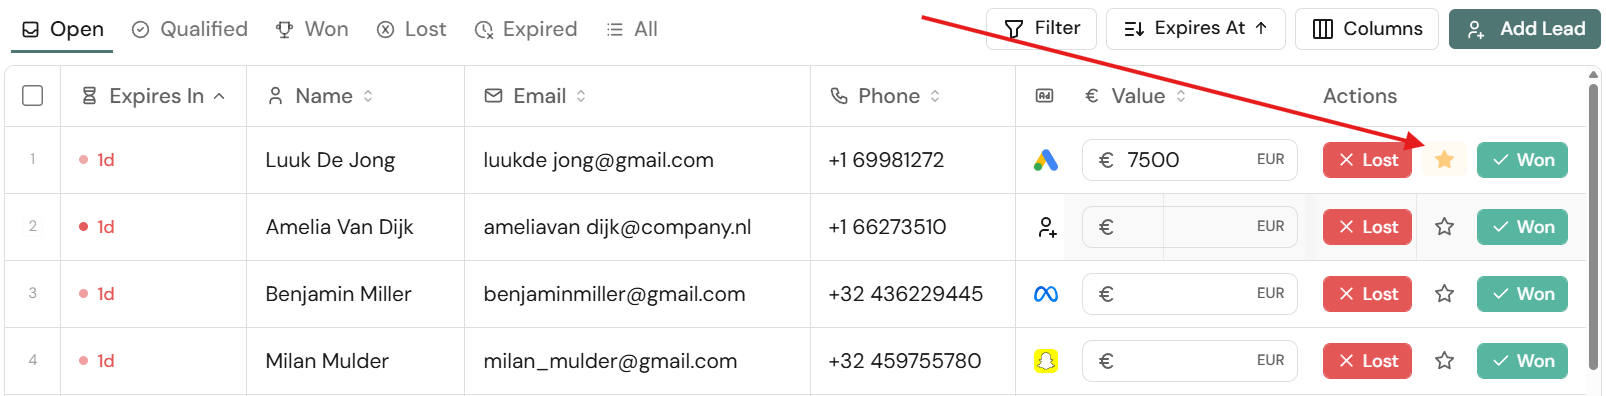
Once your Incoming and Outgoing Integrations are configured and your leads are visible in Octanist, you’re ready to start qualifying them.- Go to Leads in Octanist.
- Select a lead you want to qualify.
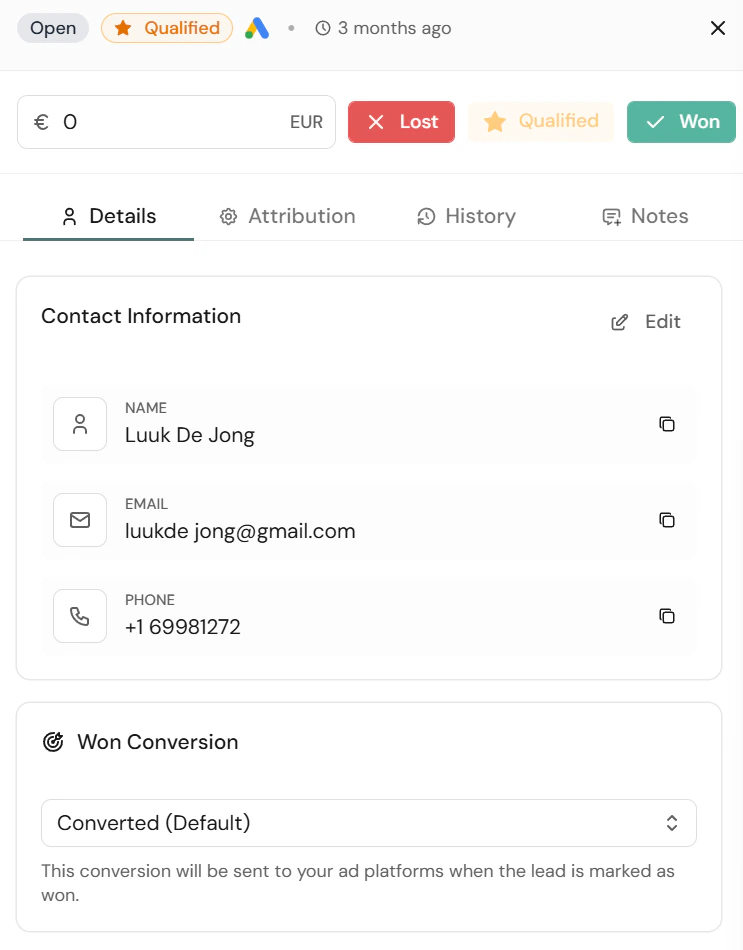
You can manage and edit conversion names in Settings > Conversions.
⚠️ This name must exactly match the one used in your ad platform (e.g., Google Ads), so make it clear and consistent.Once all fields are filled out, press Winner.
This sends the conversion value and name to the ad platforms linked in your Outgoing Integrations.
These leads will be moved to the Lost category.
This is useful for leads that haven’t converted yet but are relevant to your business. These leads:
- Show buying intent or interest.
- Can be sent to ad platforms to help optimise your targeting.
- Help signal that your ads are generating quality leads, even if they haven’t purchased yet.
- Can have a prospected lead value assigned to them — for example, the expected value if the lead becomes a client.
4. Lead Actions
Once you click on a lead, you’ll also find additional actions:-
Details: View lead metadata such as:
- The external lead ID, when one was supplied. Use Edit to add, change, or remove it. External lead IDs must remain unique within the organization.
- When the lead came in
- Through which channel
- On which URL it originated
- The conversion goal it will be attributed to
- Delete: You can delete leads, though it’s not recommended. Only delete test leads or duplicates. Keeping all real leads (even unqualified ones) helps improve campaign targeting and enhances the insights in your Octanist Dashboard.
-
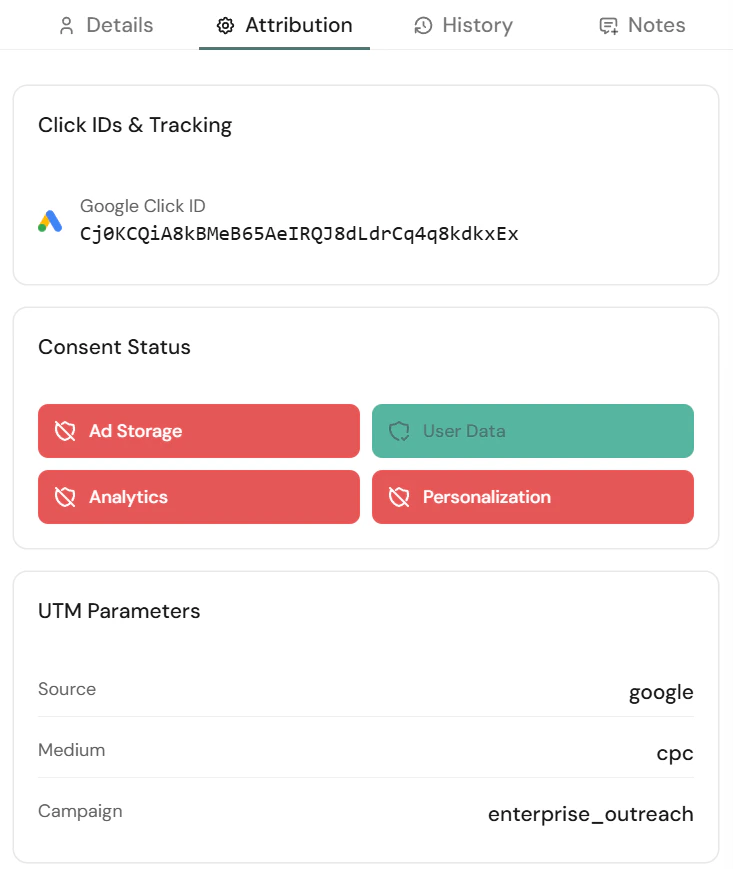
Attribution: Shows through which channel a lead came in, which Click ID was present, their consent status, and UTM parameters (if passed through the Octanist GTM Template).
-
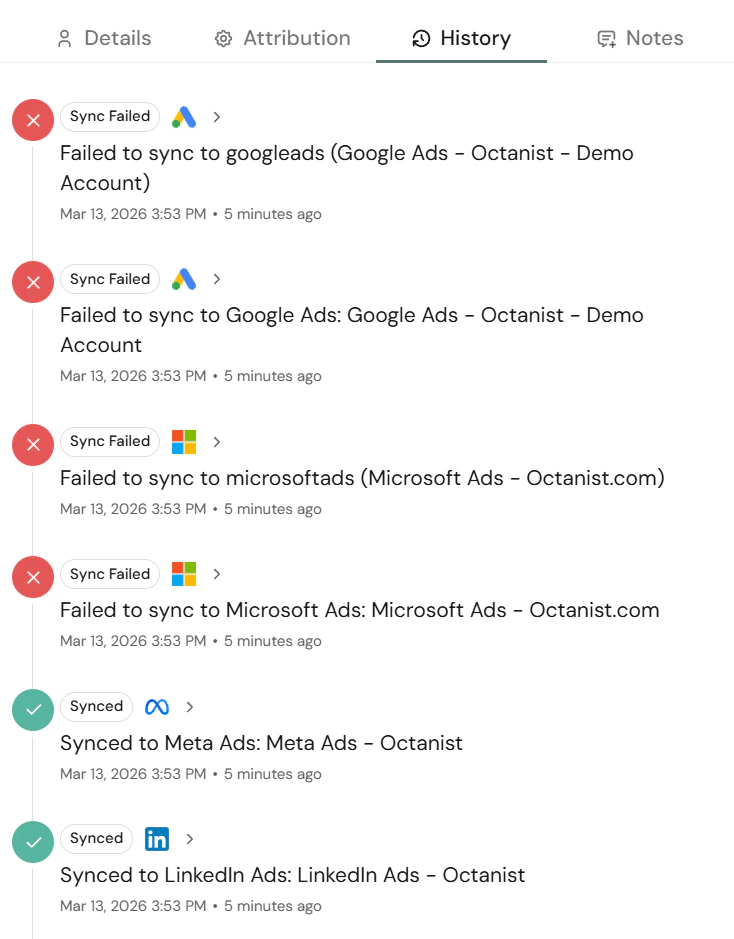
History: Shows the history of a lead — e.g., when it was marked as qualified, won, or lost, and when Octanist attempted to sync it back to ad platforms.
-
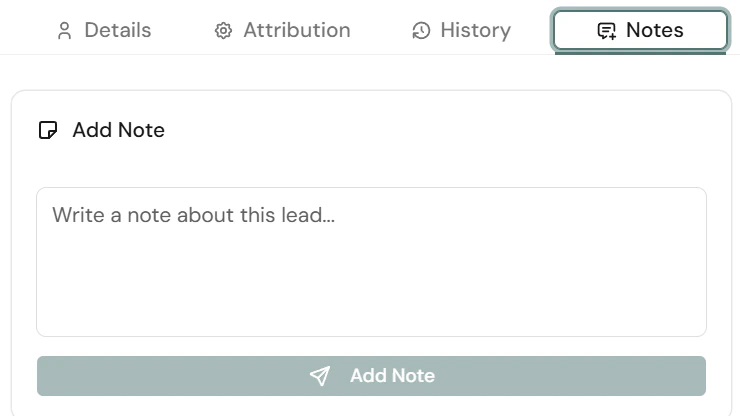
Note: Add internal notes to track communication or follow-ups (e.g., “Called the lead, they’ll respond in 2 weeks”).
5. Expired Leads
Under the Expired tab in the Leads section, you’ll find leads that haven’t been qualified within 90 days.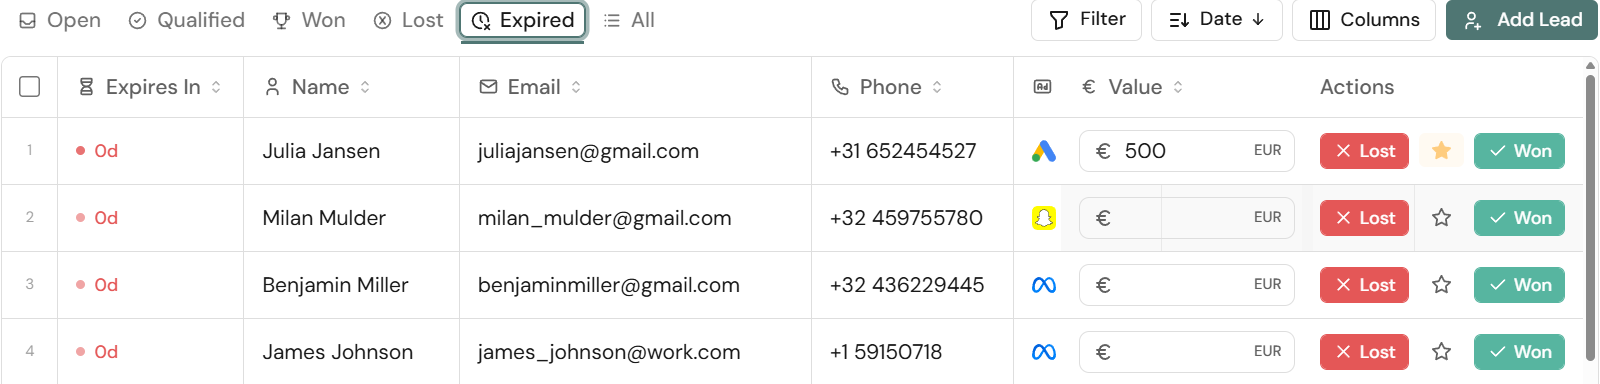
- For many ad platforms (e.g., Google Ads), click or conversion tracking expires after 90 days.
- After that, Octanist can no longer attribute a conversion to a campaign.
To avoid this, make sure to qualify leads regularly and on time.