- Install the Octanist plugin in WordPress.
- Copy the WordPress setup code from Octanist.
- Paste the setup code into the plugin settings.
- Submit a test form and check Octanist.
The legacy WordPress backend endpoint returns Octanist’s internal lead UUID, but does not accept an external lead ID. The current pixel form capture flow can store an order number, quotation number, or another customer-owned identifier when the field is mapped to External lead ID in form mapping.
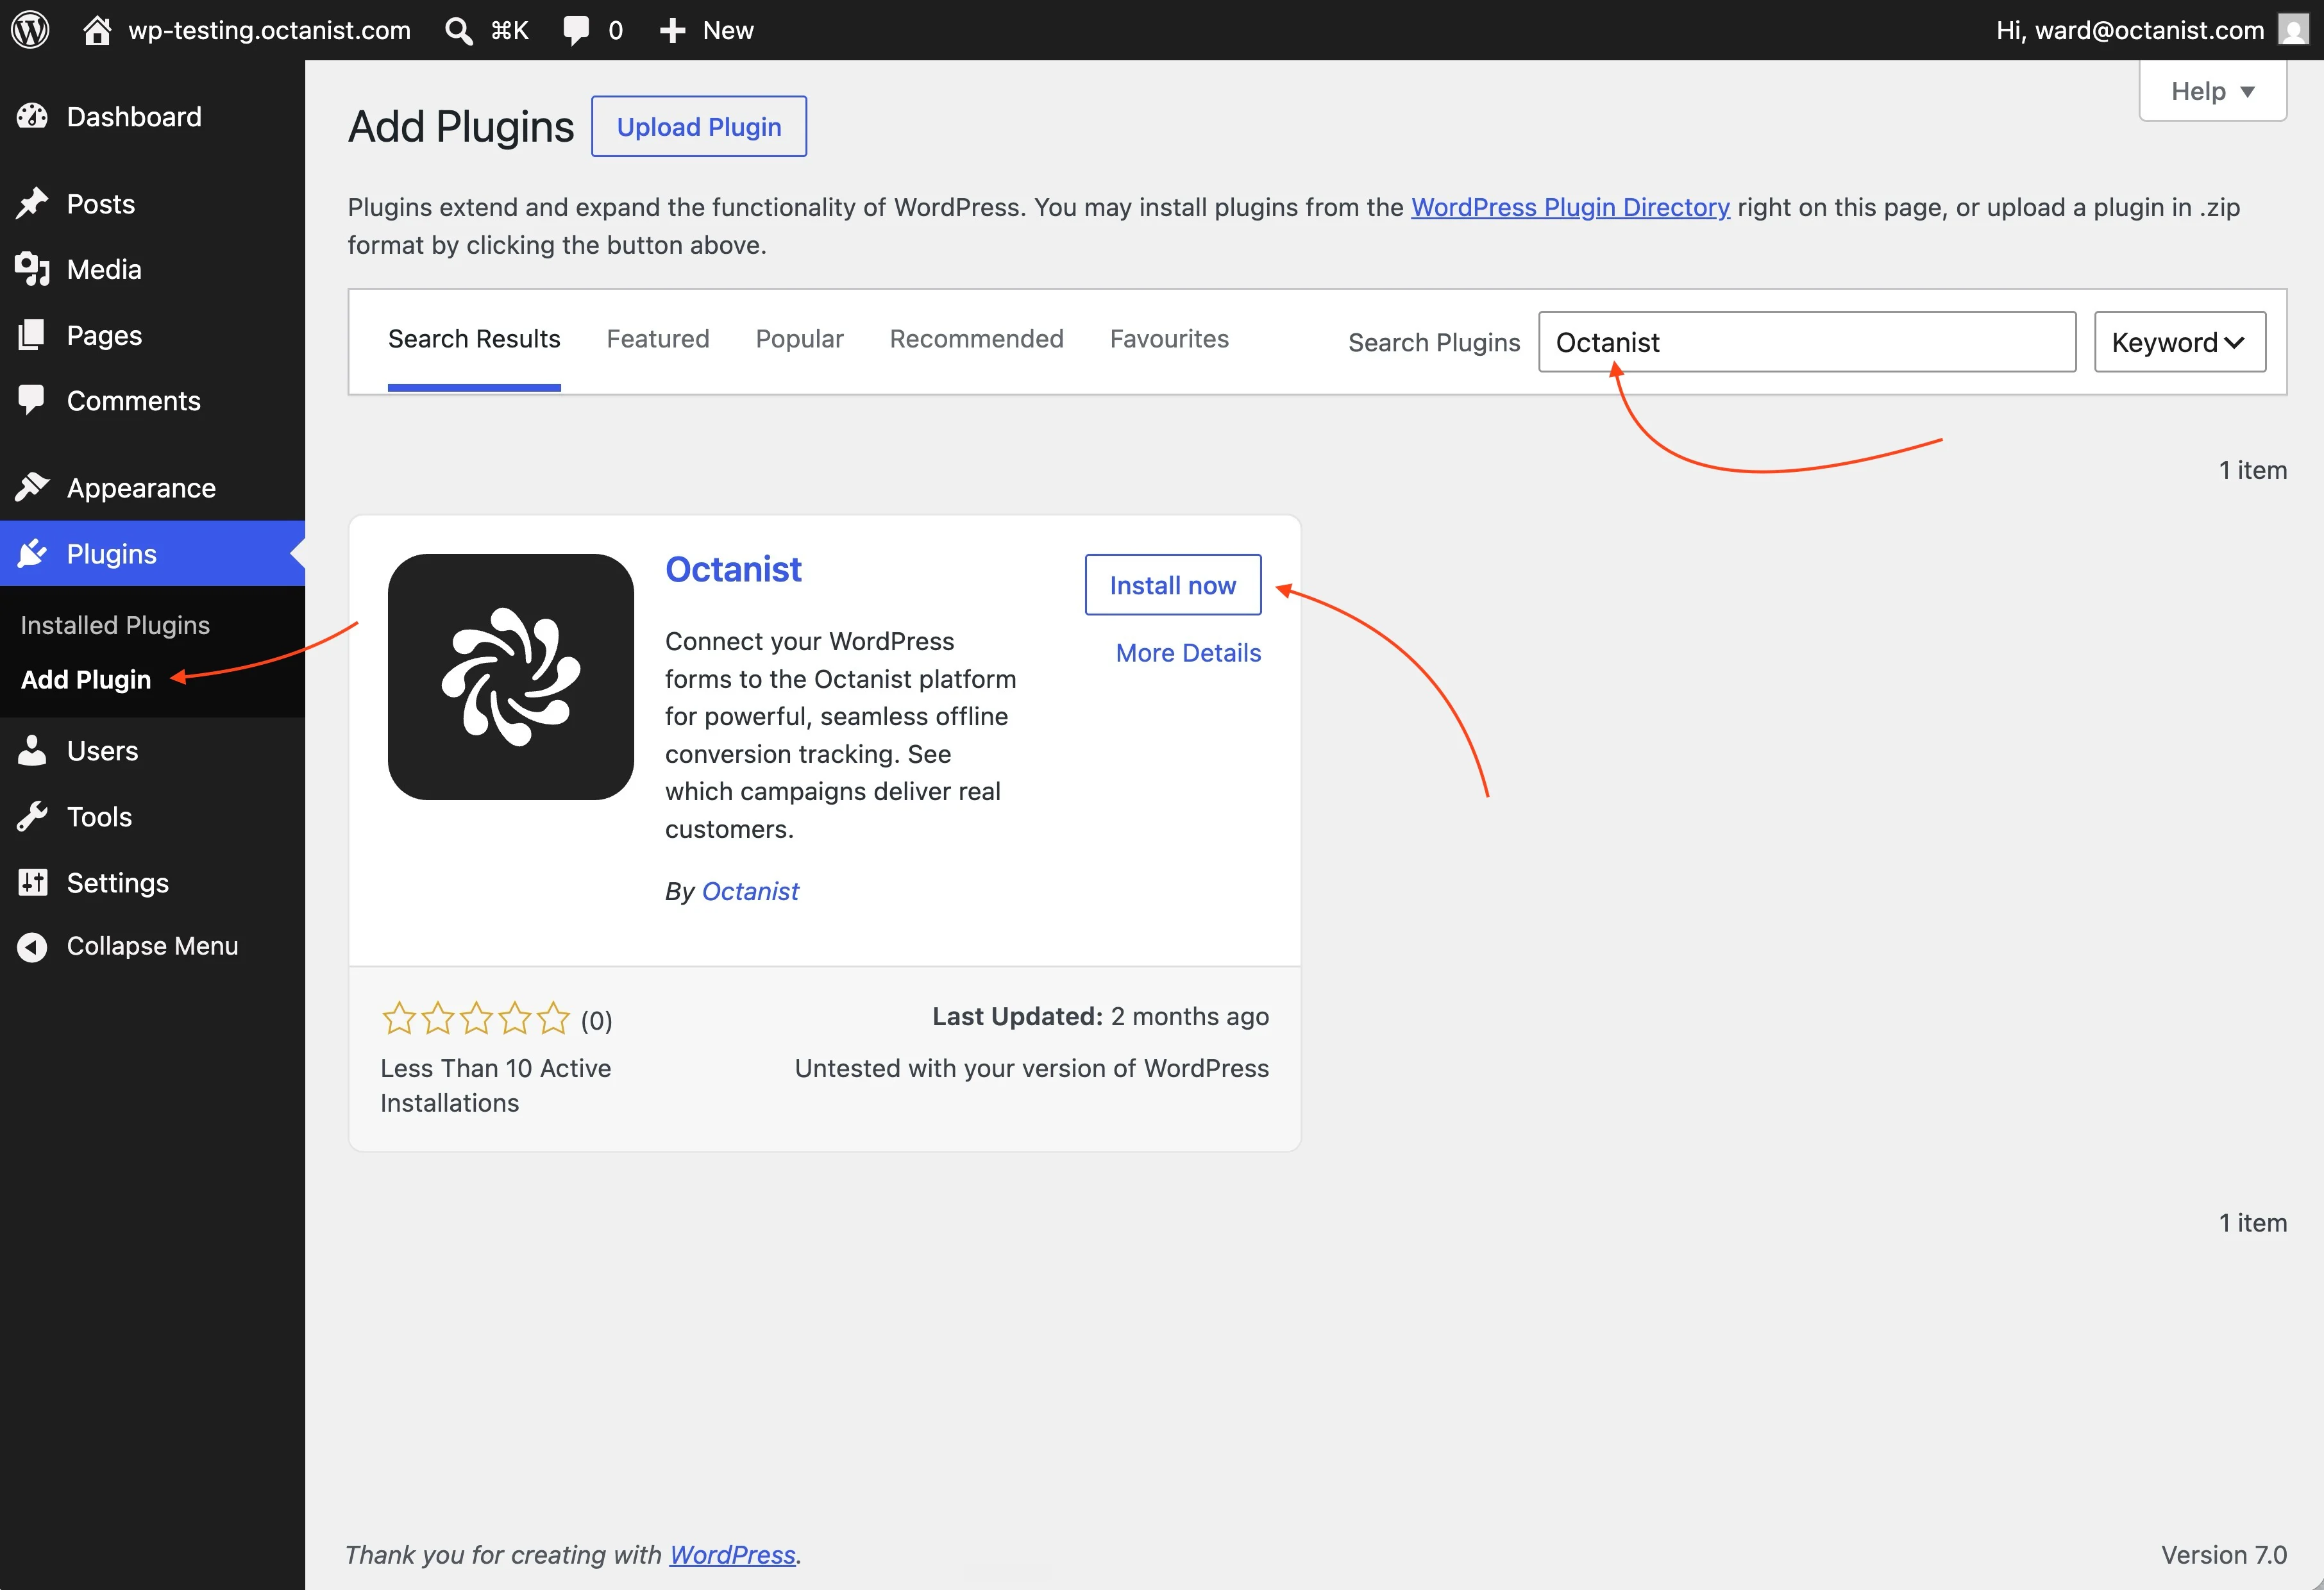
Install the plugin
- Open your WordPress admin.
- Go to Plugins > Add New.
- Search for Octanist.
- Click Install Now.
- Click Activate.
Get your setup code
- Open Octanist.
- Go to Settings > Pixel Setup.
- Select WordPress as the install method.
- Choose your consent mode.
- Select the form plugin used on your website.
- Copy the setup code.
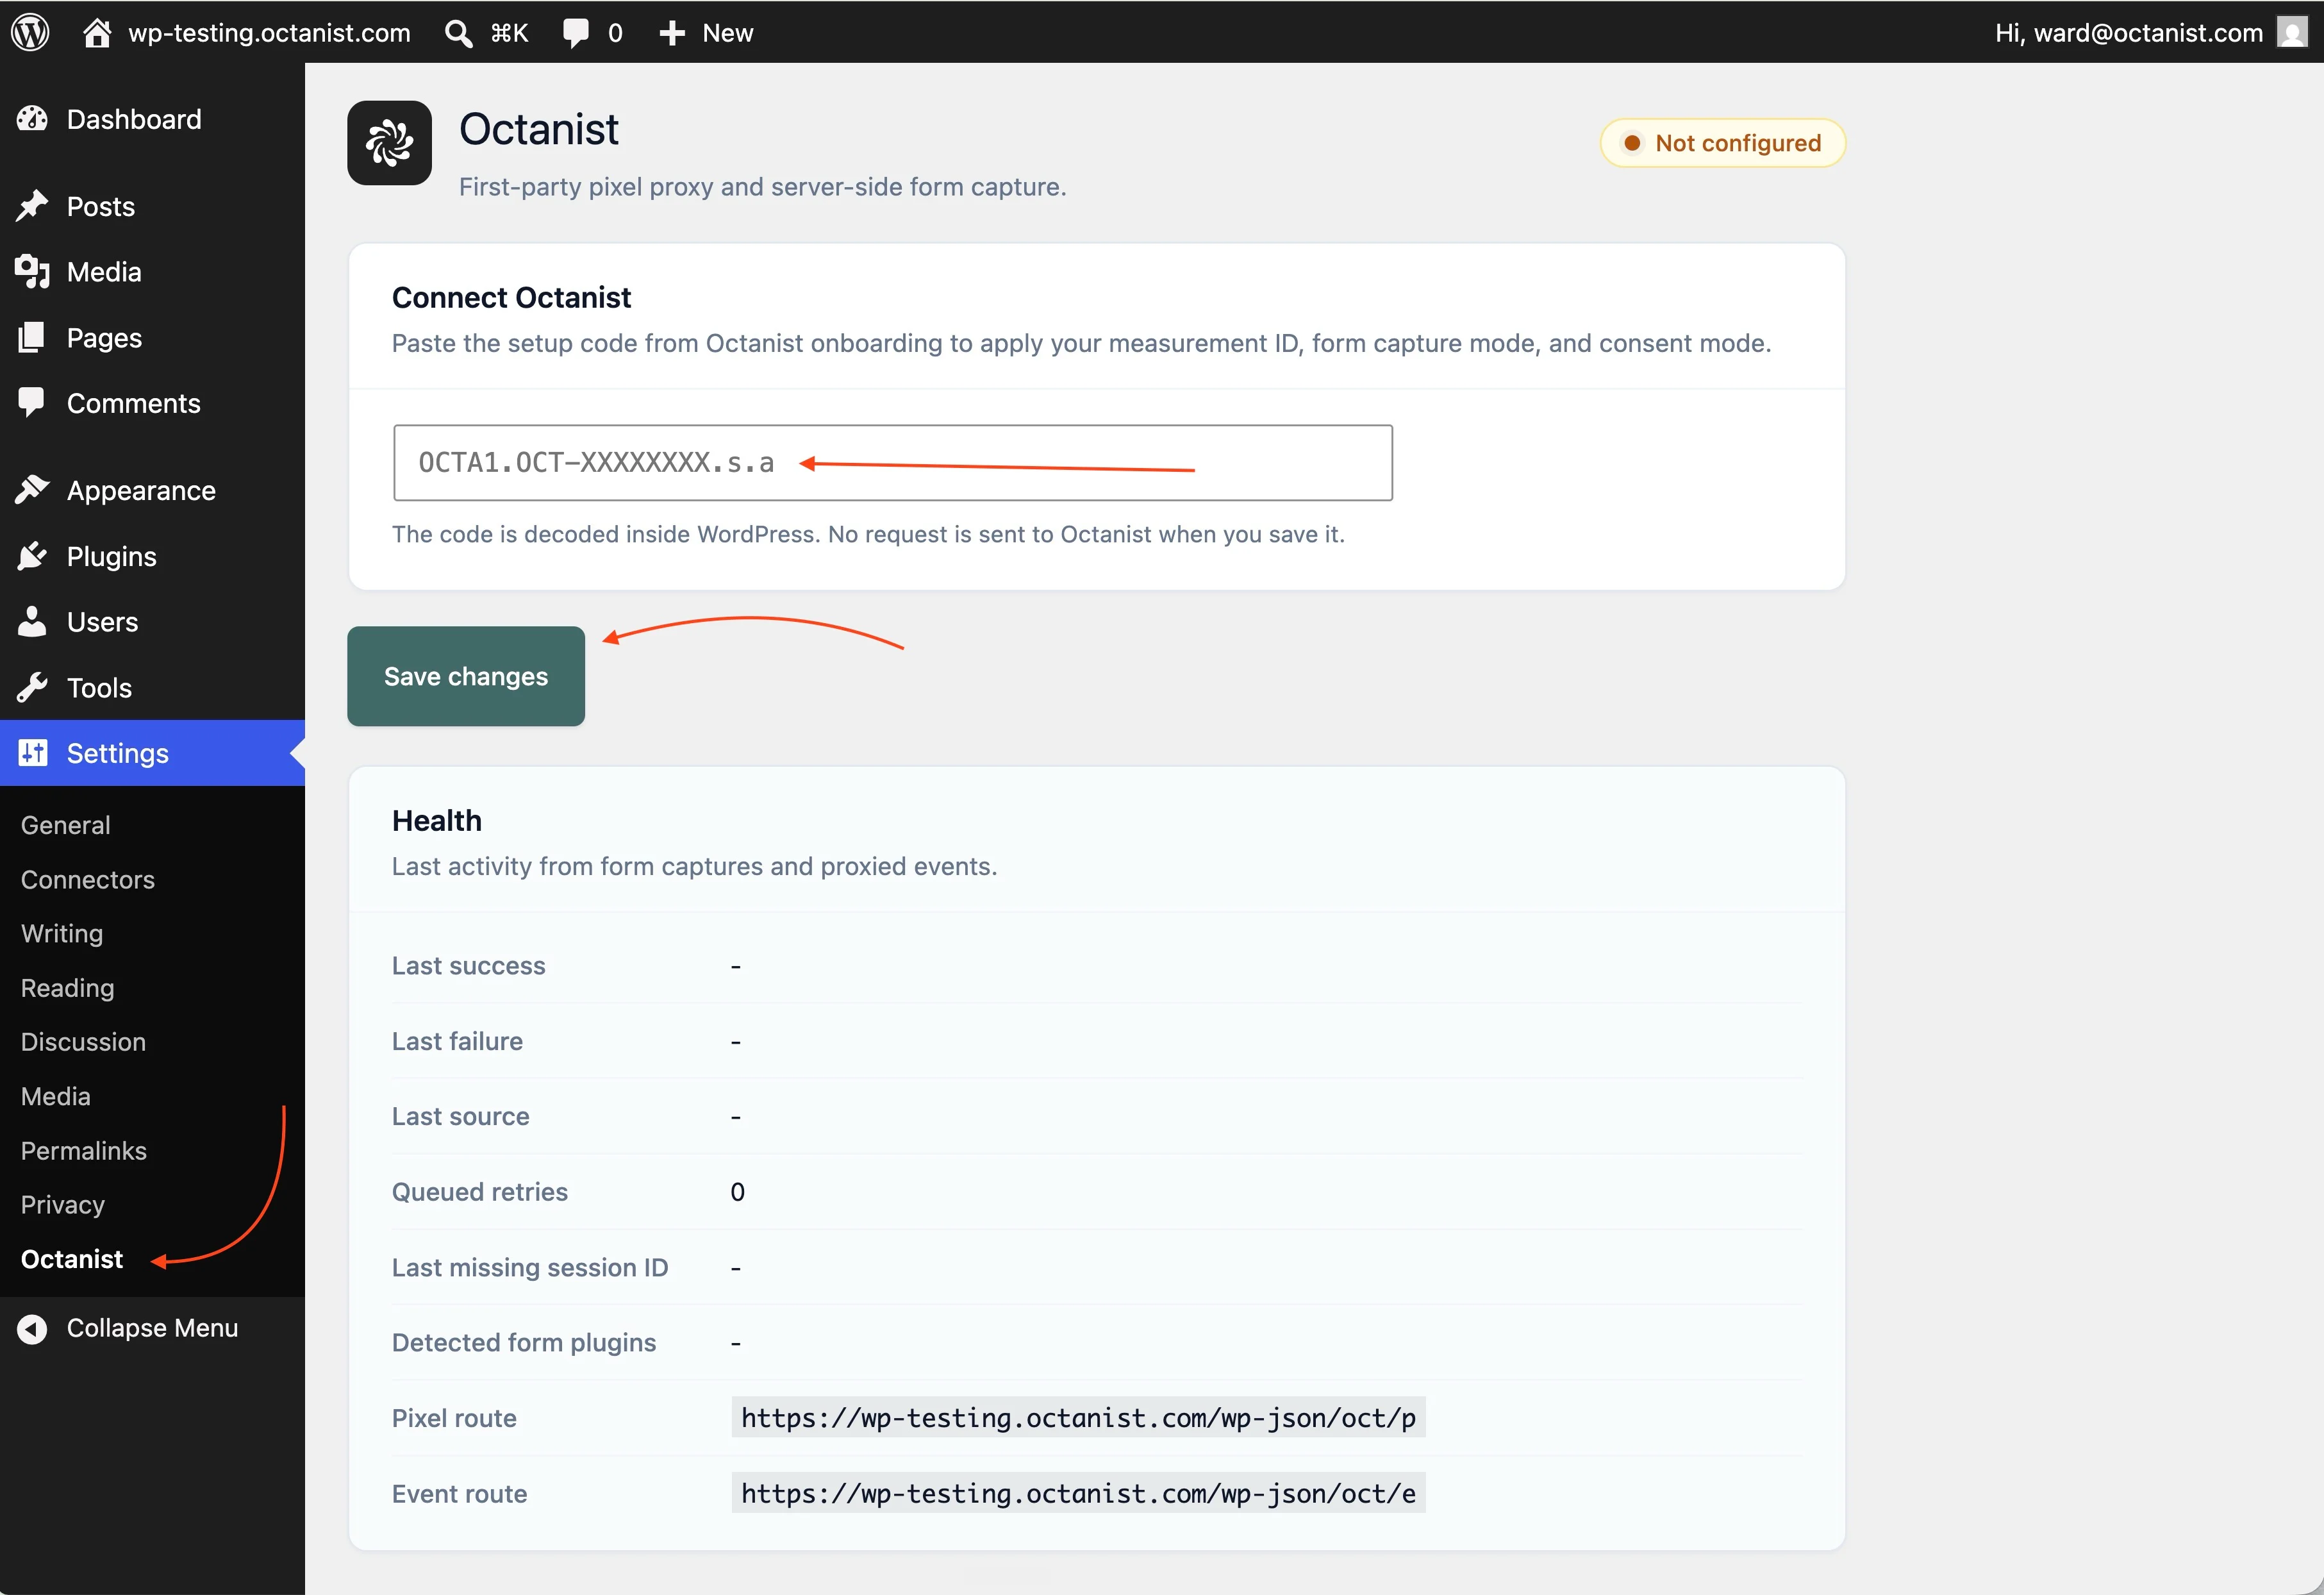
Configure WordPress
- In WordPress, go to Settings > Octanist.
- Paste the full setup code.
- Click Save Changes.
Supported form plugins
The WordPress plugin supports these form plugins: Gravity Forms
 Contact Form 7
 WPForms
 Ninja Forms
 Elementor Forms
 Fluent Forms
 Formidable Forms
 Forminator
 SureForms
 Divi Contact Form
Test the setup
- Open your live website in a new browser session.
- Submit a test form with a name, email, phone number, or another useful field.
- Open Octanist and check whether the lead appears.
- In WordPress, open Settings > Octanist and check the health panel if the lead does not arrive.
Consent mode
Use Auto unless your consent setup requires a different mode.
For more detail, see Consent mode.
Troubleshooting
No leads appear in Octanist
No leads appear in Octanist
- Confirm the setup code is saved in Settings > Octanist.
- Clear your website cache, page cache, and CDN cache.
- Refresh the page where the form is shown.
- Submit a new test form after clearing the cache.
- Confirm the submitted form contains at least one useful field, such as name, email, phone, or custom data.
- Check the health panel in the plugin settings.
The old script still loads
The old script still loads
- Clear your WordPress caching plugin cache.
- Clear any server-side cache from your hosting provider.
- Clear CDN cache if you use Cloudflare, Vercel, or another CDN.
- Open the website in an incognito window and test again.
Duplicate leads appear
Duplicate leads appear
- Make sure the same form is not also sent through GTM, Zapier, or a custom API integration.
- If you also installed the normal tracking pixel, remove form capture from one of the two setups.
Your form plugin is not listed
Your form plugin is not listed
- Choose Something else / not sure in Octanist.
- Submit a test form.
- If the lead does not appear, contact support at support@octanist.com.