The Zoho CRM integration can be complex to set up. If you are having trouble or would like assistance, please contact us at support@octanist.com.
Table of Contents
1. Zoho CRM

- Go to Zoho CRM and log in. Click the Settings icon in the top-left corner.
- In the left sidebar, search for Connections and click on it.

- Click Create New Connection.

- Select Custom Services and click Create New Service.
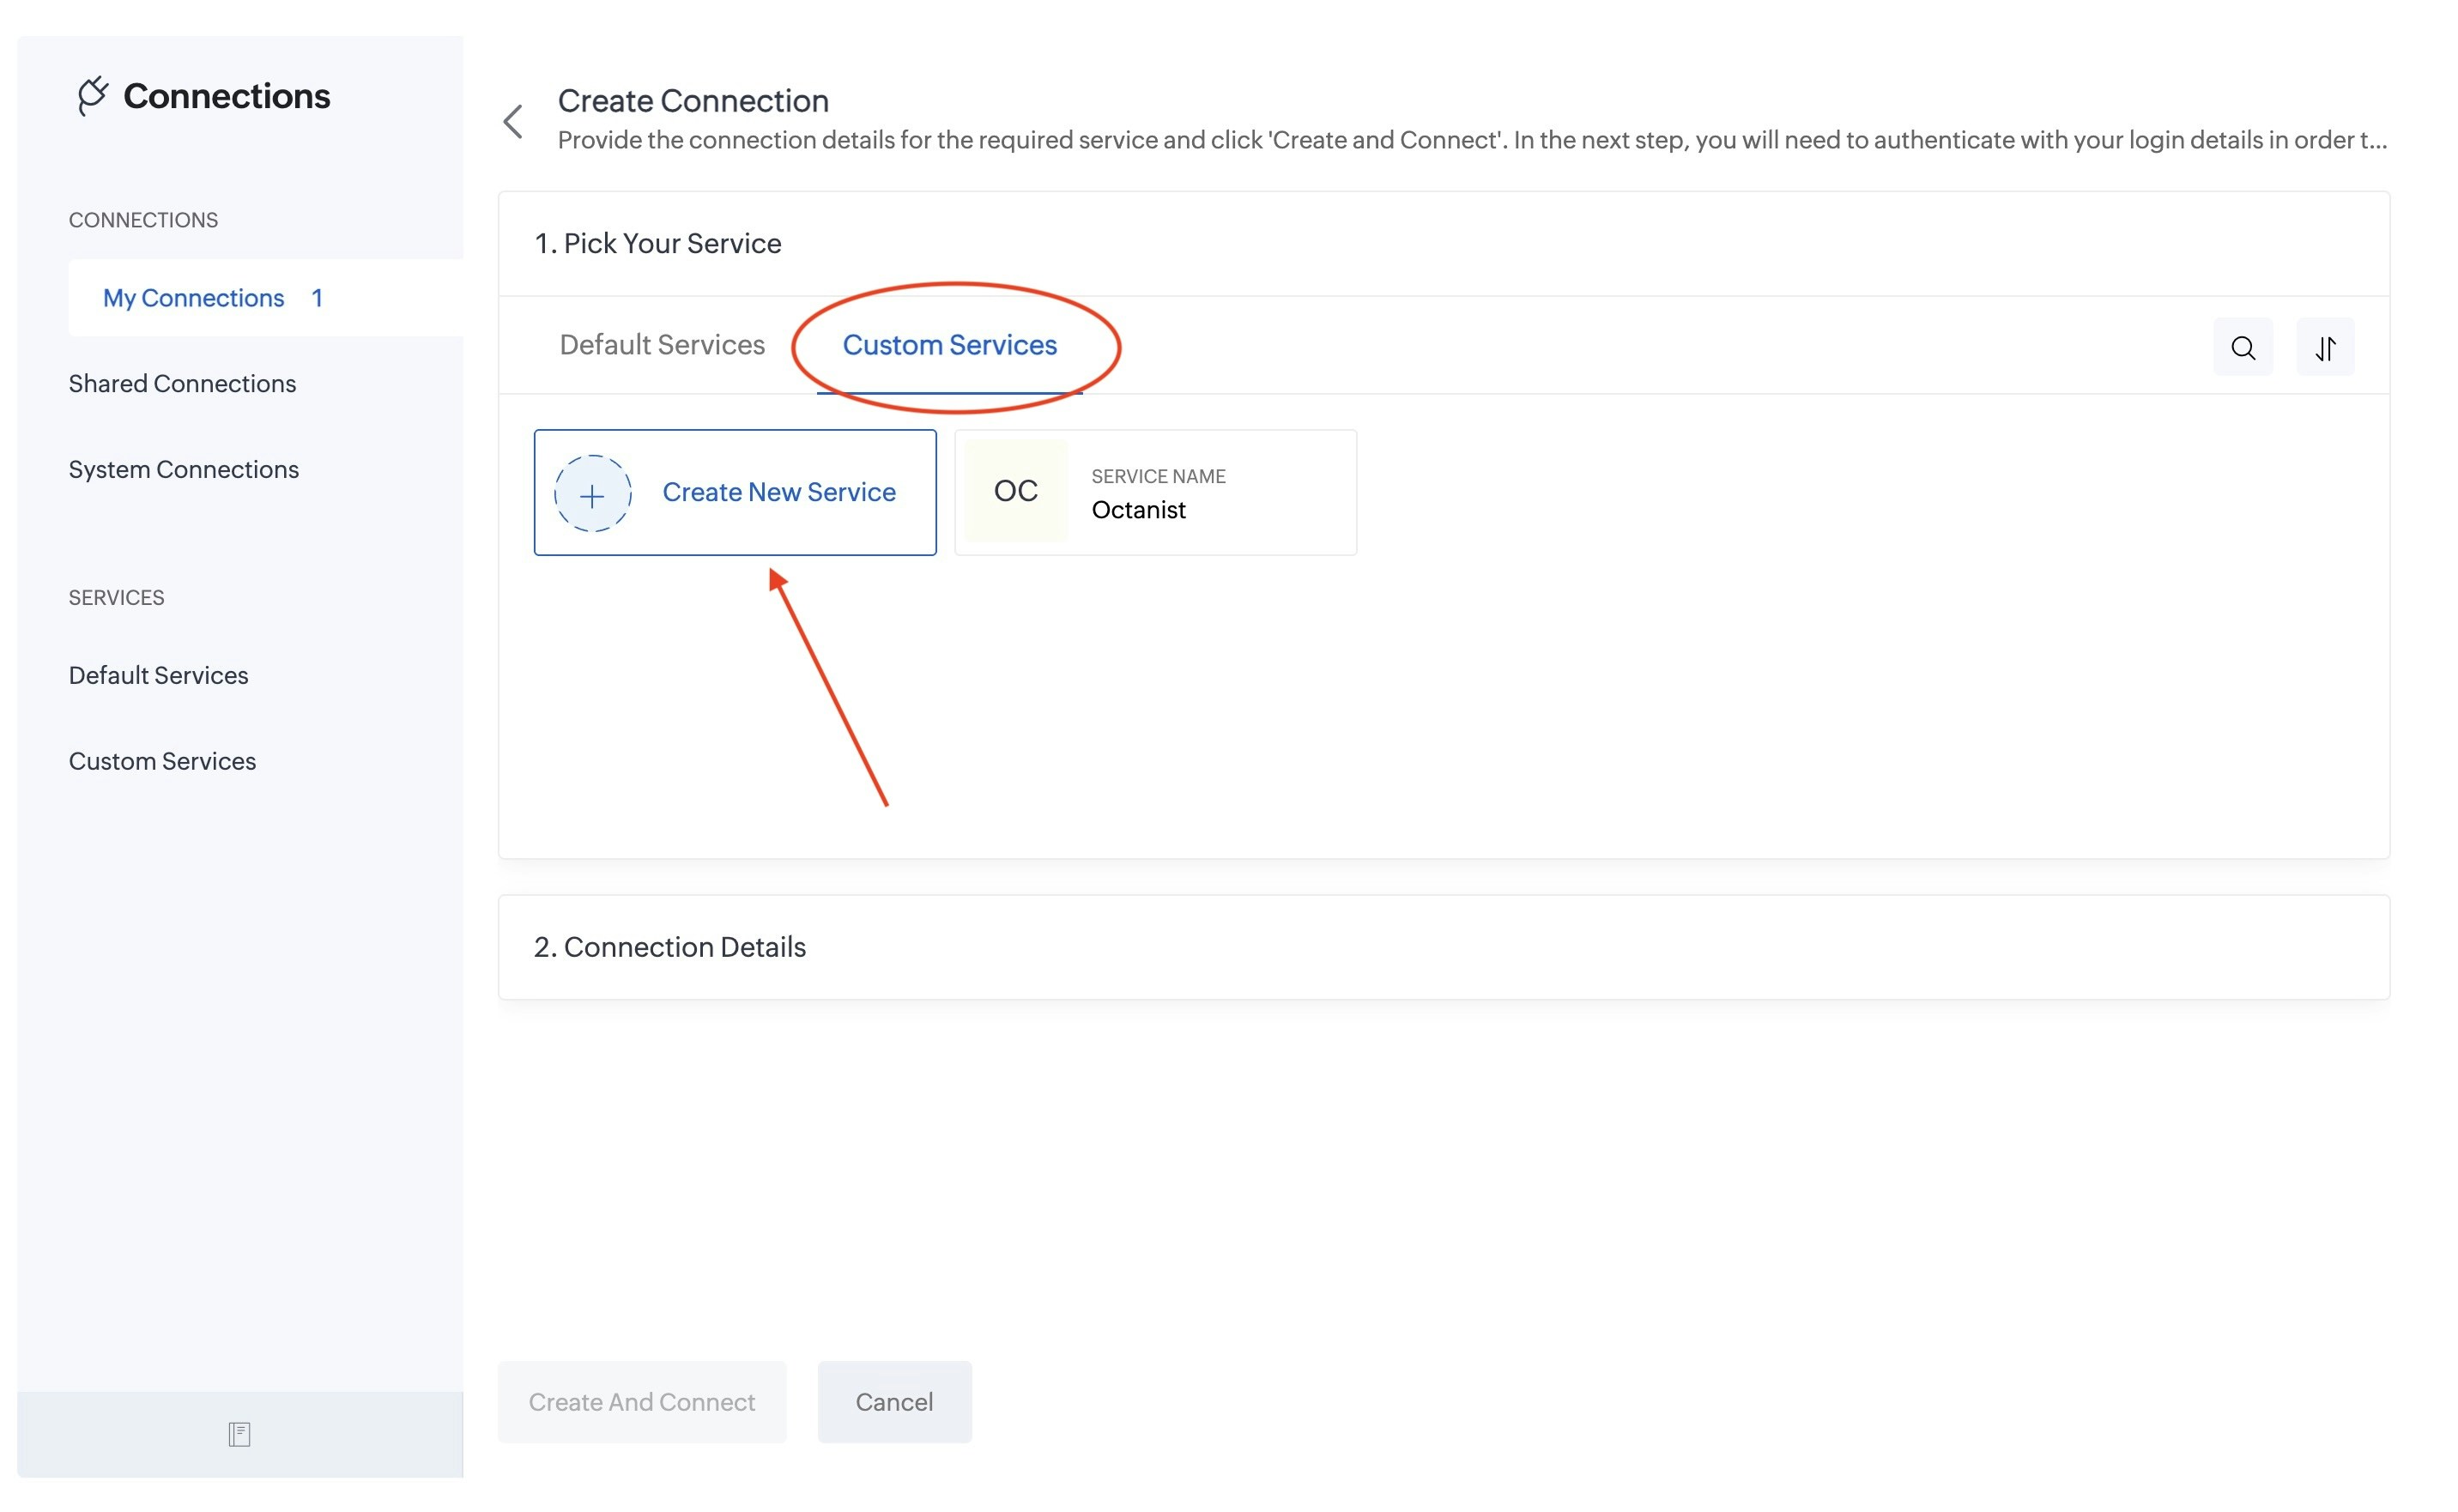
-
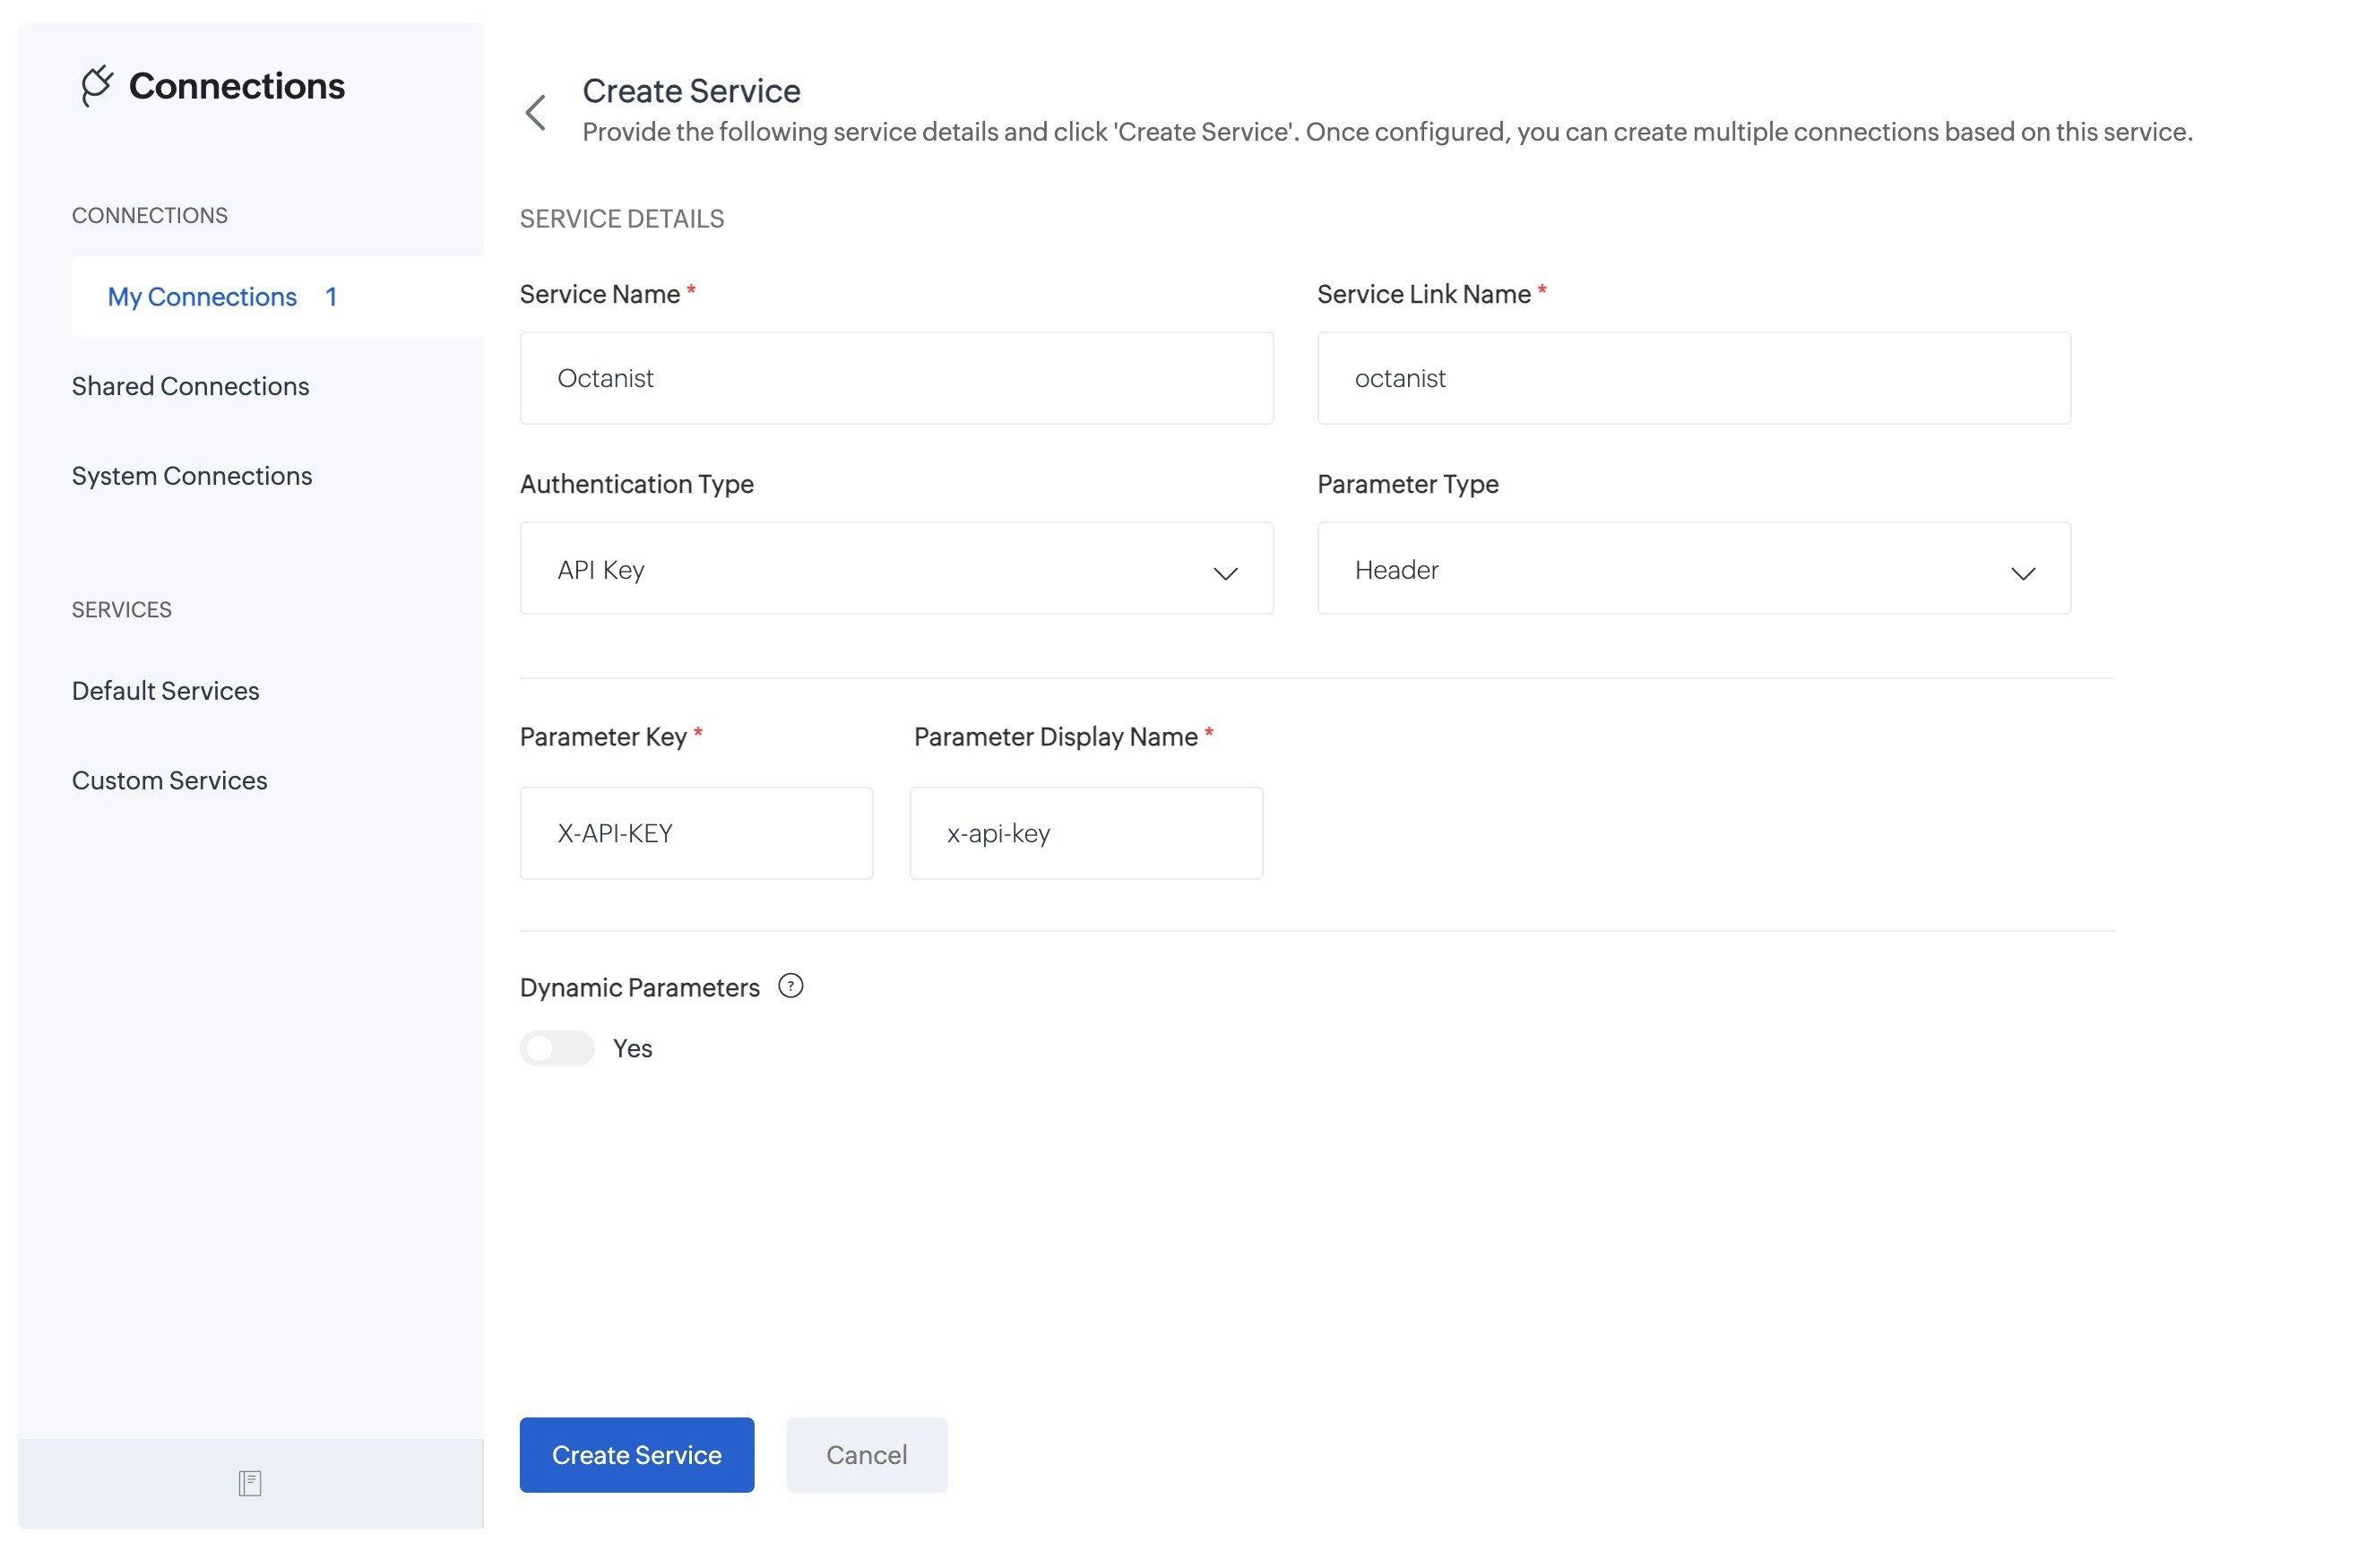
Create a new service with the following details:
- Name: give it a name that is easy to identify, such as Octanist.
- Authentication Type: select API Key.
- Parameter Type: select Header.
- Parameter Key: enter X-API-KEY.
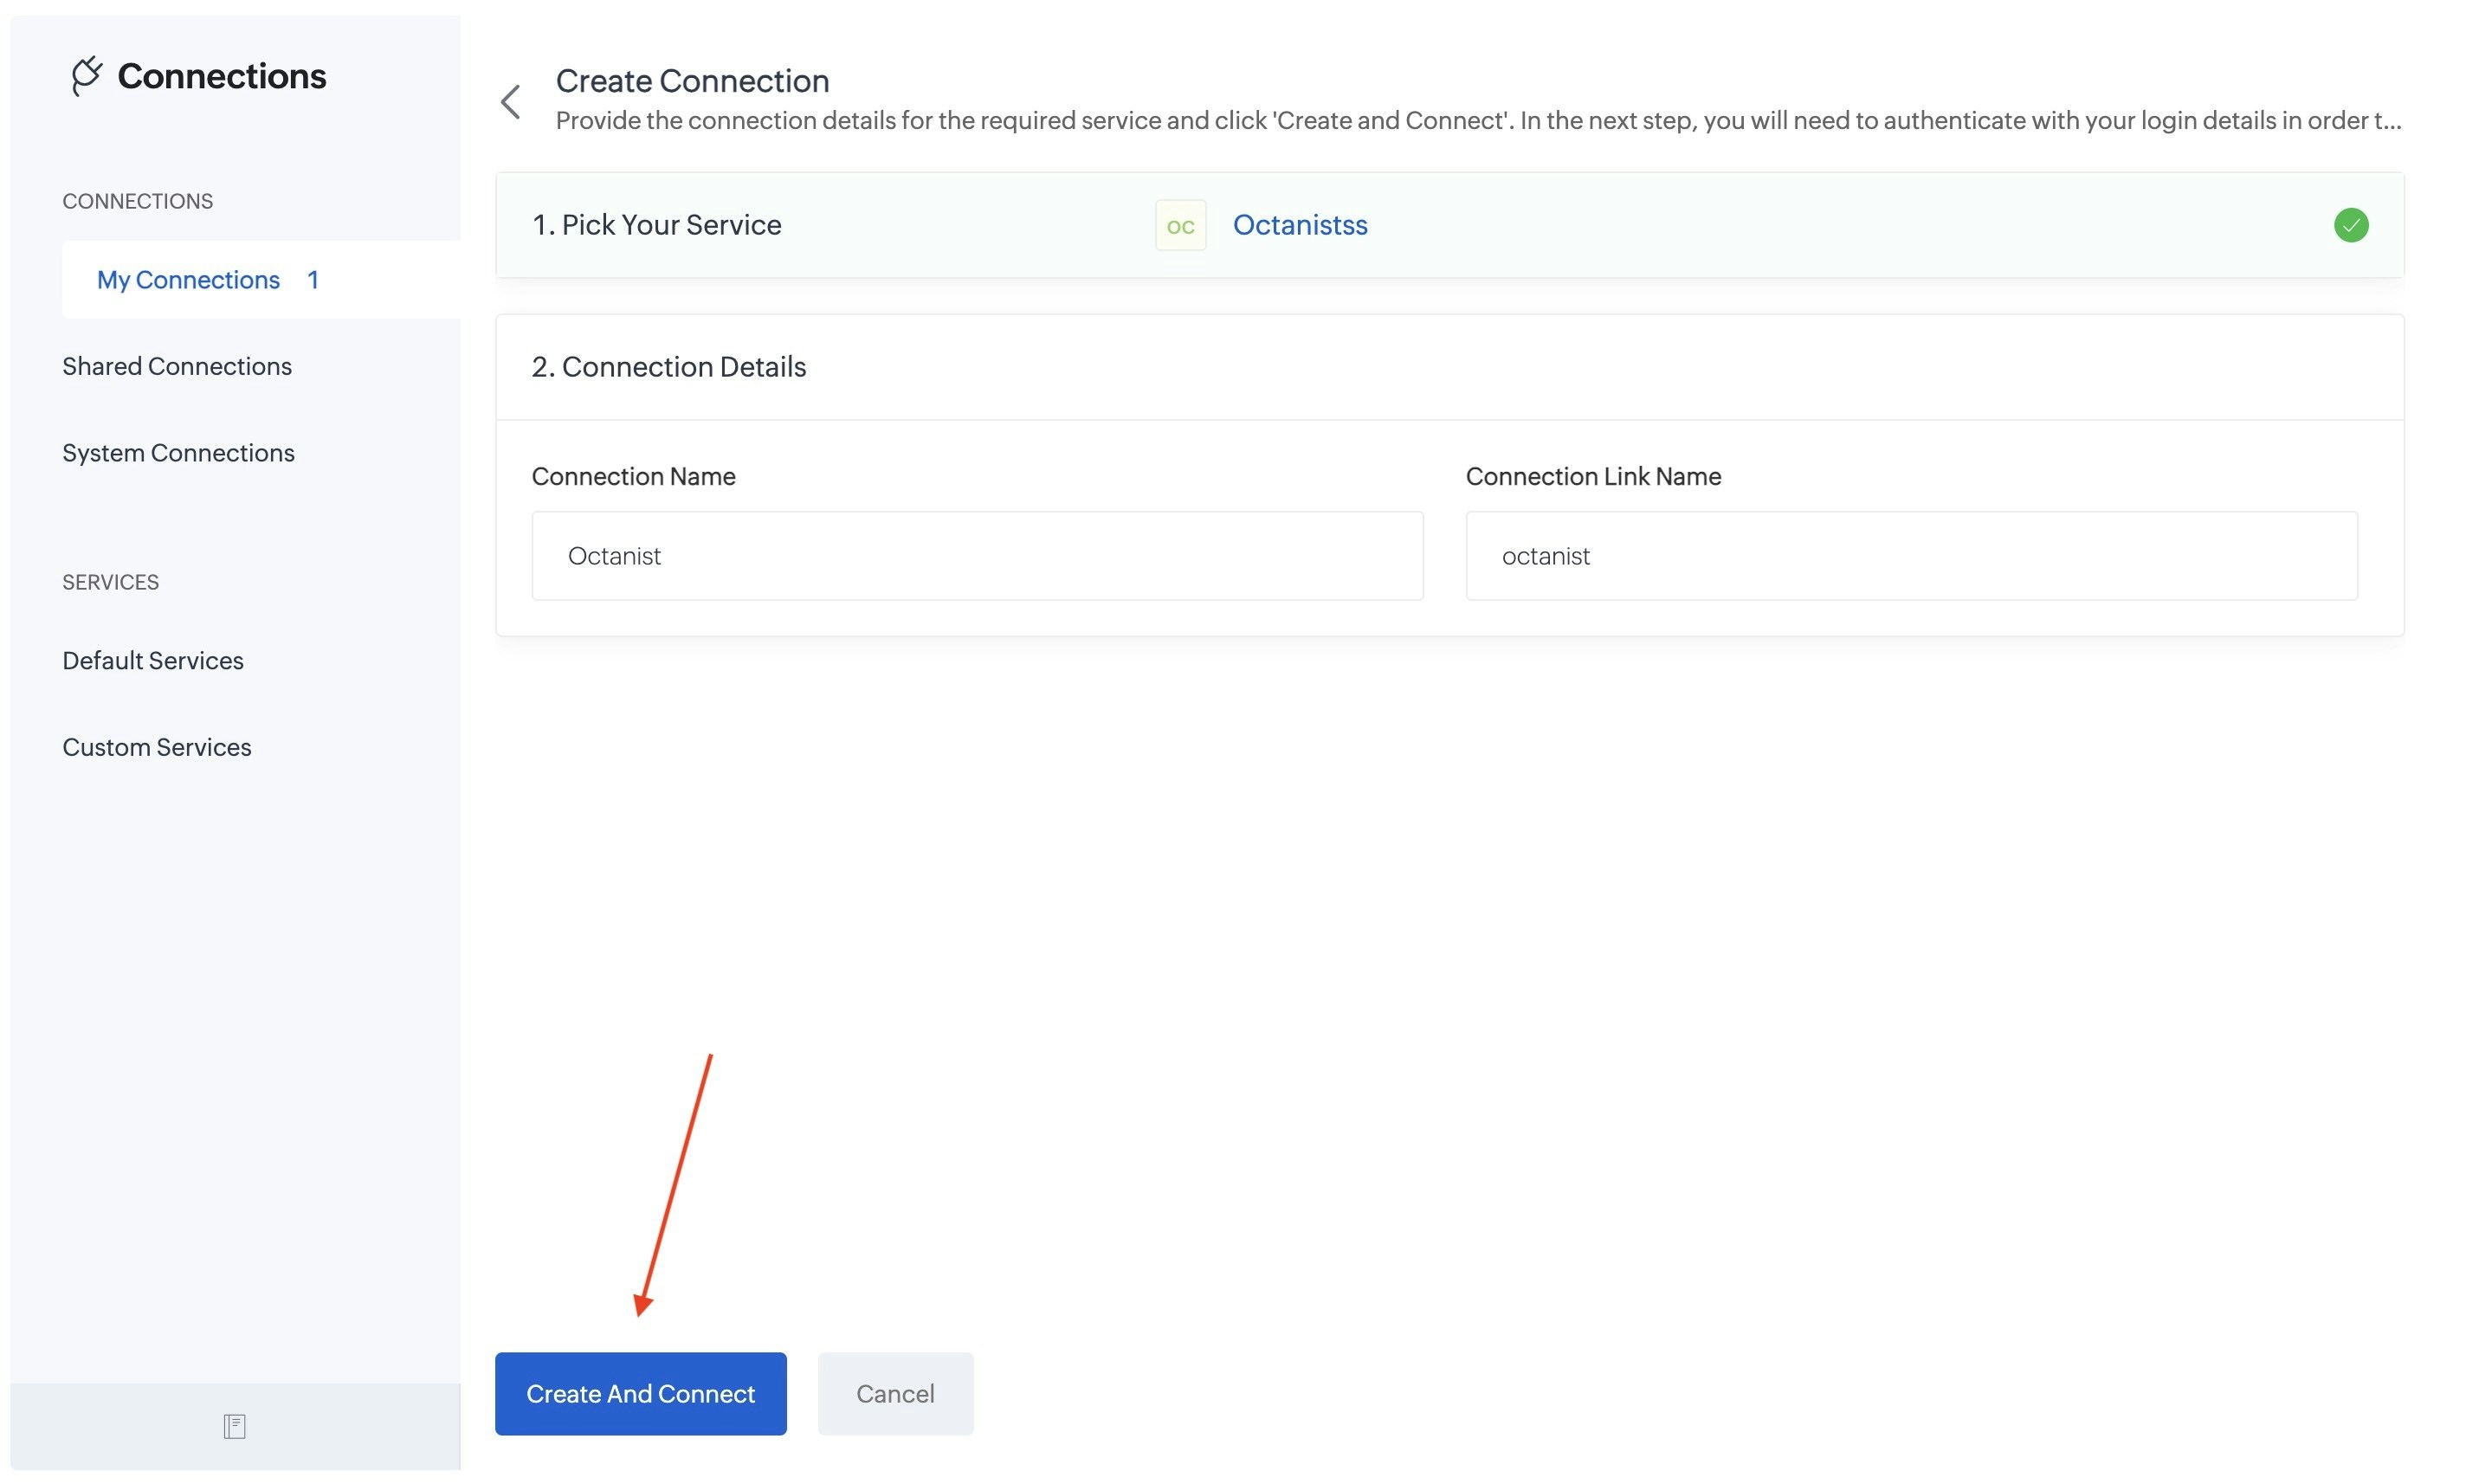
- Give the connection a name (e.g., Octanist) and click Create And Connect.
- You can find this in Octanist → Settings → General → API Key.
-
Create a new API key and give it a clear and descriptive name.

- Click Connect.

- Search for Webhooks and click Configure Webhook.
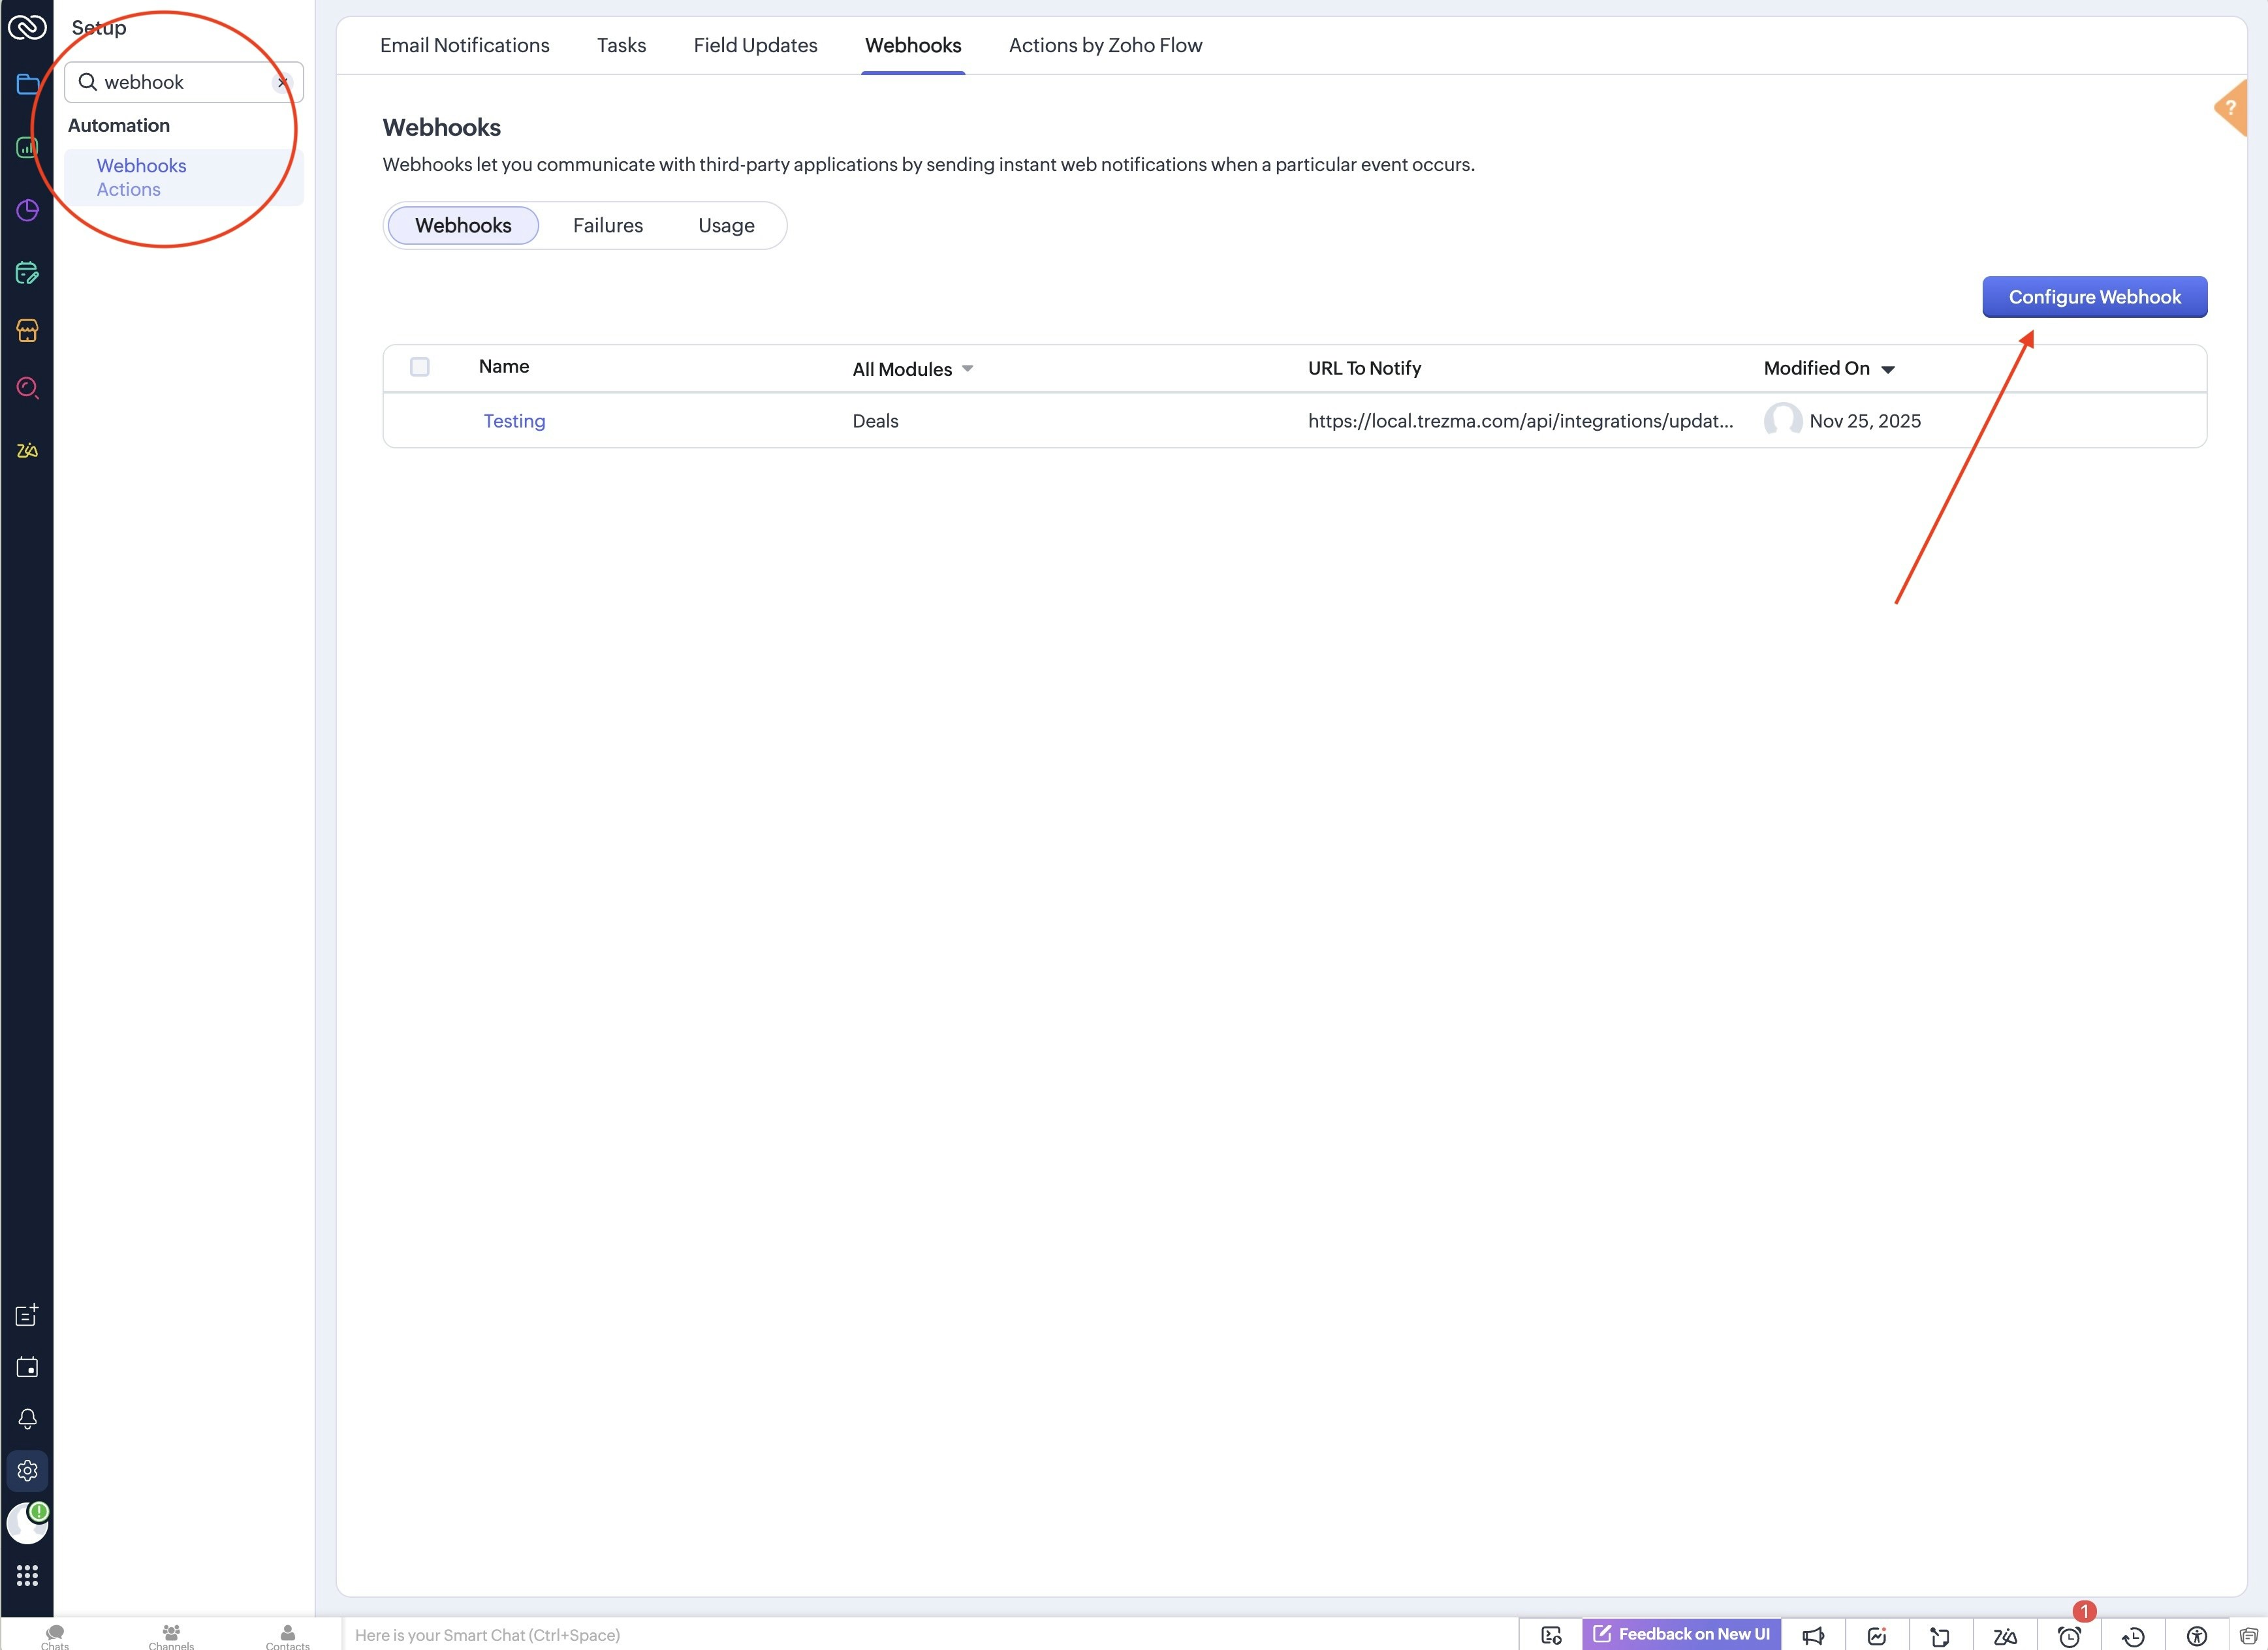
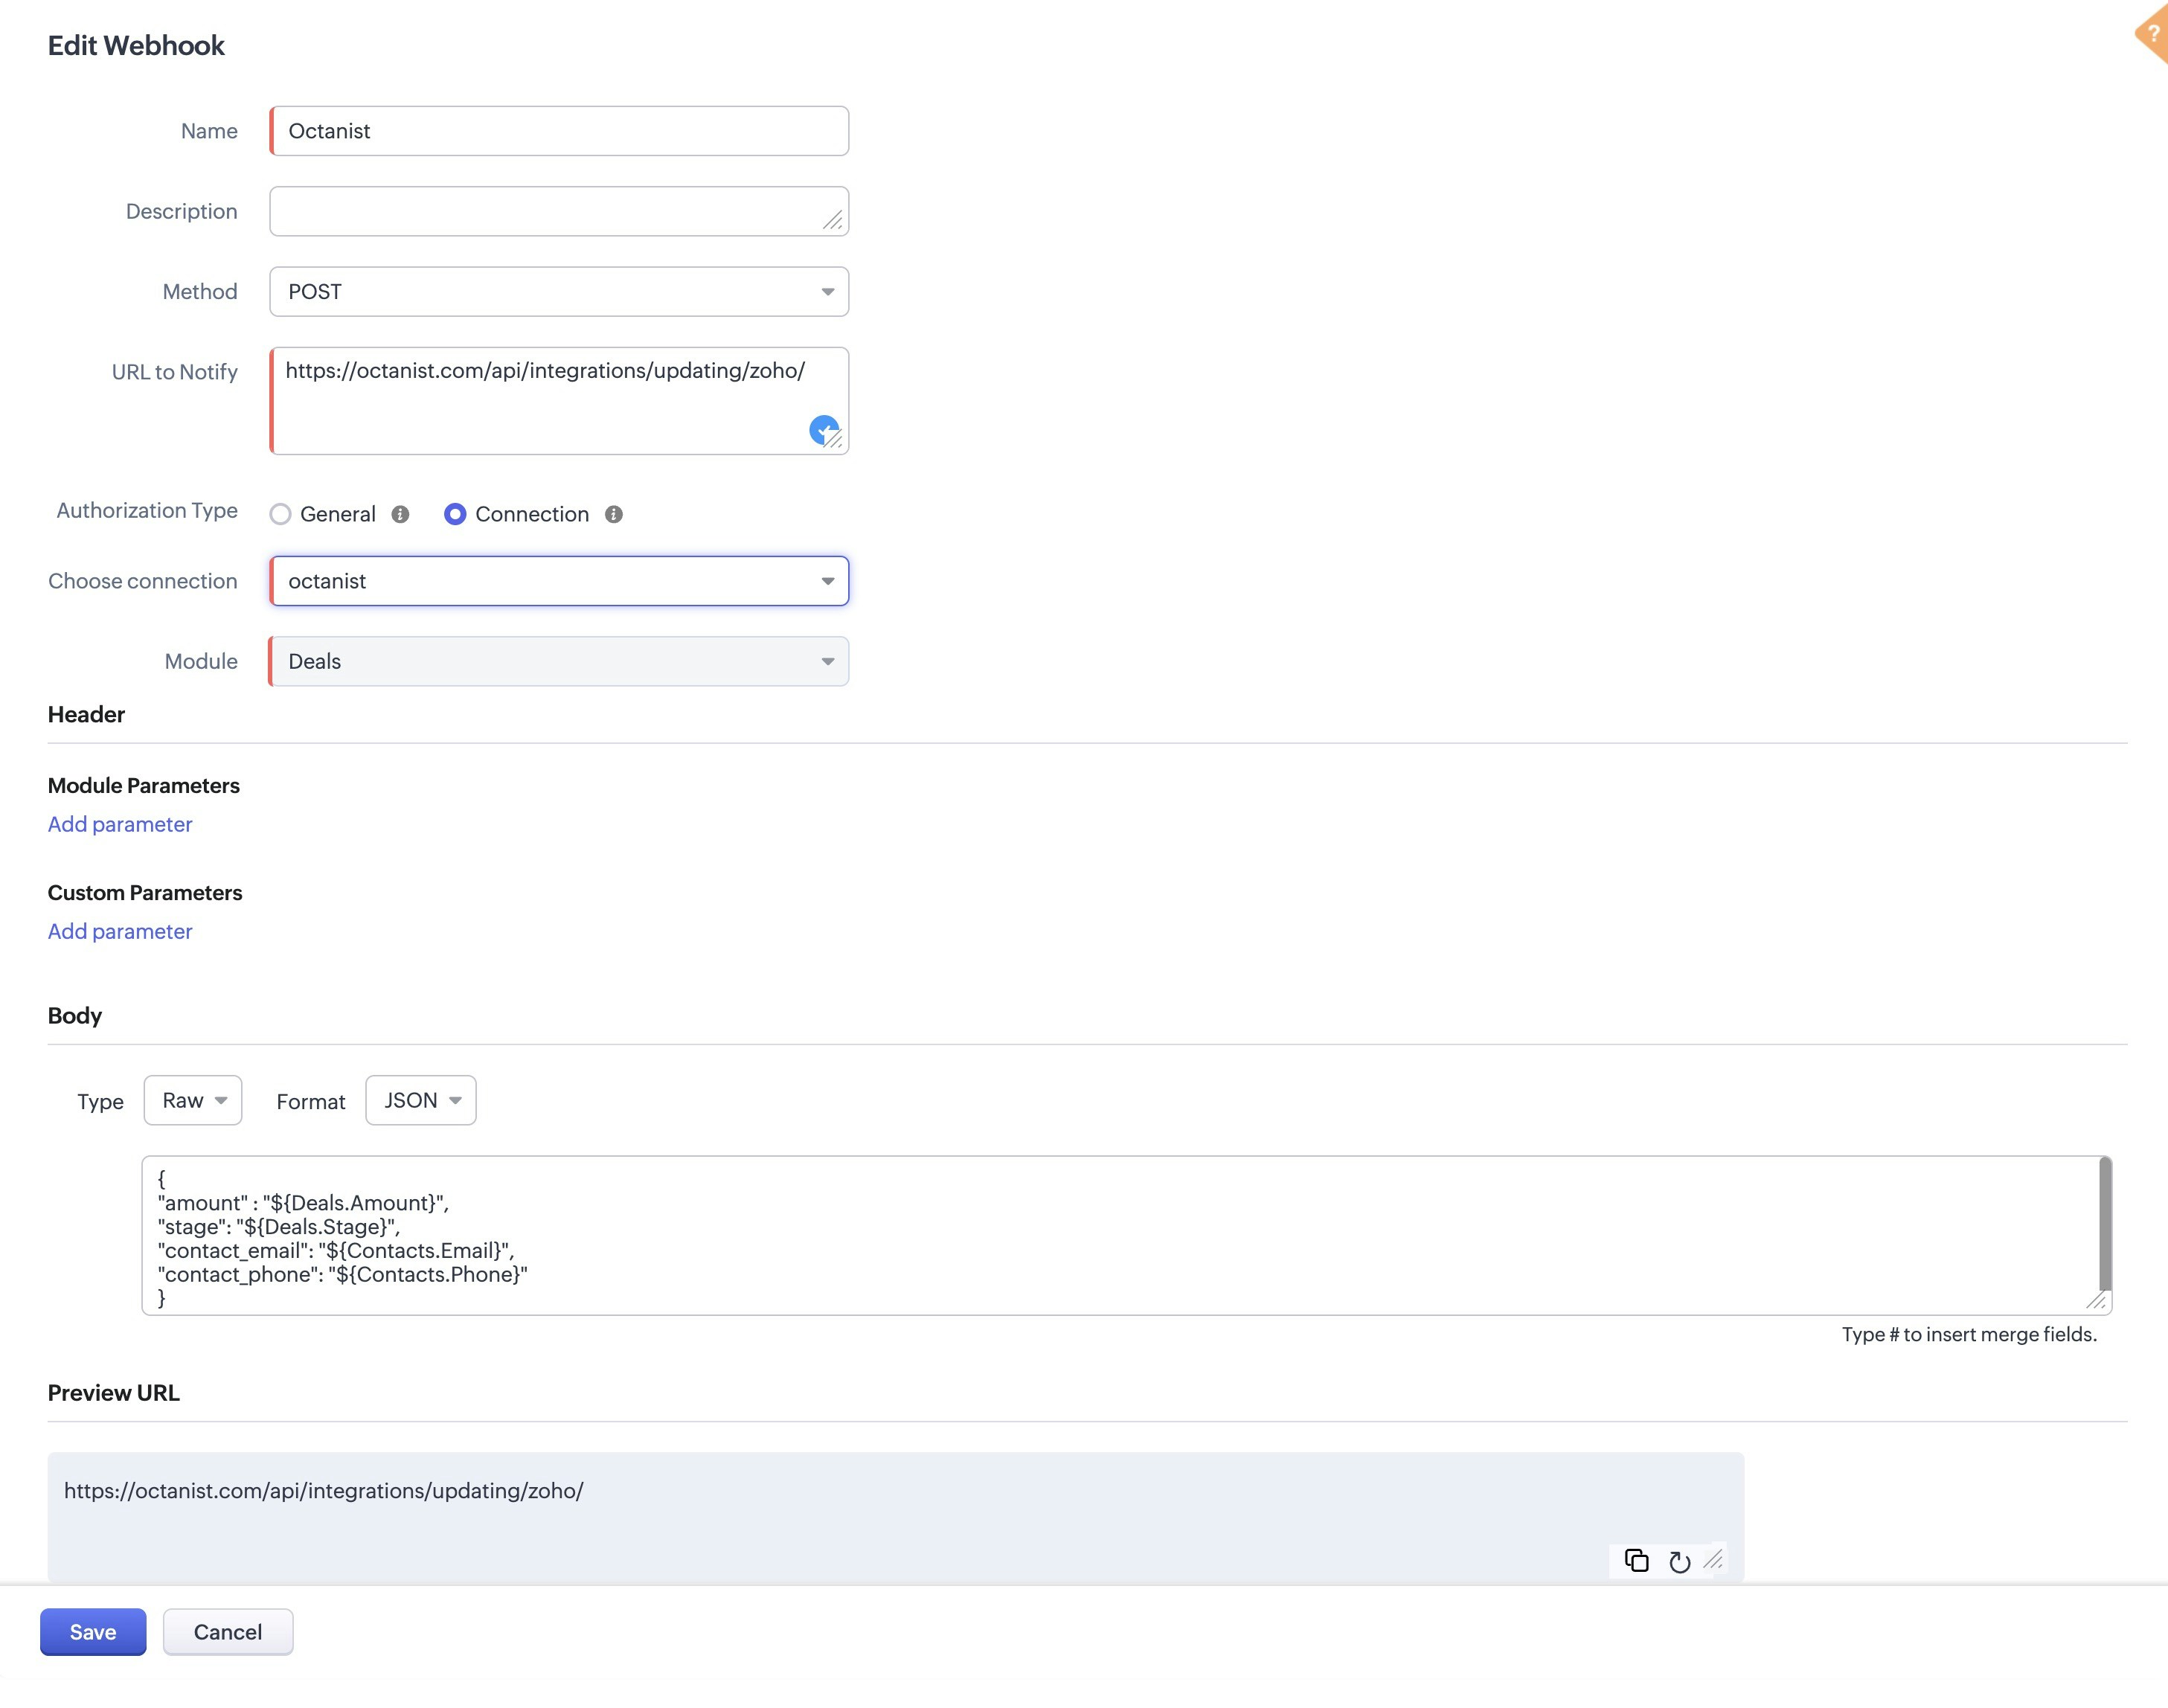
- Create a new webhook with the following fields:
- Name: give it a name that is easy to identify, such as Octanist.
- Method: select POST.
- URL to Notify: enter
https://octanist.com/api/integrations/updating/zoho/ - Authorization Type: select Connection and choose the connection you created.
- Module: select Deals.
- Body:
- Type: select Raw.
- Format: select JSON.
- Content: enter the following JSON:
- Click Save.
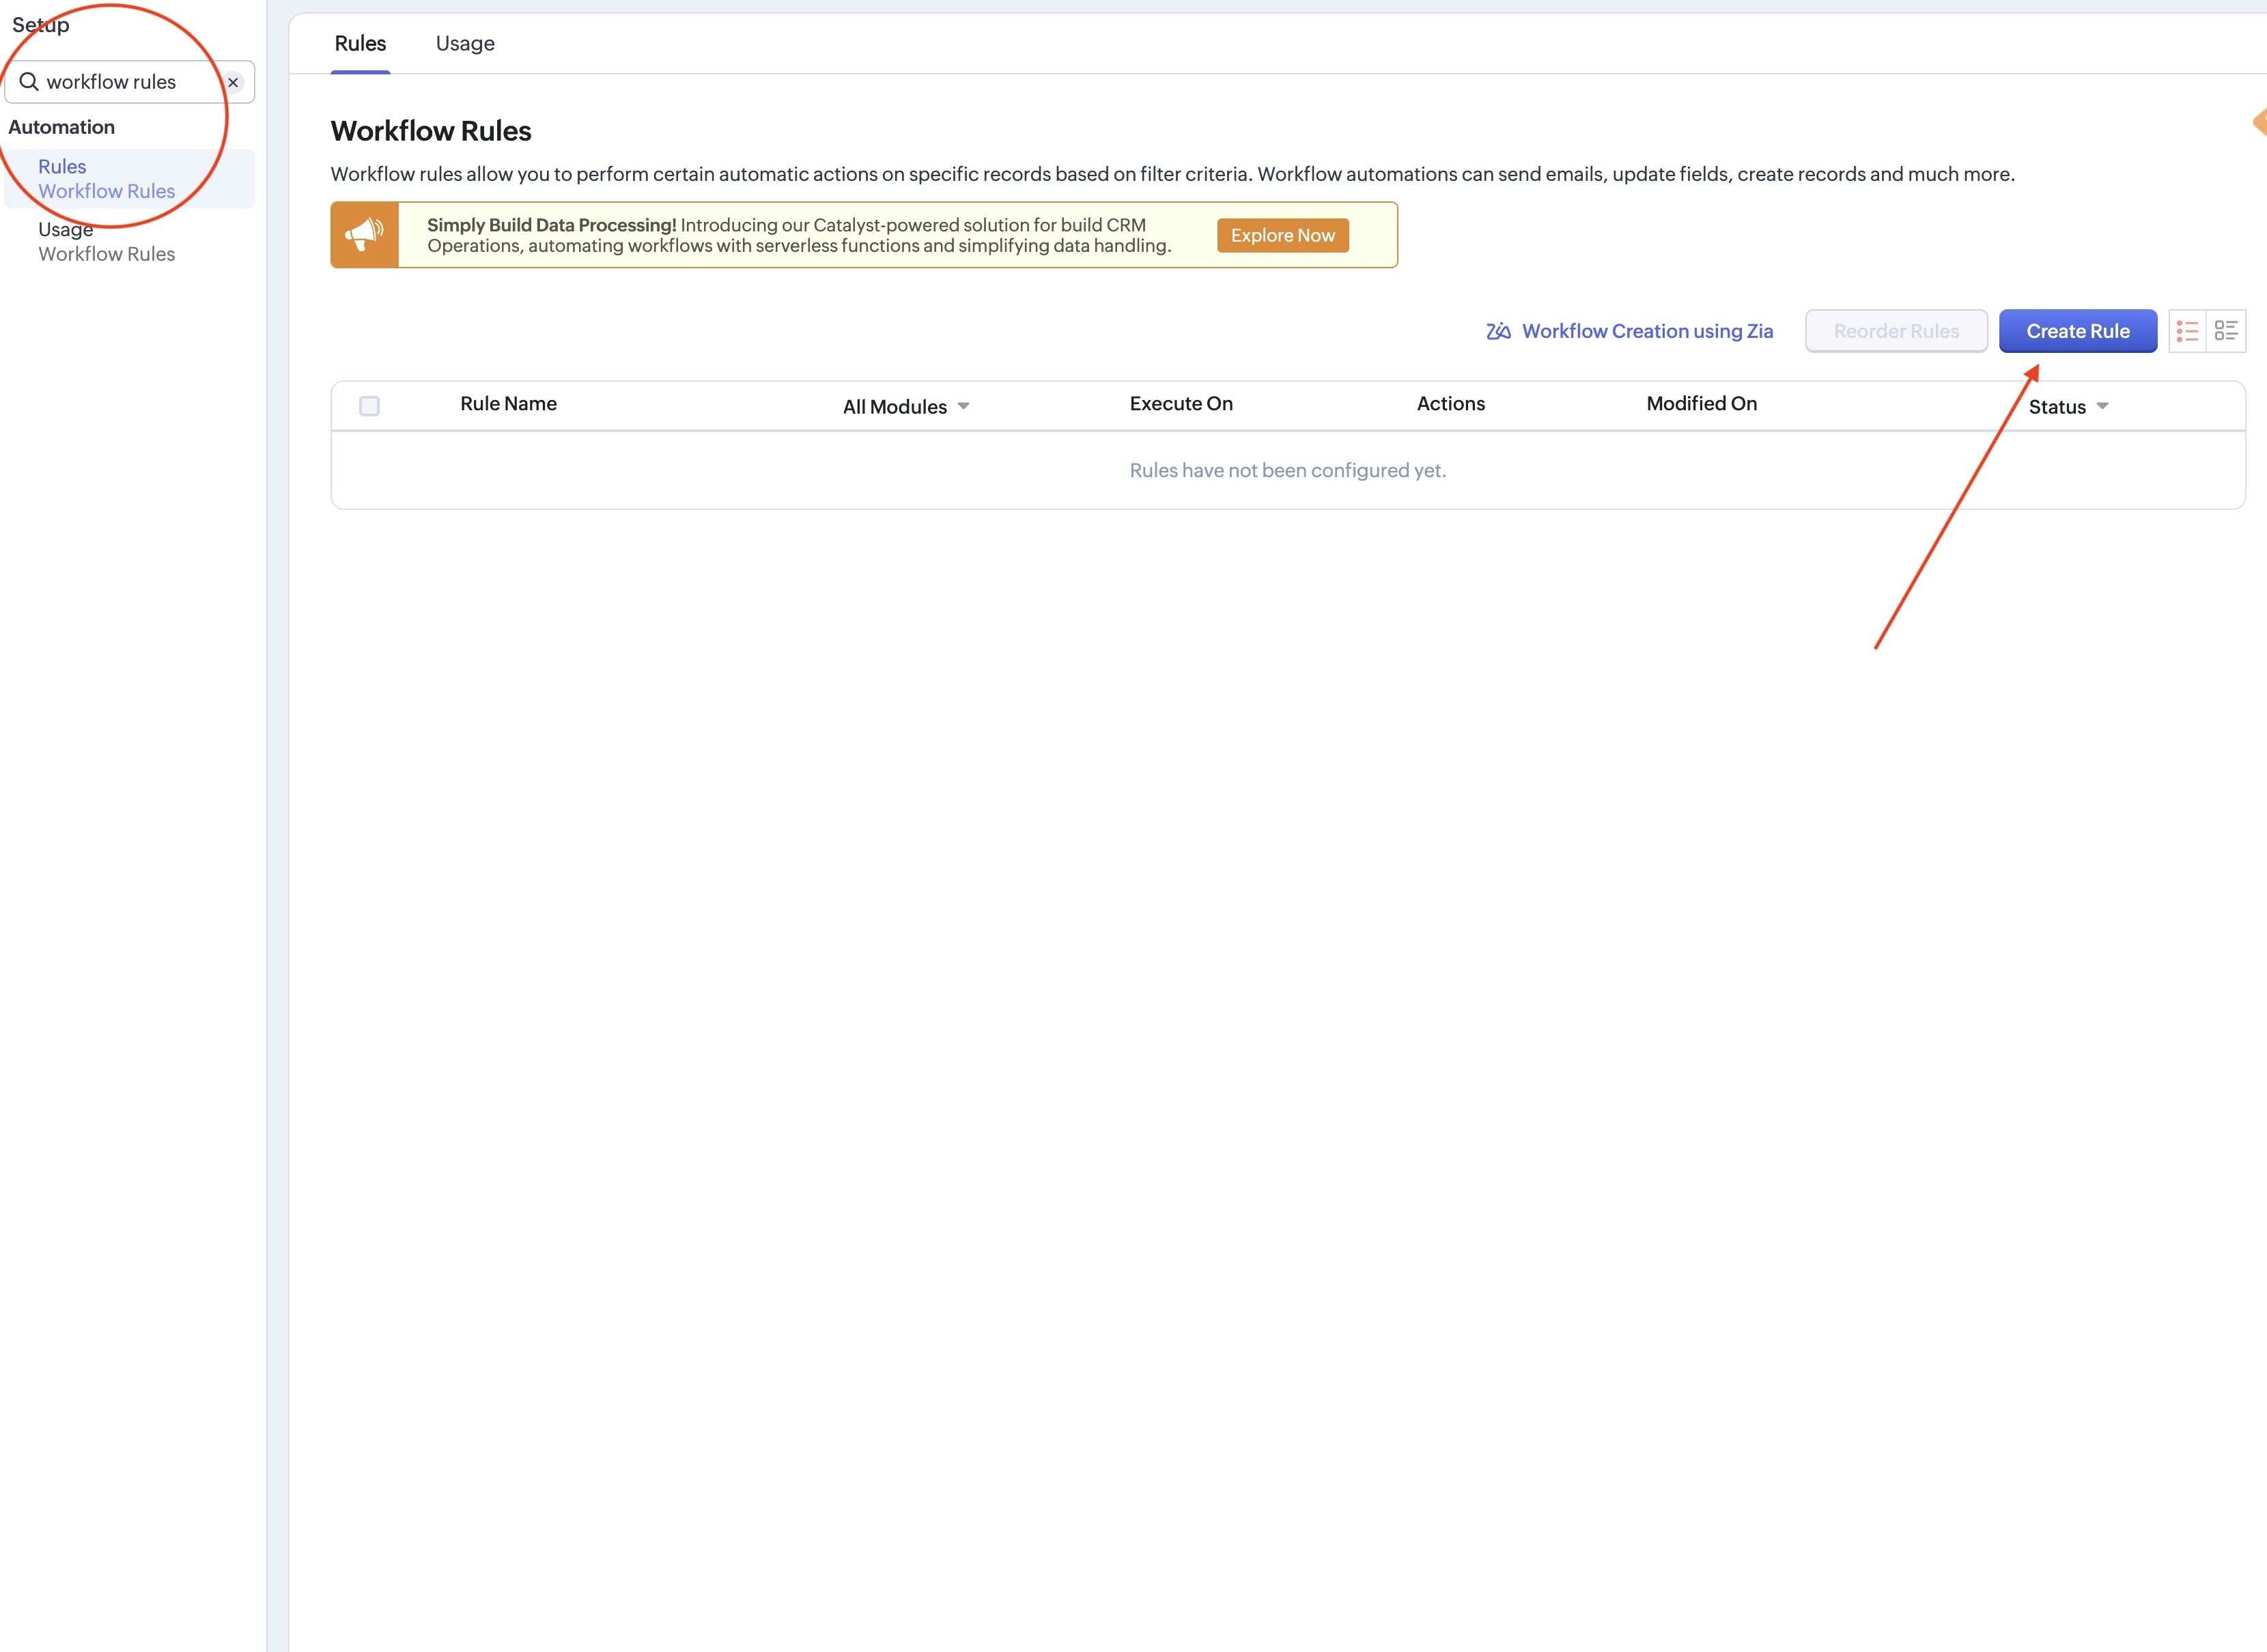
- Search for Workflow Rules and select Rules. On the page, click Create Rule.
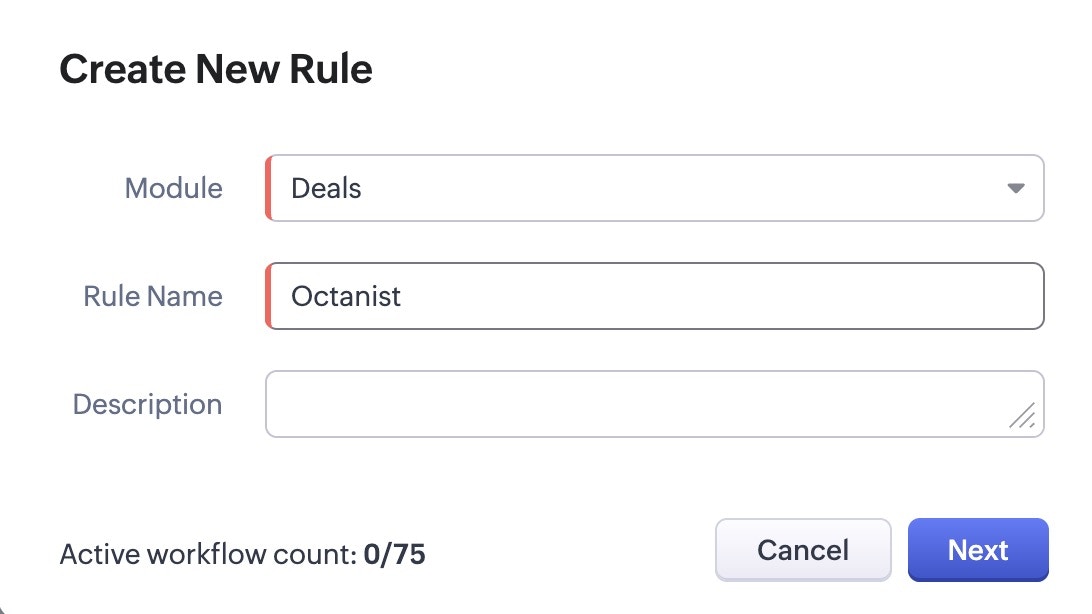
- In the popup, enter the following:
- Module: select Deals.
- Rule Name: give it a name that is easy to identify, such as Octanist.
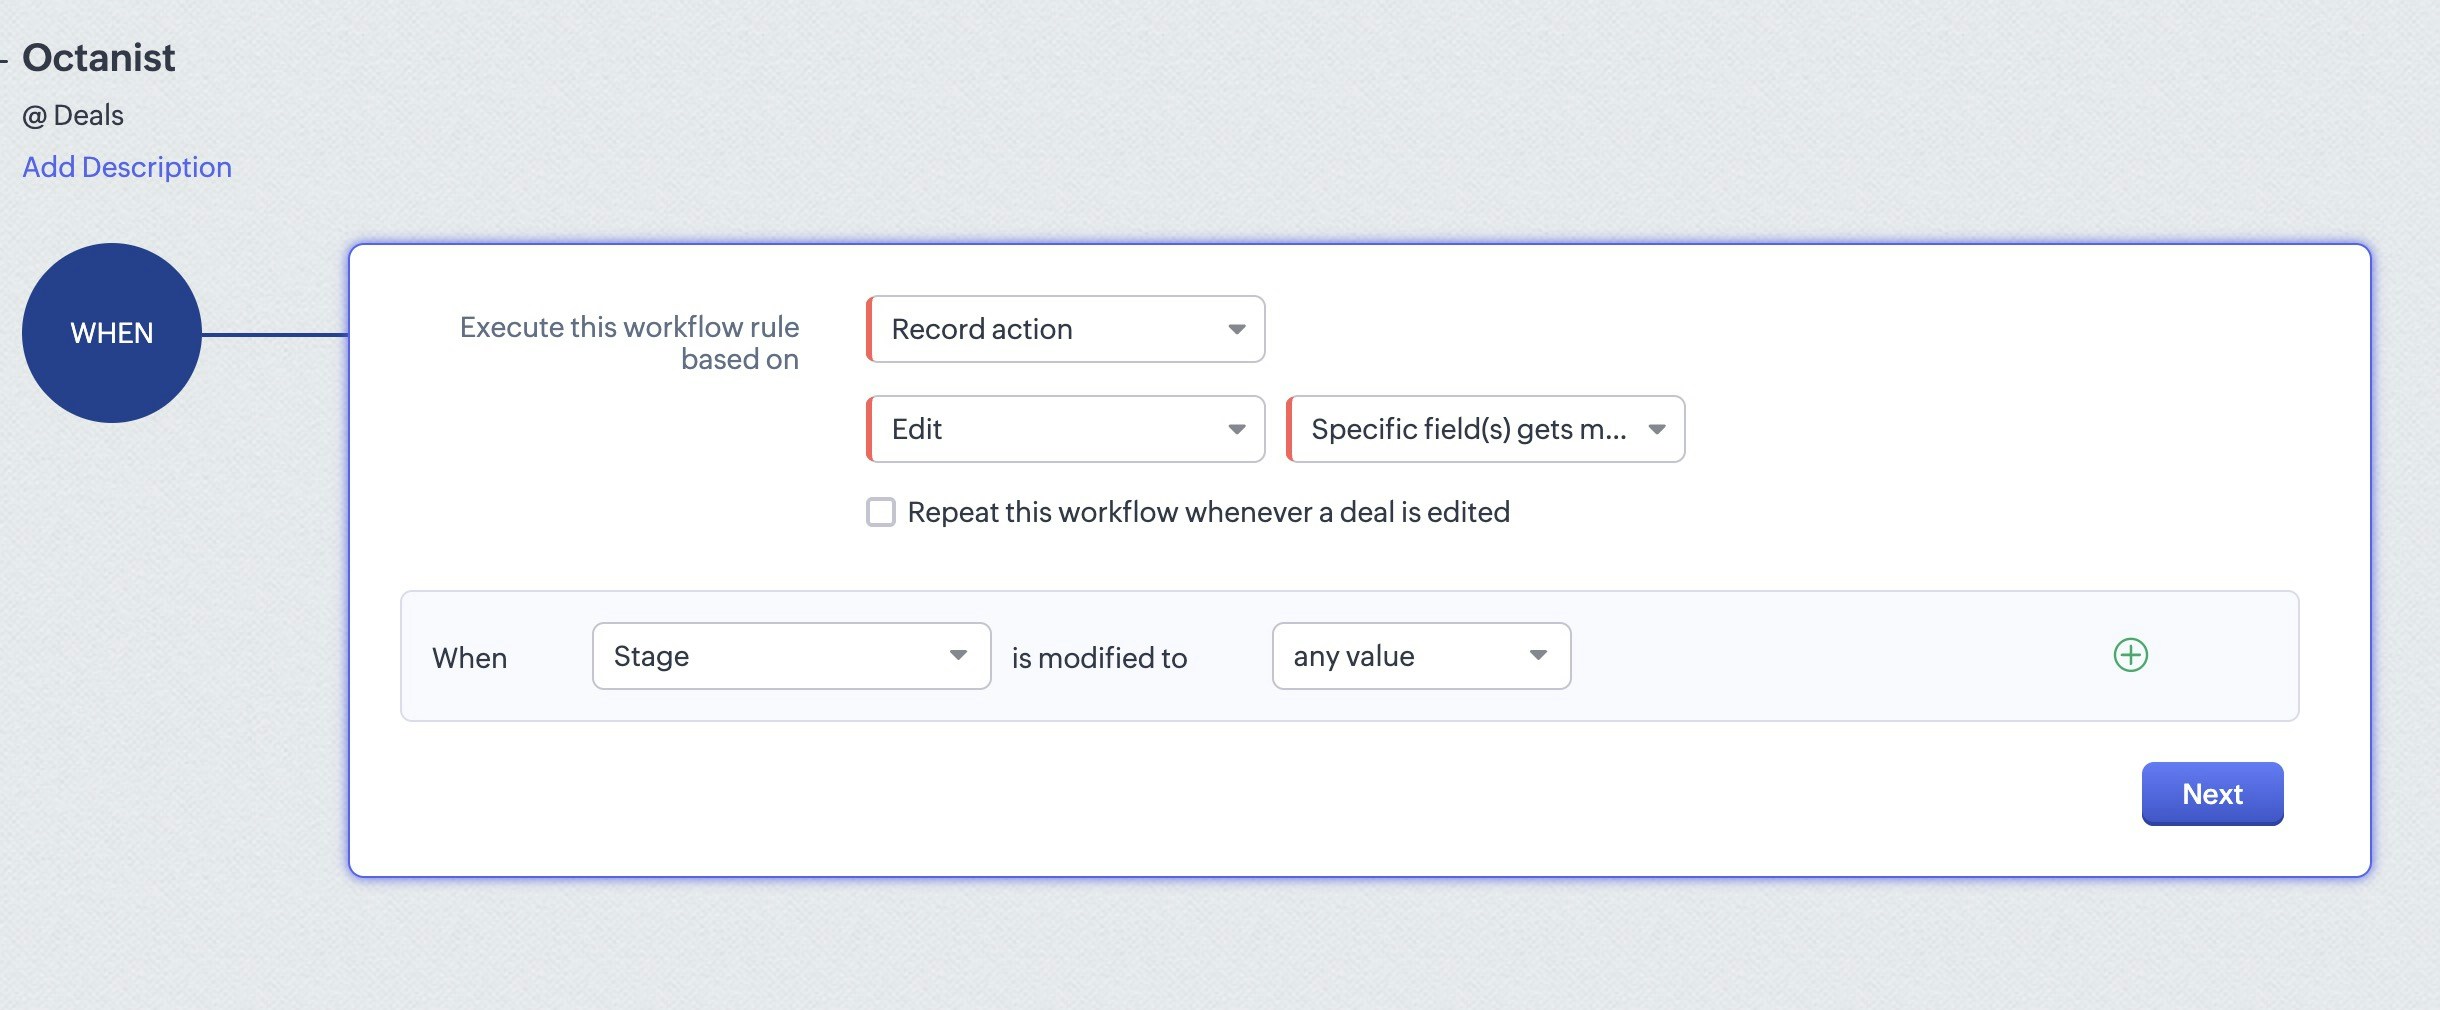
- For the WHEN step, choose the following options:
- Execute this workflow rule based on: select Record action.
- Then select Edit and Specific field(s) get modified.
- When: Stage is modified to any value.
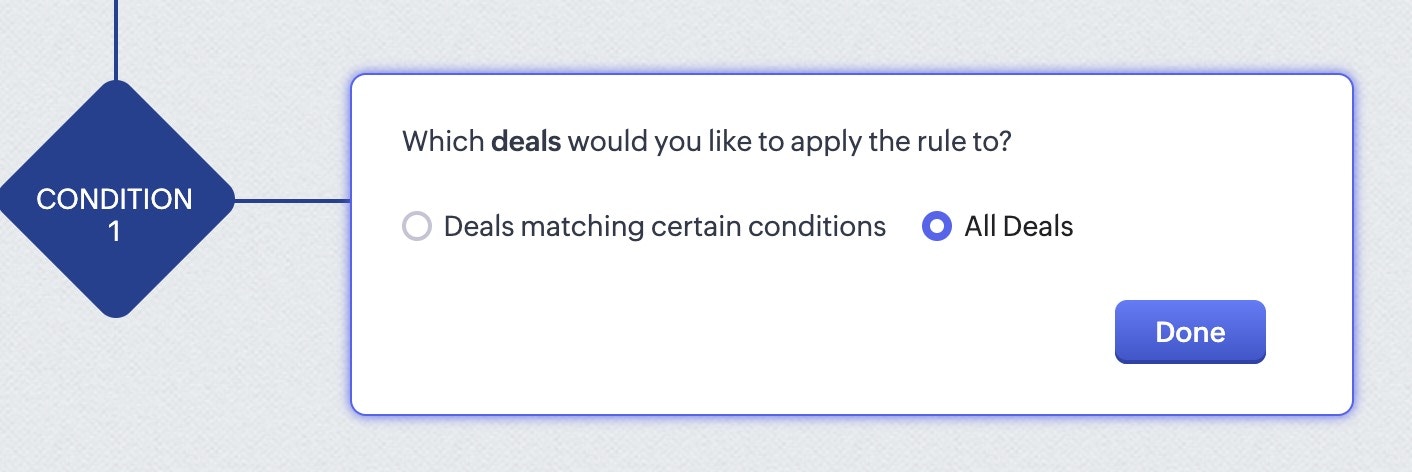
- Click Next.
- Select All Deals and click Done.
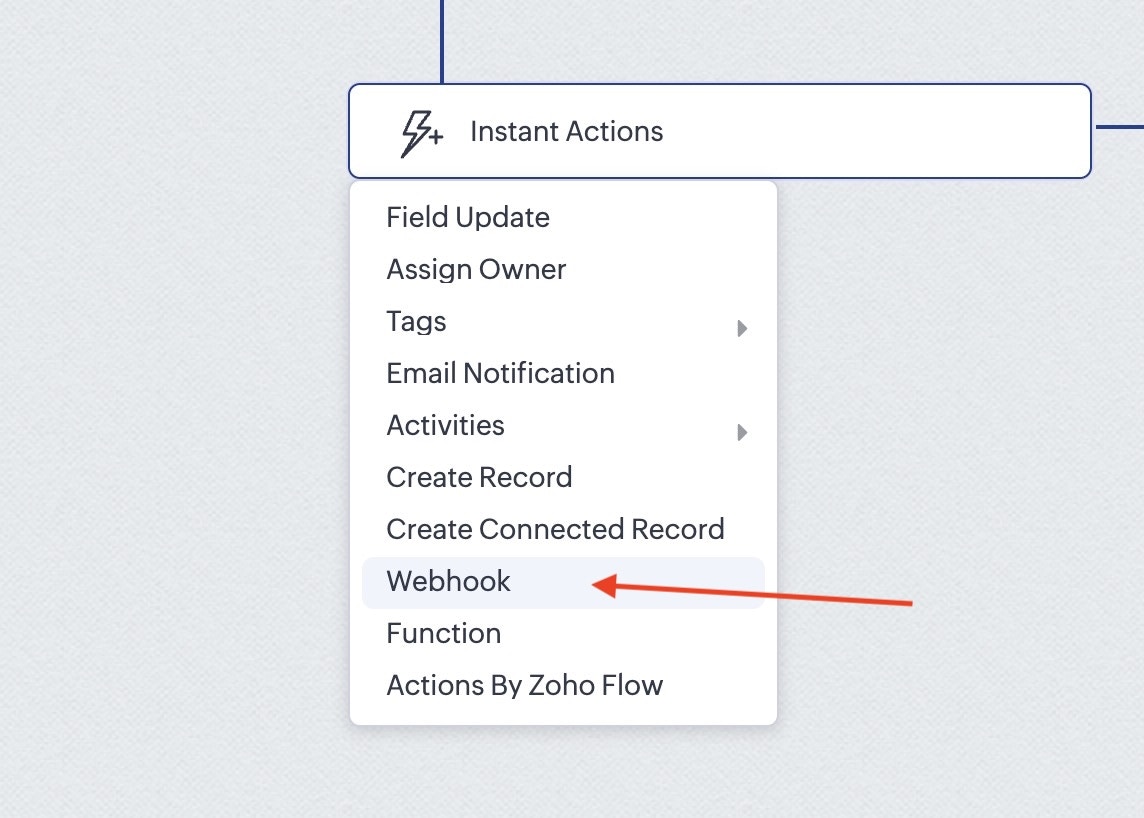
- For the action, select Webhook and choose the webhook created in step 8.
- Click Save.

2. Octanist
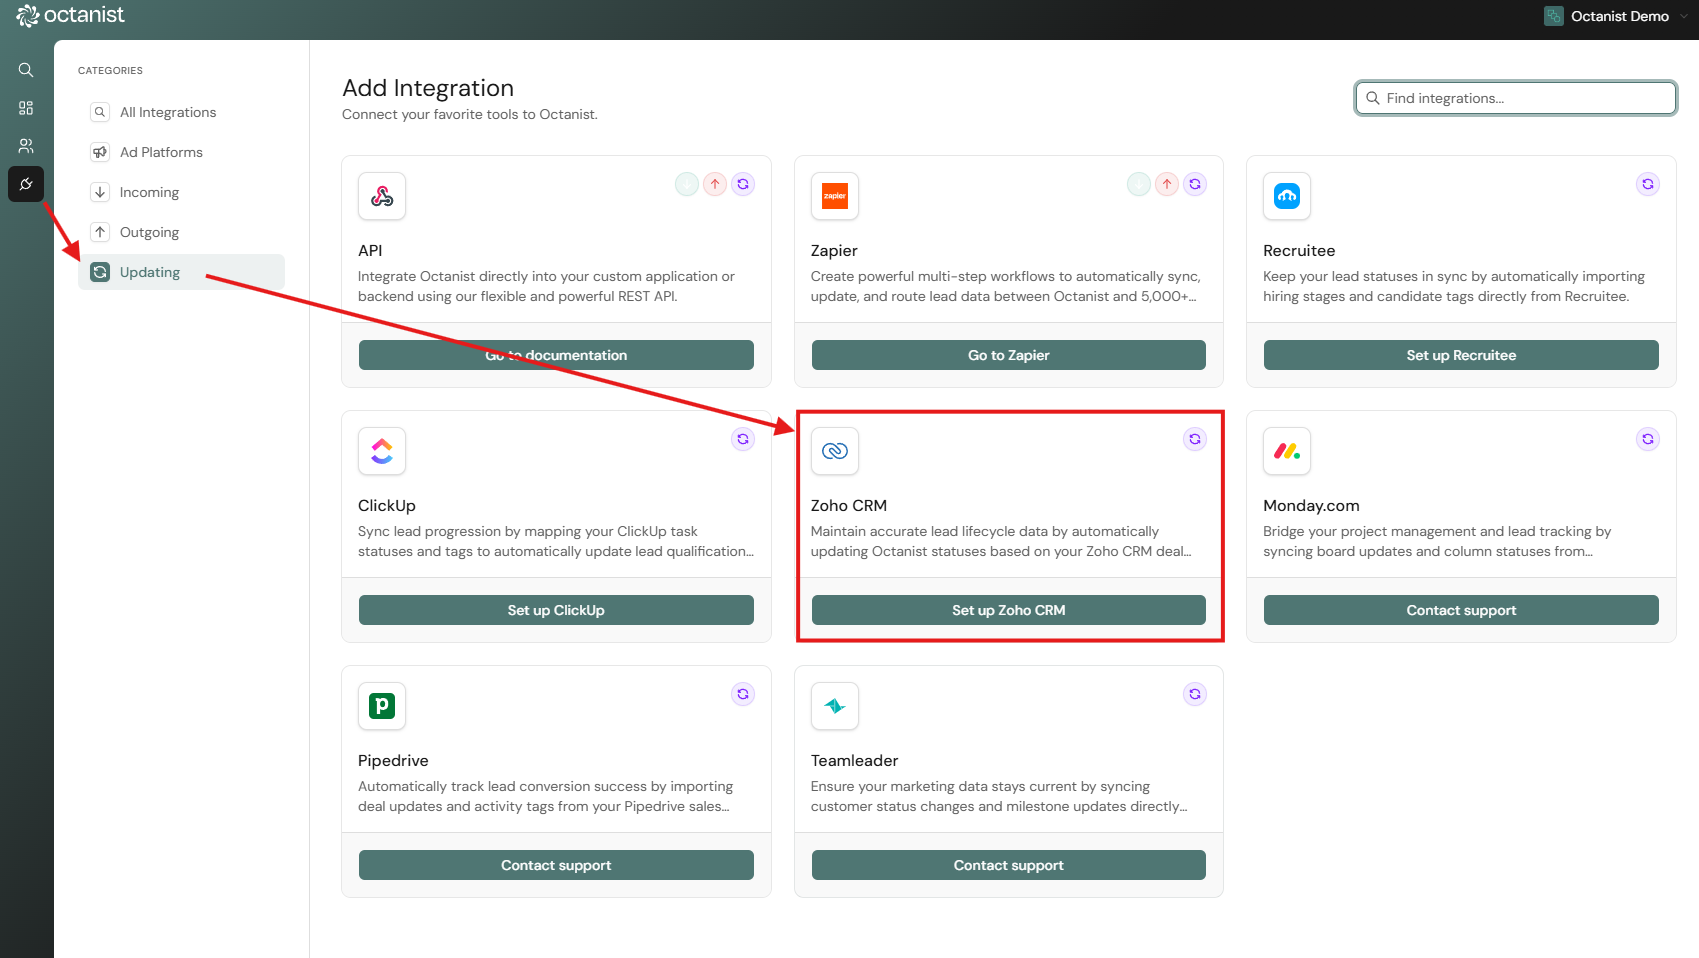
- Go to Octanist and navigate to Integrations > Updating > Add New.
- Choose Zoho CRM and click Add Integration.
-
For each stage, enter the exact stage name as it appears in Zoho CRM.
- Example - Qualified Stage Name:
Proposal - Example - Closed Won Stage Name:
Closed Won
Use the exact stage name from your Zoho CRM. - Example - Qualified Stage Name:


- Set the values for each lead stage:
- Example - Qualified Lead (high-potential client):
1000 - Example - Won Lead (purchased your product or service):
5000
- Example - Qualified Lead (high-potential client):

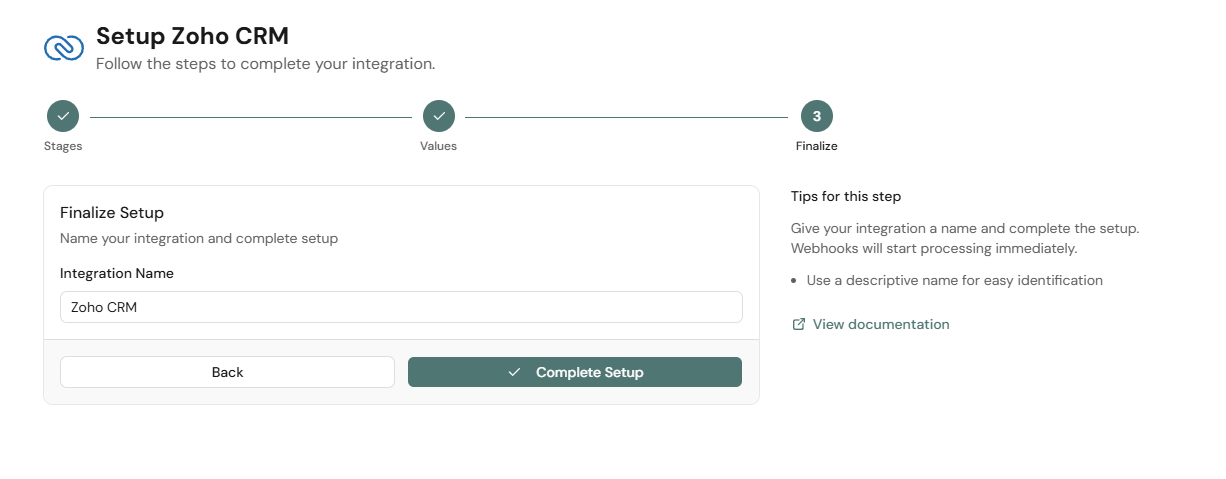
- Finally, complete the integration by giving it a descriptive name.
You are all set! Please test the integration by moving a deal within Zoho CRM. If you have any questions about this setup, contact us at support@octanist.com.