Recommended setup
Consent options
Supported consent sources
WithAuto, Octanist checks for these consent sources:
For CMPs such as OneTrust, Didomi, and Usercentrics, the important part is whether the CMP exposes IAB TCF 2.2 or Google Consent Mode. Octanist does not need a separate private integration for each CMP when one of those standards is available.
Tracking pixel and GTM Pixel
For the normal tracking pixel and GTM Pixel setup, set consent mode in the script shown in Settings > Pixel Setup.data-consent-mode="auto" for most websites.
If your consent banner blocks all tracking scripts until consent is granted, you can use granted when loading Octanist only after consent. If you are not sure, keep auto.
For custom consent banners, use the Client-side API to update consent manually.
WordPress
For WordPress, choose the consent mode in Settings > Pixel Setup before copying the WordPress setup code. The setup code stores the selected consent mode, so you only need to paste the full code into Settings > Octanist in WordPress.GTM DataLayer
The GTM DataLayer setup uses the Octanist GTM template. The template has a dedicated consent tab with two options.Google Consent Mode
Use this when your site already has Google Consent Mode through a consent management platform or a GTM consent tag. The Octanist tag reads the existing consent state and sends the lead with the correct consent value.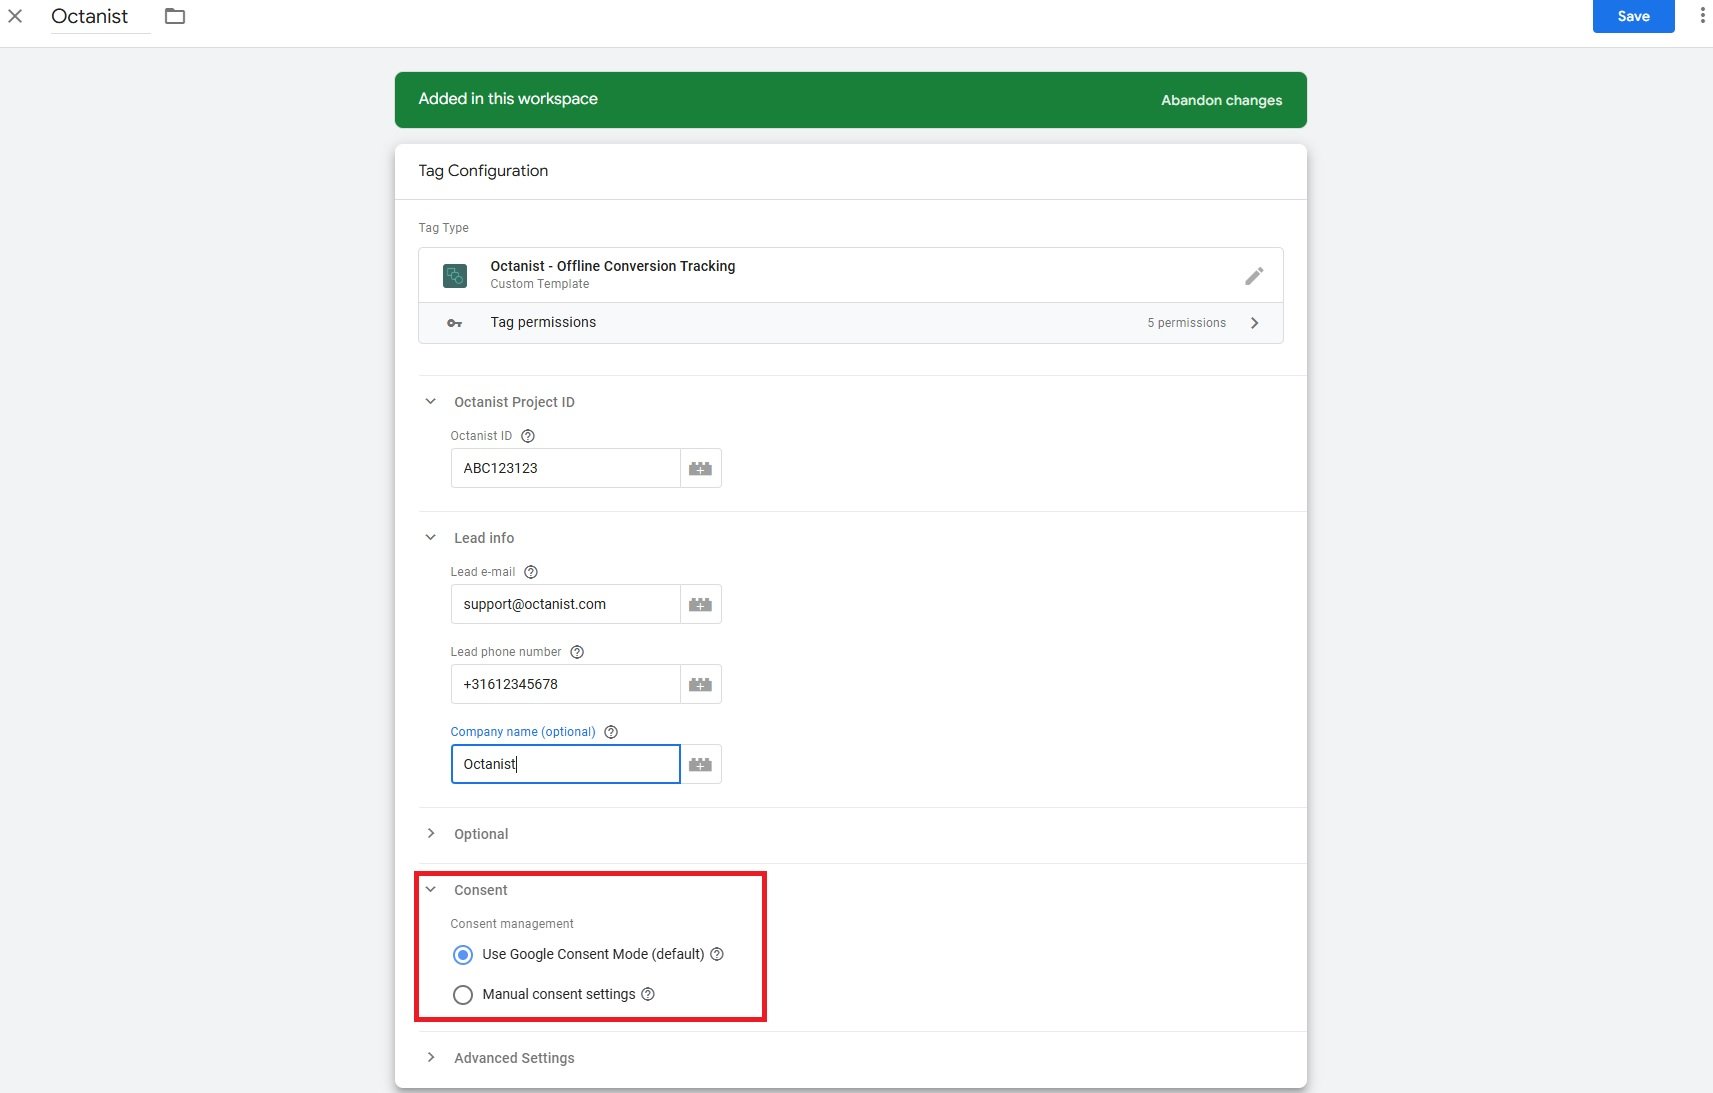
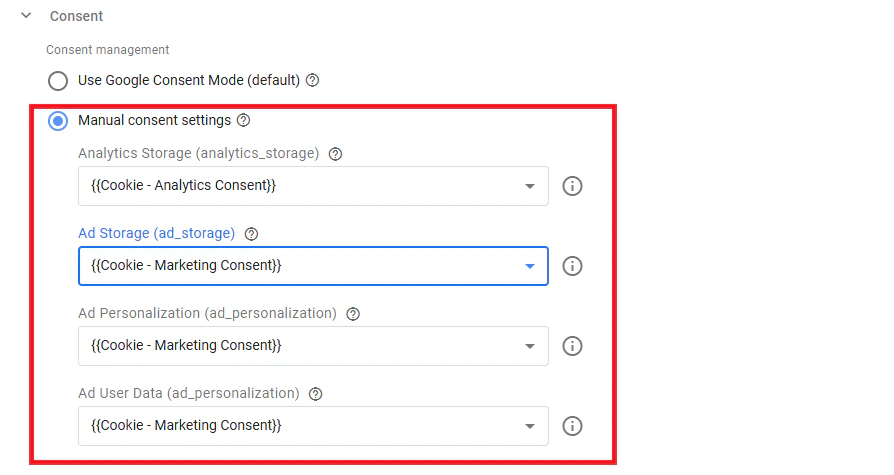
Manual consent settings
Use this when you do not use Google Consent Mode, but your website exposes a consent value in GTM. The variable should return exactly one of these values:GrantedDenied
Server-side form capture
For server-side form capture, keep the pixel installed on the website so Octanist can read the visitor’s consent state. When your backend sends the lead, include thesessionId from the hidden octa_sid field. Octanist can then link the server-side lead to the browser session and its consent state.
See Server-side form capture for the full setup.
Manual consent API
Use the manual consent API when your consent banner has its own JavaScript callback and Octanist cannot detect it automatically.window.octanistConsent before the pixel script or dispatch the octanist:consent event.
See Client-side API for examples.
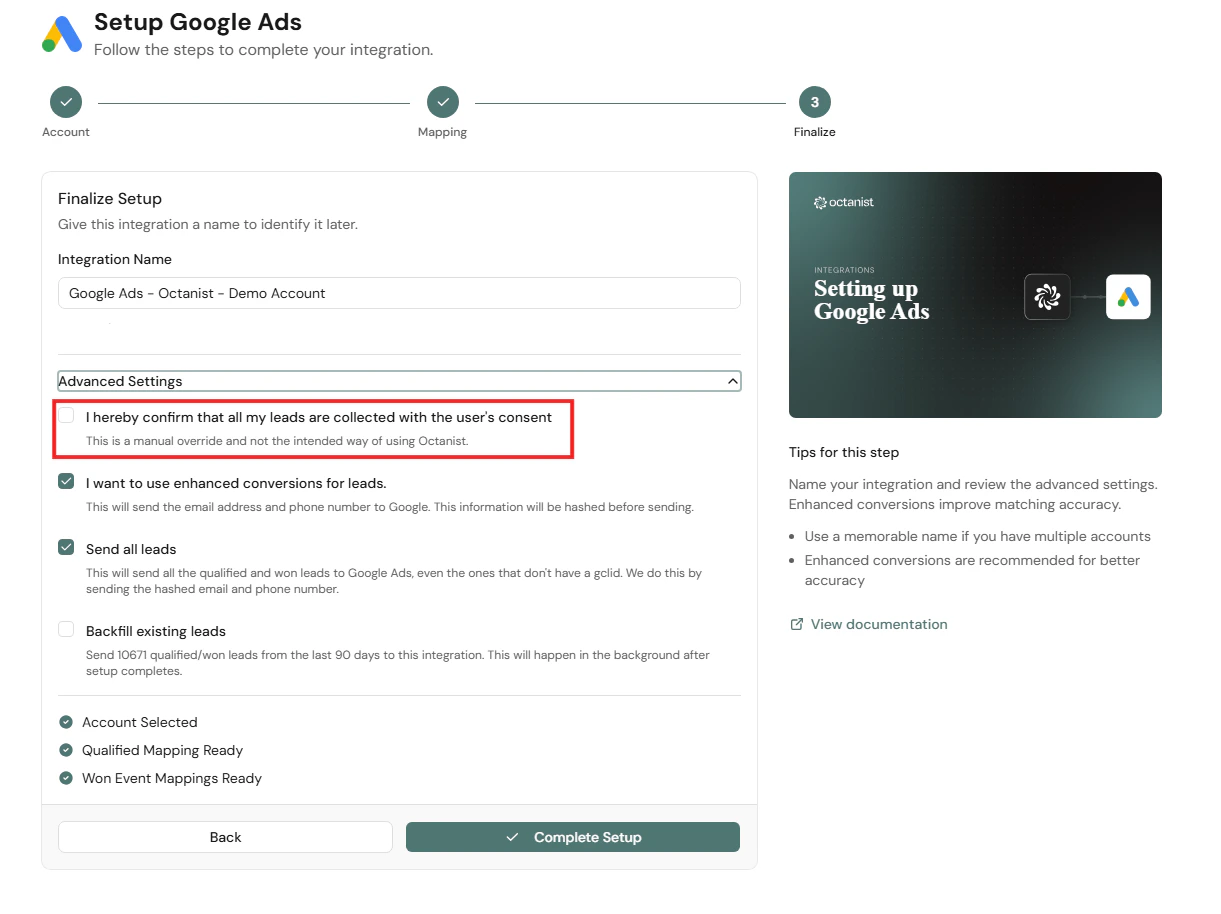
Adjust consent for outgoing integrations
Octanist allows you to override consent for leads sent to Google Ads or Google Analytics in specific cases. Use this only when you know the leads were collected with valid consent, but the consent state was not recorded correctly. For example:- Consent mode was not installed correctly at the time.
- A consent banner issue prevented consent from being stored.
- Consent was collected somewhere else and verified separately.
- Open or create a Google Ads or Google Analytics integration.
- Open the Advanced tab.
- Enable the option to send converted leads with consent granted.